فهم iso التلقائي في التصوير الفوتوغرافي

تقليص
X
 
  • تصفية - فلترة
  • الوقت
  • عرض
إلغاء تحديد الكل
مشاركات جديدة

  • فهم iso التلقائي في التصوير الفوتوغرافي

    فهم ISO التلقائي في التصوير الفوتوغرافي
    Understanding Auto ISO in Photography


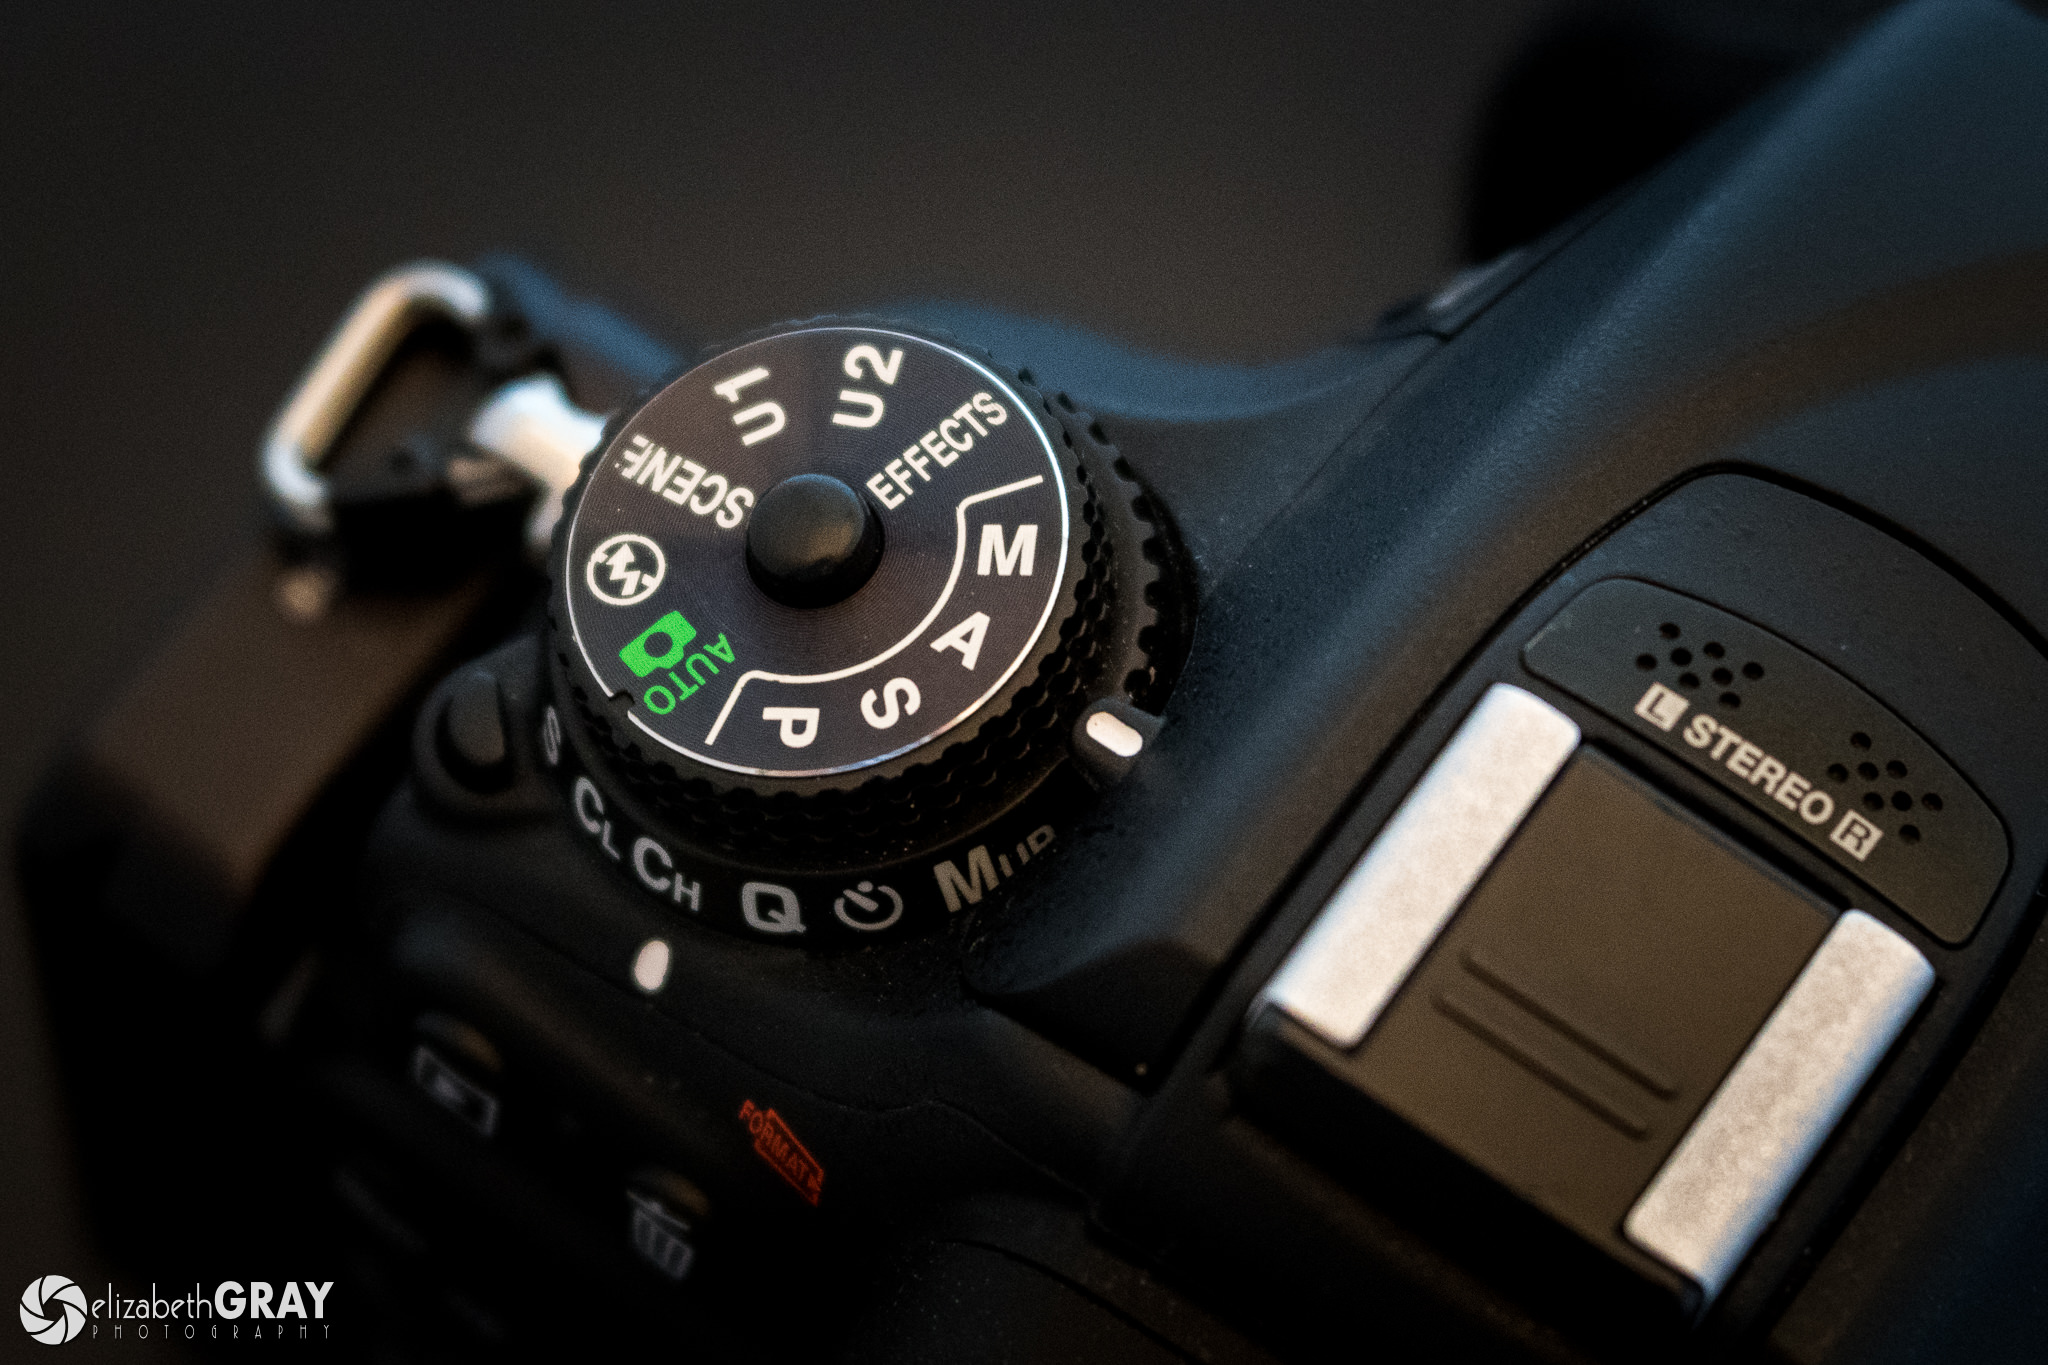
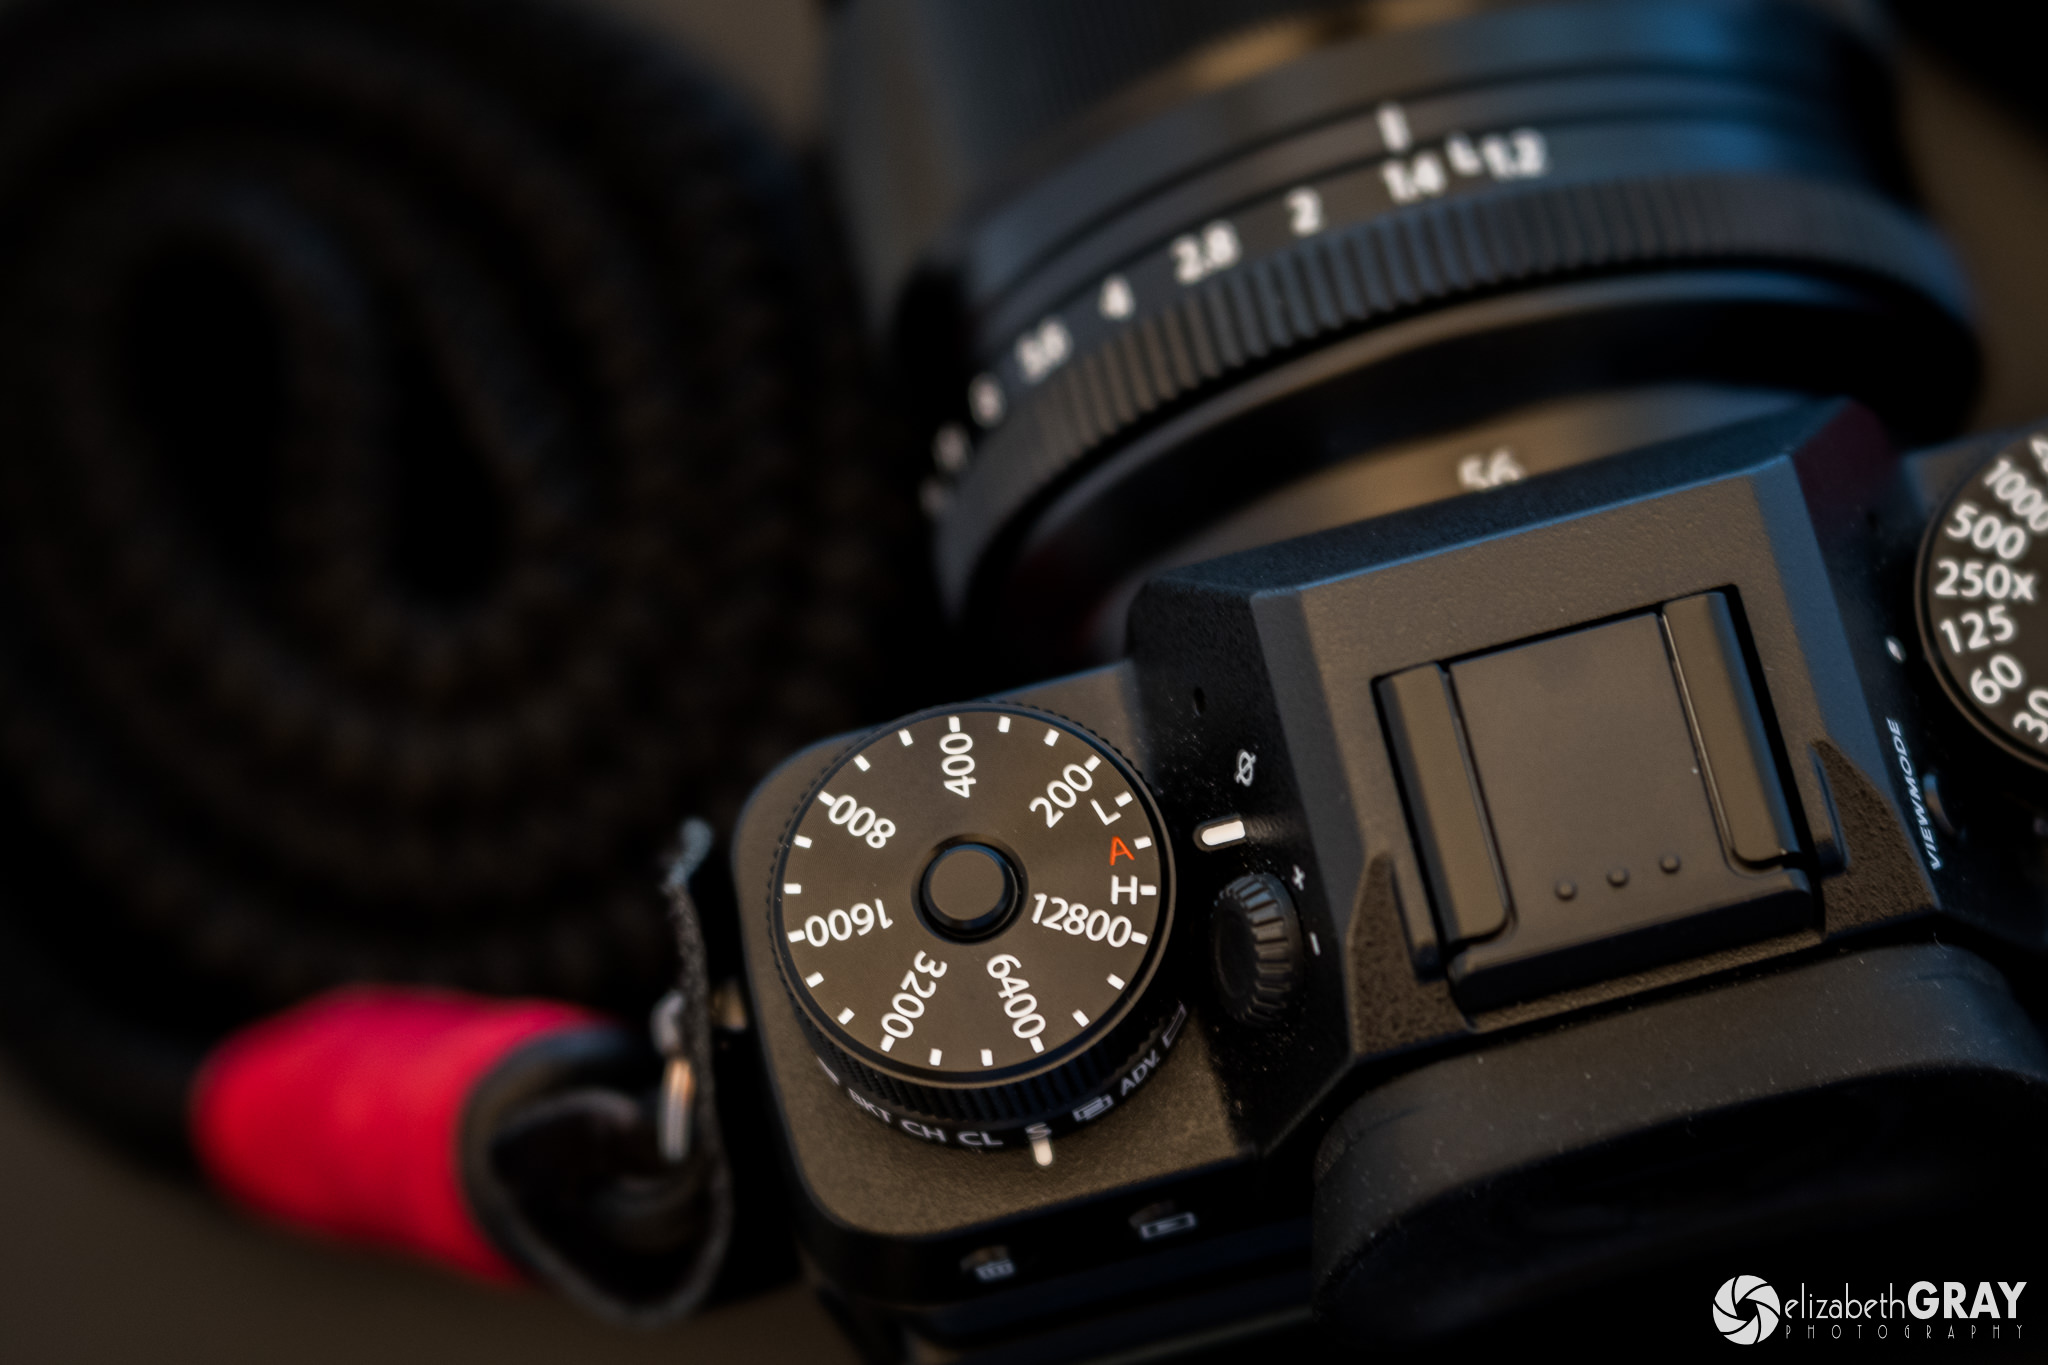
    هل تعلم أن معظم الكاميرات الرقمية الحديثة لديها القدرة على ضبط ISO تلقائيًا؟ في أيام الفيلم، كنت تقوم بإسقاط لفة من الفيلم في الكاميرا الخاصة بك وسيتم تثبيت ISO، أو ASA كما كان معروفًا في ذلك الوقت، على اللفة بأكملها. باستخدام الرقم الرقمي، لا يمكنك فقط تغيير ISO الخاص بك بسرعة، ولكن يمكنك أيضًا ضبط الكاميرا لضبطها تلقائيًا. في هذه المقالة، سوف نستكشف Auto ISO بالتفصيل ونتعرف على كيفية استخدامه مع أوضاع التصوير المختلفة في الكاميرا. بالإضافة إلى ذلك، سنناقش السيناريوهات التي يكون فيها ذلك مفيدًا والمواقف التي يكون فيها ضبط ISO يدويًا أكثر ملاءمة.

    Did you know that most modern digital cameras have the ability to set ISO automatically? Back in the film days, you would drop a roll of film into your camera and your ISO, or ASA as it was known back then, would be fixed for the entire roll. With digital, not only can you change your ISO on the fly, but you can also set your camera to adjust it automatically. In this article, we will explore Auto ISO in detail and learn how to you use it with different shooting modes of your camera. In addition, we will discuss scenarios where it is advantageous and situations when setting ISO manually is more appropriate.

  • #2
    جدول المحتويات

    مثلث التعريض الضوئي
    أوضاع التصوير
    ما هو ISO التلقائي؟
    إعداد ISO التلقائي
    استخدام أوضاع التصوير مع ISO التلقائي
    أولوية الفتحة مع ISO التلقائي
    أولوية الغالق وISO التلقائي
    الوضع اليدوي وISOA التلقائي
    بضع كلمات حول استخدام تعويض التعريض مع ISO التلقائي
    متى تستخدم ISO التلقائي
    متى يجب تجنب ISO التلقائي
    الخاتمة


    Table of Contents

    تعليق


    • #3
      1) مثلث التعريض

      قبل أن نتحدث عن Auto ISO، دعونا نجري القليل من المراجعة. يربط مثلث التعريض الضوئي بالمتغيرات الثلاثة المسؤولة عن كيفية جمع الكاميرا وتسجيلها للتعريض الضوئي: سرعة الغالق، وفتحة العدسة، وISO. سرعة الغالق هي المدة الزمنية التي يتعرض فيها المستشعر للضوء. تسمح سرعات الغالق الأعلى بدخول قدر أقل من الضوء، بينما تسمح سرعات الغالق الأطول بدخول المزيد. الفتحة هي حجم الفتحة في العدسة. تسمح الفتحة الكبيرة بمرور المزيد من الضوء إلى المستشعر. وأخيرًا، يمكن اعتبار ISO بمثابة حساسية المستشعر (على الرغم من أن هذا يعد تبسيطًا بعض الشيء). بالنسبة لأي حالة إضاءة معينة، كلما زادت قيمة ISO، قلّت حاجة المستشعر إلى الضوء لتسجيل الصورة. إذا تغير أي من هذه المتغيرات، فيجب على المتغيرات الأخرى (إما واحد أو كليهما) تعديلها لالتقاط المشهد بشكل صحيح.


      1) The Exposure Triangle


      Before we talk about Auto ISO, let’s do a bit of review. The exposure triangle relates the three variables which are responsible for how your camera collects and records the exposure: shutter speed, aperture, and ISO. Shutter speed is the length of time the sensor is exposed to light. Faster shutter speeds let less light in, and longer ones let in more. Aperture is the size of the opening in the lens. A big opening lets more light pass through to the sensor. And lastly, ISO can be thought of as the sensitivity of the sensor (though that is a bit of a simplification). For any given lighting condition, the higher the ISO, the less light is needed by the sensor to record the image. If any one of these variables changes, the others (either one or both) have to adjust to capture the scene correctly.

      تعليق


      • #4
        2) أوضاع التصوير

        أنا متأكد أنك سمعت عن أوضاع التصوير الأربعة الرئيسية الموجودة في كاميرات DSLR والكاميرات غير المزودة بمرآة. في وضع البرنامج التلقائي (P)، تختار الكاميرا كلاً من فتحة العدسة وسرعة الغالق. في أولوية فتحة العدسة (A أو Av لمصوري Canon) تحدد فتحة، ويختار كمبيوتر الكاميرا سرعة الغالق الصحيحة. في أولوية الغالق (S أو Tv لمصوري Canon) يمكنك اختيار سرعة الغالق، وتقوم الكاميرا بتعيين الفتحة المناسبة. في الوضع اليدوي (M)، يمكنك ضبط كل من فتحة العدسة وسرعة الغالق. لكن مهلا، لقد قلت أن هناك ثلاثة متغيرات! ماذا حدث للايزو؟


        2) Shooting Modes


        I’m sure you have heard of the four main shooting modes found on DSLR’s and mirrorless cameras. In Automatic Program Mode (P) the camera chooses both the aperture and the shutter speed. In Aperture Priority (A or Av for Canon shooters) you select an aperture, and the camera’s computer chooses the correct shutter speed. In Shutter Priority (S or Tv for Canon shooters) you pick a shutter speed, and the camera sets the proper aperture. In Manual Mode (M), you set both the aperture and the shutter speed. But wait, you said there were three variables! What happened to ISO?


        تعليق


        • #5
          عندما لا تستخدم Auto ISO، تفترض أوضاع التصوير المذكورة أعلاه أنك قمت بالفعل بتحديد ISO مناسب لظروف الإضاءة. بمعنى آخر، تم إخراج ISO من المعادلة لأنه تم اختياره وإصلاحه بواسطتك بالفعل. إذا كان الضوء ساطعًا، فمن المحتمل أنك قمت بتعيين ISO منخفض في مكان ما بين 100-200. لتحقيق سرعات غالق أسرع أو عند مستويات إضاءة أقل، من المرجح أن تقوم بتعيين ISO الخاص بك بين 400-1600. في بعض الحالات، قد تحتاج حتى إلى الارتفاع. أنا مرتاح جدًا لاستخدام حساسية ISO تصل إلى 6400 مع معدات Fujifilm الخاصة بي، و3200 مع كاميرا Nikon D500.

          باختصار، في وضع البرنامج، يقوم المستخدم فقط بتعيين ISO، وتكون الكاميرا مسؤولة عن اختيار الاثنين الآخرين. في أولوية فتحة العدسة والغالق، يكون المستخدم مسؤولاً عن ضبط اثنين من متغيرات التعريض الثلاثة (الفتحة وISO، أو سرعة الغالق وISO)، وتضبط الكاميرا الثالث. في الوضع اليدوي، يقوم المستخدم بتعيين كافة المتغيرات الثلاثة.


          When you are not using Auto ISO, the shooting modes above assume that you have already selected an appropriate ISO for the lighting conditions. In other words, ISO is taken out of the equation because it has already been chosen and fixed by you. If the light is bright, you have probably set a low ISO somewhere around 100-200. To achieve faster shutter speeds or at lower light levels, you will most likely set your ISO between 400-1600. In some instances, you may even need to go higher. I am very comfortable using an ISO up to 6400 with my Fujifilm gear, and 3200 with my Nikon D500.

          In summary, in Program Mode, the user only sets the ISO, the camera is responsible for selecting the other two. In Aperture and Shutter Priority, the user is responsible for setting two of the three exposure variables (aperture and ISO, or shutter speed and ISO), the camera sets the third. In Manual Mode, the user sets all three variables.

          تعليق


          • #6
            3) ما هو ISO التلقائي؟

            عند ضبط الكاميرا على Auto ISO، لا يزال بإمكانك التصوير باستخدام أحد الأوضاع الأربعة التي ذكرتها أعلاه. ومع ذلك، بدلاً من تحديد قيمة ISO مسبقًا، تقوم الكاميرا بتحديدها لك. تقوم الكاميرا بذلك بناءً على عدة معايير تختارها عند تكوين Auto ISO.


            3) What is Auto ISO?


            When your camera is set to Auto ISO, you still shoot using one of the four modes that I mentioned above. However, rather than you pre-selecting an ISO value, the camera selects it for you. The camera does this based on several criteria that you choose when you configure Auto ISO.


            تعليق


            • #7
              4) إعداد ISO التلقائي

              لذلك دعونا نلقي نظرة على كيفية تكوين Auto ISO على الكاميرا الخاصة بك. تقوم كل شركة مصنعة للكاميرات بالأشياء بشكل مختلف قليلاً، وحتى داخل نفس العلامة التجارية، قد تختلف الميزات قليلاً حسب طراز الكاميرا. تأكد من الرجوع إلى دليل المستخدم الخاص بك للحصول على إرشادات مفصلة حول مكان العثور على إعدادات تكوين ISO التلقائي في نظام قائمة الكاميرا.

              لتكوين ISO التلقائي، تحتاج إلى تعيين ثلاثة متغيرات. أولاً، ستحتاج إلى إخبار الكاميرا بالحد الأقصى لحساسية ISO الذي ترغب في تحمله. يعد اختيار الحد الأقصى لـ ISO أمرًا شخصيًا للغاية. فما يراه شخص ما على أنه مقبول، قد يراه آخر غير مقبول. تذكر أن مستويات ISO الأعلى ليست علاجًا سحريًا لتحقيق سرعات غالق أسرع في الإضاءة المنخفضة. هناك مقايضات، مثل زيادة الضوضاء وانخفاض جودة الصورة. للحصول على مناقشة متعمقة حول الضوضاء وISO، راجع مقالة Spencer الممتازة حول ثبات ISO. يناقش في مقالته أسباب الضوضاء وكيف يتأثر النطاق الديناميكي عند مستويات ISO الأعلى.


              4) Setting Up Auto ISO


              So let’s take a look at how to configure Auto ISO on your camera. Each camera manufacturer does things a bit differently, and even within the same brand, the features may differ slightly by camera model. Make sure you refer to your user manual for detailed instructions on where to find the Auto ISO configuration settings in your camera’s menu system.

              To configure Auto ISO, you need to set three variables. Firstly, you will need to tell the camera what the maximum ISO is that you are willing to tolerate. Selecting the maximum ISO is highly subjective. What one person sees as OK, another may find unacceptable. Remember, higher ISO’s are not a miracle cure for achieving faster shutter speeds in low light. There are trade-offs, such as increased noise and reduced image quality. For an in-depth discussion of noise and ISO, see Spencer’s excellent article on ISO Invariance. In his article, he discusses what causes noise and how dynamic range is affected at higher ISO’s.

              تعليق


              • #8
                ثانيًا، عليك أن تخبر الكاميرا بنوع ISO الذي يجب أن تستخدمه في الطرف السفلي. أقوم دائمًا باختيار أدنى مستوى ISO أصلي متاح. في كاميرا Nikon الخاصة بي التي تبلغ ISO 100، وفي كاميرا Fuji، تبلغ ISO الأساسية 200. وفي كاميرات Canon وFujifilm، يعد تحديد الحد الأقصى والحد الأدنى لـ ISO أمرًا بسيطًا إلى حد ما. ومع ذلك، في كاميرا Nikon، يتم إدخال الحد الأدنى من ISO في نفس الحقل المستخدم لإعداد ISO يدويًا. إذا كنت من مستخدمي كاميرا Nikon وتستخدم Auto ISO، فتأكد من ضبط حساسية ISO لديك مرة أخرى على 100. وإلا فلن تستفيد الكاميرا من ISO أقل من المستوى الذي قمت بتعيينه يدويًا.

                وأخيرًا، تحتاج إلى ضبط الحد الأدنى لسرعة الغالق التي تريد أن تظل الكاميرا أعلى منها. على سبيل المثال، إذا كنت تقوم بتصوير الألعاب الرياضية، فقد تحتاج إلى الحفاظ على سرعة الغالق لديك أسرع من 1/1000 ثانية لمنع تشوش حركة الرياضيين. من ناحية أخرى، إذا كانت أهدافك تتحرك ببطء، فربما تكون سرعة 1/125 ثانية كافية.


                Secondly, you need to tell the camera what ISO it should use on the lower end. I always select the lowest native ISO available. On my Nikon camera that is ISO 100, and on my Fuji’s the base ISO is 200. On Canon and Fujifilm cameras, setting the maximum and minimum ISO is fairly straightforward. However on a Nikon, the minimum ISO is entered in the same field used for setting ISO manually. If you are a Nikon shooter and are using Auto ISO, make sure you set your ISO sensitivity back to 100. Otherwise, the camera will not take advantage of ISO’s below the level you set manually.

                Lastly, you need to set the minimum shutter speed that you want the camera to stay above. For example, if you are shooting sports you might need to keep your shutter speed faster than 1/1000s to prevent motion blur of the athletes. On the other hand, if your subjects are moving slowly, maybe 1/125s is fast enough.


                تعليق


                • #9
                  تتيح لك بعض الكاميرات ضبط الحد الأدنى لسرعة الغالق تلقائيًا بناءً على البعد البؤري للعدسة. تستخدم الكاميرا القاعدة المتبادلة للقيام بذلك. تنص القاعدة التبادلية على أنه يجب عليك استخدام سرعة غالق أسرع من واحدة على البعد البؤري للعدسة (استنادًا إلى الطول البؤري المكافئ للإطار الكامل). إذا كنت تستخدم عدسة مقاس 100 مم، فستلزم سرعة غالق لا تقل عن 1/100 ثانية. تضيف الكاميرا أيضًا عامل أمان يتراوح ما بين 1.5 إلى 2، اعتمادًا على ماركة الكاميرا. لذا، إذا أدركت الكاميرا أنك تستخدم عدسة مقاس 100 مم، فستقوم بتعيين الحد الأدنى لسرعة الغالق على 1/150 ثانية أو 1/200 ثانية. يعد هذا الحد الأدنى من السرعة أمرًا جيدًا إذا كنت قلقًا فقط بشأن ضبابية الحركة بسبب اهتزاز الكاميرا المحمولة باليد. ومع ذلك، بالنسبة لمعظم العلامات التجارية للكاميرات، لا تأخذ هذه الميزة في الاعتبار العدسات التي تحتوي على خاصية تثبيت الصورة. يتيح لك تثبيت الصورة التصوير بسرعات غالق أبطأ من تلك التي تتجاوز البعد البؤري. بالإضافة إلى ذلك، لا تستطيع الكاميرا تحديد ما إذا كنت بحاجة إلى تجميد حركة الهدف، بدلاً من مجرد حركة الكاميرا. إذا كان الأمر كذلك، فإن القاعدة التبادلية لن تساعدك! لهذه الأسباب، أقوم دائمًا بتعيين الحد الأدنى لسرعة الغالق بناءً على ما أقوم بتصويره، ولا أسمح للكاميرا بتحديده تلقائيًا.


                  Some cameras allow you to set the minimum shutter speed automatically based on the focal length of your lens. The camera uses the reciprocal rule to do this. The reciprocal rule says that you should use a shutter speed faster than one over the focal length of your lens (based on the full frame equivalent focal length). If you are using a 100mm lens, then a minimum shutter speed of 1/100s is needed. The camera also adds a safety factor of somewhere in the neighborhood of 1.5 to 2, depending on camera brand. So if the camera recognizes that you are using a 100 mm lens, it would set the minimum shutter speed to 1/150s or 1/200s. This minimum speed is fine if you are only worried about motion blur due to handheld camera shake. However, for most camera brands, this feature does not take into account lenses that have image stabilization. Image stabilization allows you to shoot at slower shutter speeds than one over the focal length. Additionally, the camera can’t determine if you need to freeze subject movement, as opposed to just camera movement. If that is the case, the reciprocal rule won’t help you! For these reasons, I always set my minimum shutter speed based on what I am shooting, and I do not let the camera select it automatically.

                  تعليق


                  • #10
                    5) استخدام أوضاع التصوير مع ISO التلقائي

                    لقد قمت بتنشيط Auto ISO وأنت على استعداد لالتقاط بعض الصور. دعونا نلقي نظرة على كيفية تأثر أوضاع التصوير المختلفة عند تشغيل Auto ISO. لن أناقش وضع البرنامج التلقائي (P) لأنني آمل أن تتمتع ببعض التحكم الإبداعي في صورك. إن السماح للكاميرا الخاصة بك بالتمتع بنطاق حر على فتحة العدسة وسرعة الغالق وISO لا يمنحك أي رأي في الشكل الذي ستبدو عليه صورك! راجع مقالتي السابقة حول اختيار التعريض الضوئي الإبداعي - دليل المبتدئين لمعرفة كيفية استخدام فتحة العدسة وسرعة الغالق بشكل فني.

                    للمساعدة في توضيح كيفية عمل كل وضع تصوير مع Auto ISO، سأستخدم بعض نماذج بيانات التعريض الضوئي. لكل حالة سأقوم بالافتراضات التالية:

                    تحتوي العدسة على فتحات تتراوح بين f/2.8 وf/22. تم ضبط نطاق ISO التلقائي على 200 (دقيقة) و3200 (كحد أقصى). تحتوي الكاميرا على نطاق ISO أصلي يتراوح بين 200 إلى 6400. الحد الأدنى لسرعة الغالق في Auto ISO هو تم ضبطها على 1/125 ثانية. أسرع سرعة غالق ممكنة في الكاميرا هي 1/8000 ثانية.

                    5) Using Shooting Modes with Auto ISO


                    You’ve activated Auto ISO and are ready to take some pictures. Let’s look at how the various shooting modes are affected when Auto ISO is turned on. I’m not going to discuss the Automatic Program Mode (P) because I am hoping that you are taking some creative control over your images. Letting your camera have free range over aperture, shutter speed, and ISO gives you no say in how your images will look! Review my past article on Choosing a Creative Exposure – A Beginner’s Guide to see how to use aperture and shutter speed artistically.

                    To help illustrate how each shooting mode works in combination with Auto ISO, I’m going to use some sample exposure data. For each case I am going to make the following assumptions:
                    • The lens has apertures between f/2.8 and f/22.
                    • The Auto ISO range is set to 200 (min) and 3200(max).
                    • The camera has a native ISO range between 200 to 6400.
                    • The minimum shutter speed in Auto ISO has been set to 1/125s.
                    • The fastest possible shutter speed on the camera is 1/8000s.

                    تعليق


                    • #11
                      5.1) أولوية فتحة العدسة مع ISO التلقائي

                      في أولوية فتحة العدسة، يمكنك تحديد فتحة بناءً على مقدار عمق المجال الذي تريده في صورتك. ثم تقوم الكاميرا باختيار سرعة الغالق الصحيحة. إذا كانت سرعة الغالق المحسوبة أبطأ من الحد الأدنى للسرعة، فستقوم الكاميرا بزيادة ISO.

                      في هذا المثال الأول، لنفترض أن فتحة f/8 تعطي تعريضًا ضوئيًا صحيحًا عند الحد الأدنى لسرعة الغالق البالغة 1/125 ثانية وأقل حساسية ISO تبلغ 200. سنستخدم هذا كنقطة بداية ونفترض أن الضوء لا يتغير مع مرور الوقت. نقوم بضبط الفتحة.

                      إذا كنت تريد ضبط فتحات أسرع (f/5.6 أو f/4 أو f/2.8)، فستزيد الكاميرا من سرعة الغالق وتحافظ على الحد الأدنى من ISO.

                      ومع ذلك، إذا اخترت فتحات أصغر، مثل f/11 أو f/16 أو f/22، فسيتعين على الكاميرا زيادة ISO الخاص بك للحفاظ على سرعة الغالق أعلى من الحد الأدنى للقيمة.

                      فتحة العدسة، سرعة الغالق، ISOComments1، أولوية فتحة العدسة - يقوم المستخدم بتعيين الفتحة بناءً على عمق المجال المطلوب.2.81/1000200تزداد سرعة الغالق ويتم الحفاظ على الحد الأدنى لحساسية ISO.41/500200تزداد سرعة الغالق ويتم الحفاظ على الحد الأدنى لحساسية ISO.5.61/250200تزداد سرعة الغالق ويتم الحفاظ على الحد الأدنى لحساسية ISO.81/ 125200نقطة البداية111/125400للحفاظ على الحد الأدنى لسرعة الغالق يتم زيادة ISO.161/125800للحفاظ على الحد الأدنى لسرعة الغالق يتم زيادة ISO.221/1251600للحفاظ على الحد الأدنى لسرعة الغالق يتم زيادة ISO.

                      5.1) Aperture Priority with Auto ISO


                      In Aperture Priority, you select an aperture based on how much depth of field you want in your image. The camera then selects the correct shutter speed. If the calculated shutter speed is slower than the minimum speed, then the camera will increase the ISO.

                      In this first example, let’s suppose that an aperture of f/8 gives a correct exposure at the minimum shutter speed of 1/125s and the lowest ISO of 200. We will use this as our starting point and assume the light does not change as we adjust the aperture.

                      If you want to set faster apertures (f/5.6, f/4 or f/2.8) the camera will increase the shutter speed and maintain the minimum ISO.

                      However, if you choose smaller apertures, such as f/11, f/16 or f/22, the camera will have to increase your ISO to keep the shutter speed above the minimum value.
                      1Aperture Priority – User sets aperture based on the required depth of field.
                      2.8 1/1000 200 Shutter speed increases and min ISO is maintained.
                      4 1/500 200 Shutter speed increases and min ISO is maintained.
                      5.6 1/250 200 Shutter speed increases and min ISO is maintained.
                      8 1/125 200 Starting Point
                      11 1/125 400 To maintain min shutter speed ISO is increased.
                      16 1/125 800 To maintain min shutter speed ISO is increased.
                      22 1/125 1600 To maintain min shutter speed ISO is increased.

                      تعليق


                      • #12
                        تأكد من أنك تولي اهتمامًا دقيقًا للشاشة الموجودة في عدسة الكاميرا. في معظم نماذج الكاميرات، إذا وصلت الكاميرا إلى الحد الأقصى لحساسية ISO وما زالت غير قادرة على تحقيق التعريض الضوئي الصحيح، فإنها تضحي بالحد الأدنى لسرعة الغالق. بمعنى آخر، لن تغير الكاميرا فتحة العدسة (هذا هو تعريف أولوية فتحة العدسة)، ولن تتجاوز أبدًا الحد الأقصى لحساسية ISO الذي قمت بتعيينه في التكوين. لذلك، يجب استخدام سرعة غالق أبطأ لعرض الصورة بشكل صحيح.

                        يمكنك رؤية مثال على متى يحدث هذا هنا. هذه المرة الإضاءة أغمق قليلاً. فتحة f/4 عند 1/125 ثانية وISO 200 تنتج تعريضًا ضوئيًا صحيحًا (نقطة البداية لدينا). لنفترض أنك تريد ضبط فتحة f/22 لتحقيق نطاق DOF كبير. نظرًا لعدم وجود ضوء كافٍ عند أعلى ISO، تقوم الكاميرا بتخفيض سرعة الغالق بمقدار توقف إلى 1/60 ثانية.

                        فتحة العدسة، سرعة الغالق، ISOComments1، أولوية فتحة العدسة - يقوم المستخدم بتعيين الفتحة بناءً على عمق المجال المطلوب. 2.81/250200 تزداد سرعة الغالق ويتم الحفاظ على الحد الأدنى لحساسية ISO.41/125200 نقطة البداية.5.61/125400 للحفاظ على الحد الأدنى لسرعة الغالق، يتم زيادة ISO.81/125800للحفاظ على الحد الأدنى لسرعة الغالق ISO. تم زيادة.111/1251600للحفاظ على الحد الأدنى لسرعة الغالق تم زيادة ISO.161/1253200للحفاظ على الحد الأدنى لسرعة الغالق تم زيادة ISO. الآن عند الحد الأقصى ISO.221/603200، يضحي بالحد الأدنى من سرعة الغالق لتحقيق التعريض الضوئي الصحيح وعدم تجاوز الحد الأقصى لـ ISO.


                        Make sure you are paying careful attention to the display in your viewfinder. In most camera models, if the camera reaches the maximum ISO and still cannot achieve a correct exposure, it sacrifices your minimum shutter speed. In other words, the camera will not change your aperture (that is the definition of Aperture Priority), and it will never go above the maximum ISO you set in the configuration. Therefore, it must use a slower shutter speed to expose the image correctly.

                        You can see an example of when this happens here. This time the lighting is a bit darker. An aperture of f/4 , at 1/125s and ISO 200 produces a correct exposure (our starting point). Say you want to set an aperture of f/22 to achieve a large DOF. Since there is not enough light at the highest ISO, the camera drops the shutter speed a stop, to 1/60s.
                        1Aperture Priority – User sets aperture based on the required depth of field.
                        2.8 1/250 200 Shutter speed increases and min ISO is maintained.
                        4 1/125 200 Starting Point.
                        5.6 1/125 400 To maintain min shutter speed ISO is increased.
                        8 1/125 800 To maintain min shutter speed ISO is increased.
                        11 1/125 1600 To maintain min shutter speed ISO is increased.
                        16 1/125 3200 To maintain min shutter speed ISO is increased. Now at max ISO.
                        22 1/60 3200 Sacrifices min shutter speed to achieve correct exposure and not exceed max ISO.

                        تعليق


                        • #13
                          من المستبعد جدًا أن تحصل على صورة قليلة التعرض للضوء باستخدام Aperture Priority وAuto ISO. وذلك لأن الكاميرا ستتجاوز دائمًا الحد الأدنى لسرعة الغالق (كما في المثال الأخير). يمكن لمعظم الكاميرات تعريض ما يصل إلى 30 ثانية تلقائيًا، وهو عادةً ما يكون أكثر من الوقت الكافي لجمع ما يكفي من الضوء. ومع ذلك، هذا ليس عمليًا جدًا! إذا لاحظت أن الكاميرا تنخفض إلى أقل من الحد الأدنى لسرعة الغالق التي حددتها، فستحتاج إلى فتح فتحة العدسة.

                          من الممكن الحصول على لقطة ذات تعريض زائد في هذا الوضع. لنفترض على سبيل المثال أنك تستخدم عدسة سريعة وتريد الحصول على عمق DOF سطحي للغاية، لذا قمت بضبط فتحة العدسة على f/2.8. إذا كانت الكاميرا تستخدم بالفعل أدنى مستوى ISO، وكانت هناك حاجة إلى سرعة غالق أسرع مما هو ممكن ميكانيكيًا على الكاميرا، فسيتم تعريض الصورة بشكل زائد. الطريقة الوحيدة للتغلب على ذلك هي إغلاق الفتحة الخاصة بك.


                          It is highly unlikely that you will ever get an underexposed image using Aperture Priority and Auto ISO. This is because the camera will always override the minimum shutter speed (like in the last example). Most cameras can automatically expose up to 30s, which is usually more than ample time to collect enough light. However, this is not very practical! If you notice the camera is dropping below your set minimum shutter speed, you will need to open up your aperture.

                          It is possible to get an overexposed shot in this mode, though. Say for example you are using a fast lens and want to achieve a very shallow DOF, so you set your aperture to f/2.8. If the camera is already using the lowest ISO, and a faster shutter speed than is mechanically possible on your camera is needed, then your image will be overexposed. The only way around this is to close down your aperture.

                          تعليق


                          • #14
                            5.2) أولوية الغالق وISO التلقائي

                            في أولوية الغالق، يمكنك تحديد سرعة الغالق بناءً على الطريقة التي تريد بها تسجيل الحركة. هل تريد تجميد الحركة باستخدام سرعة غالق سريعة، أو إنشاء إحساس بالحركة باستخدام سرعة غالق بطيئة؟ مع تنشيط Auto ISO، تحدد الكاميرا بعد ذلك الفتحة اللازمة للتعريض الضوئي الصحيح باستخدام أقل ISO. نظرًا لأنك تقوم بضبط سرعة الغالق، تتجاهل الكاميرا الحد الأدنى لسرعة الغالق المحددة في تكوين ISO التلقائي. إذا كانت الفتحة القصوى لا تسمح بدخول ما يكفي من الضوء، فستقوم الكاميرا بزيادة ISO.

                            لنفترض أنك اخترت سرعة غالق تبلغ 1/125 ثانية وقررت الكاميرا أن فتحة العدسة f/11 مطلوبة لالتقاط المقدار الصحيح من الضوء بحد أدنى ISO يبلغ 200، (نقطة البداية لدينا). إذا قررت إبطاء سرعة الغالق لديك لطمس الحركة إلى 1/60 ثانية أو 1/30 ثانية، فستتوقف الكاميرا عند الفتحة باستخدام ISO 200.


                            5.2) Shutter Priority and Auto ISO


                            In Shutter Priority, you select a shutter speed based on how you want to record motion. Do you want to freeze action with a fast shutter speed, or create a sense of movement using a slow shutter speed? With Auto ISO activated, the camera then determines the aperture necessary for the correct exposure using the lowest ISO. Because you are setting the shutter speed, the camera ignores the minimum shutter speed set in the Auto ISO configuration. If the maximum aperture does not let in enough light, then the camera increases ISO.

                            Let’s say that you choose a shutter speed of 1/125s and the camera determines that an aperture of f/11 is required to capture the correct amount of light at the minimum ISO of 200, (our starting point). If you decide to slow your shutter speed down to blur the motion to 1/60s or 1/30s the camera stops down the aperture using ISO 200.

                            تعليق


                            • #15
                              ومع ذلك، احرص على عدم المبالغة في تعريض اللقطة. إذا قررت أنك تحتاج إلى سرعة غالق أبطأ لأسباب فنية (1/15 ثانية أو أبطأ)، فسيتم تعريض الصورة بشكل زائد. وذلك لأن العدسة التي اخترناها لا يمكن أن تتوقف عند حجم أصغر من f/22. نظرًا لأن ISO منخفض قدر الإمكان، فستكون الصورة الناتجة مشرقة جدًا.

                              من ناحية أخرى، إذا قررت استخدام سرعة غالق أسرع، فستقوم الكاميرا بزيادة فتحة العدسة. عند 1/2000 ثانية، يتم تحديد أن فتحة العدسة f/2.8 مطلوبة. أي سرعات غالق أعلى من 1/2000 ثانية ستؤدي إلى زيادة في ISO.

                              سرعة الغالق، ISOComments1، أولوية الغالق – يقوم المستخدم بتعيين سرعة الغالق بناءً على كيفية التقاط الحركة.2.81/4000400 نظرًا لأن الفتحة مفتوحة على مصراعيها بالفعل، يتم زيادة ISO.2.81/2000200، زيادة فتحة العدسة مع الحفاظ على الحد الأدنى لـ ISO. الآن عند أوسع فتحة عدسة.41/1000200زيادة فتحة العدسة مع الحفاظ على الحد الأدنى لحساسية ISO.5.61/500200زيادة فتحة العدسة مع الحفاظ على الحد الأدنى لحساسية ISO.81/250200زيادة فتحة العدسة مع الحفاظ على الحد الأدنى لحساسية ISO.111/125200نقطة البداية.161/60200تقل فتحة العدسة مع الحفاظ على الحد الأدنى لحساسية ISO. .221/30200 تنخفض فتحة العدسة مع الحفاظ على الحد الأدنى لحساسية ISO. الآن عند أضيق فتحة عدسة. 221/15200 تعرض للضوء بشكل مفرط نظرًا لأن فتحة العدسة صغيرة بقدر الإمكان وISO عند أدنى مستوى ممكن.


                              However, be careful not to overexpose your shot. If you decide that you need an even slower shutter speed for artistic reasons (1/15s or slower) the image will be overexposed. This is because the lens we chose cannot stop down smaller than f/22. Since the ISO is as low as it can get, the resulting image will be too bright.

                              On the other hand, if you decide to use a faster shutter speed, the camera will increase your aperture. At 1/2000s it determines that an aperture of f/2.8 is required. Any shutter speeds above 1/2000s will cause an increase in the ISO.
                              1Shutter Priority – The user sets the shutter speed based on how motion is to be captured.
                              2.8 1/4000 400 Since the aperture is already wide open, ISO is increased.
                              2.8 1/2000 200 Aperture increase while min ISO is maintained. Now at the widest aperture.
                              4 1/1000 200 Aperture increase while min ISO is maintained.
                              5.6 1/500 200 Aperture increase while min ISO is maintained.
                              8 1/250 200 Aperture increase while min ISO is maintained.
                              11 1/125 200 Starting Point.
                              16 1/60 200 Aperture decreases while min ISO is maintained.
                              22 1/30 200 Aperture decreases while min ISO is maintained. Now at the narrowest aperture.
                              22 1/15 200 Overexposed since aperture is as small as possible and ISO as low as possible.

                              تعليق

                              يعمل...
                              X