كيفية استخدام العدسات المقربة How to Use Telephoto Lenses

تقليص
X
 
  • تصفية - فلترة
  • الوقت
  • عرض
إلغاء تحديد الكل
مشاركات جديدة

  • كيفية استخدام العدسات المقربة How to Use Telephoto Lenses

    كيفية استخدام العدسات المقربة
    How to Use Telephoto Lenses


    تعتبر العدسات المقربة - العدسات التي يتم "تكبيرها" بدرجة كبيرة - أدوات رائعة لأي نوع من أنواع التصوير الفوتوغرافي تقريبًا، ولكنها ليست بالضرورة سهلة الاستخدام. على وجه الخصوص، ستعمل العدسات المقربة على تكبير أي اهتزاز للكاميرا وتوفر عمقًا أقل بكثير للمجال مقارنةً بالزوايا الواسعة. لا تدع ذلك يوقفك، رغم ذلك. تتميز الصور المقربة بطريقة فريدة لعرض العالم - وهي طريقة قد تكون مثالية لصورك. في هذه المقالة، سأتناول بالتفصيل كيفية استخدام العدسات المقربة، وأناقش بعض فوائدها ونصائح للتعامل مع تحدياتها الفريدة. على الرغم من أنني شخصيًا أميل إلى التقاط صور للمناظر الطبيعية، إلا أن التقنيات الواردة في هذه المقالة تنطبق بغض النظر عن الأهداف التي ترغب في التقاطها


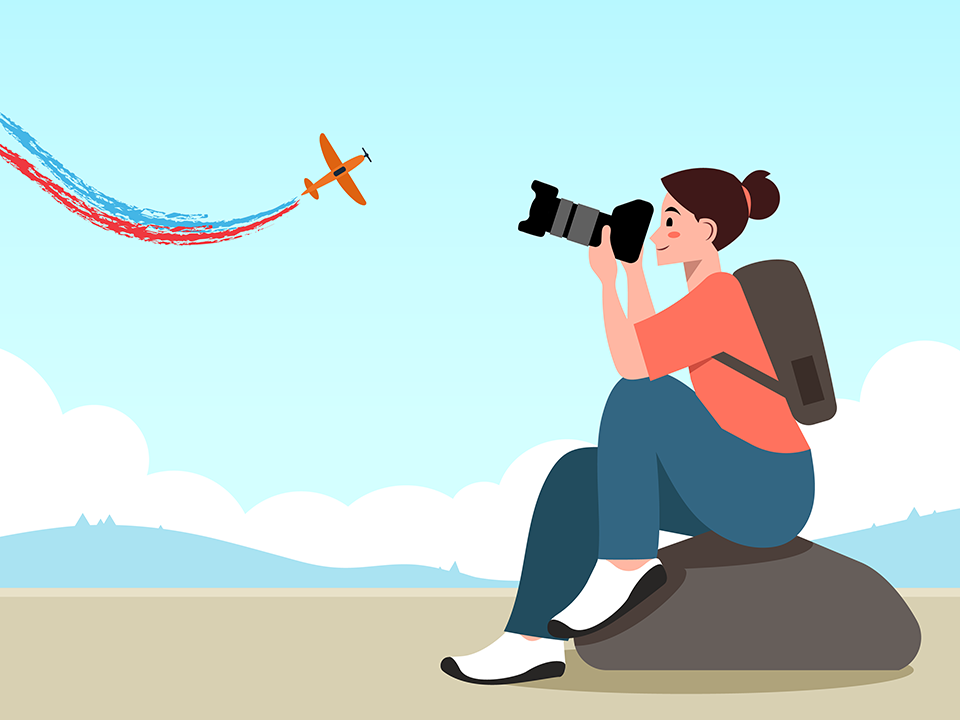
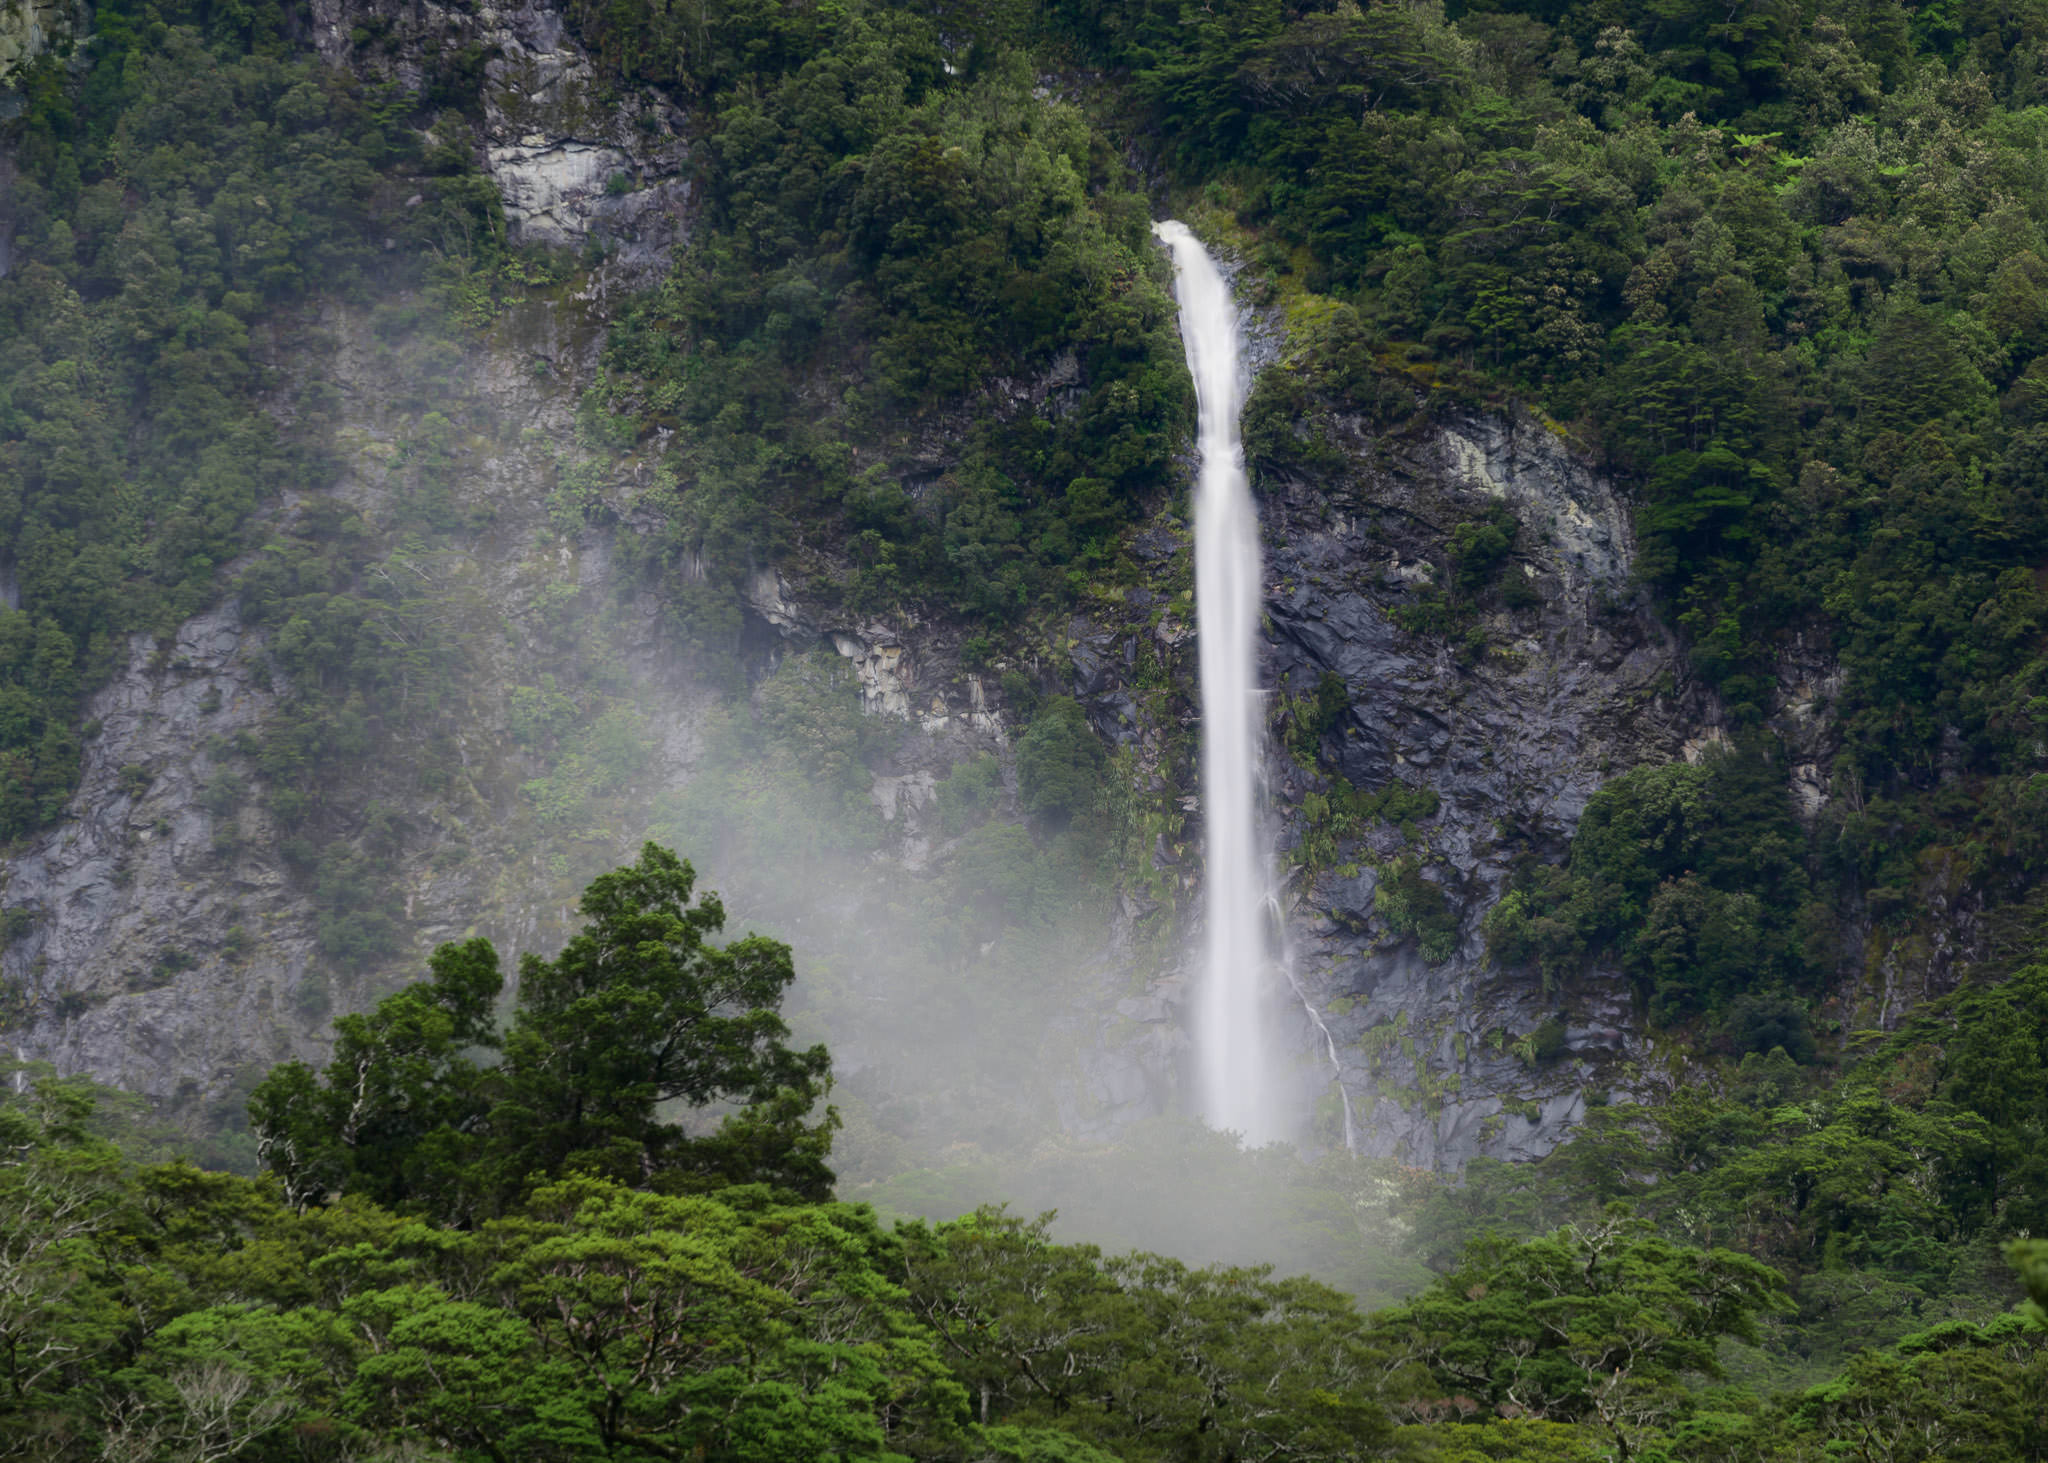
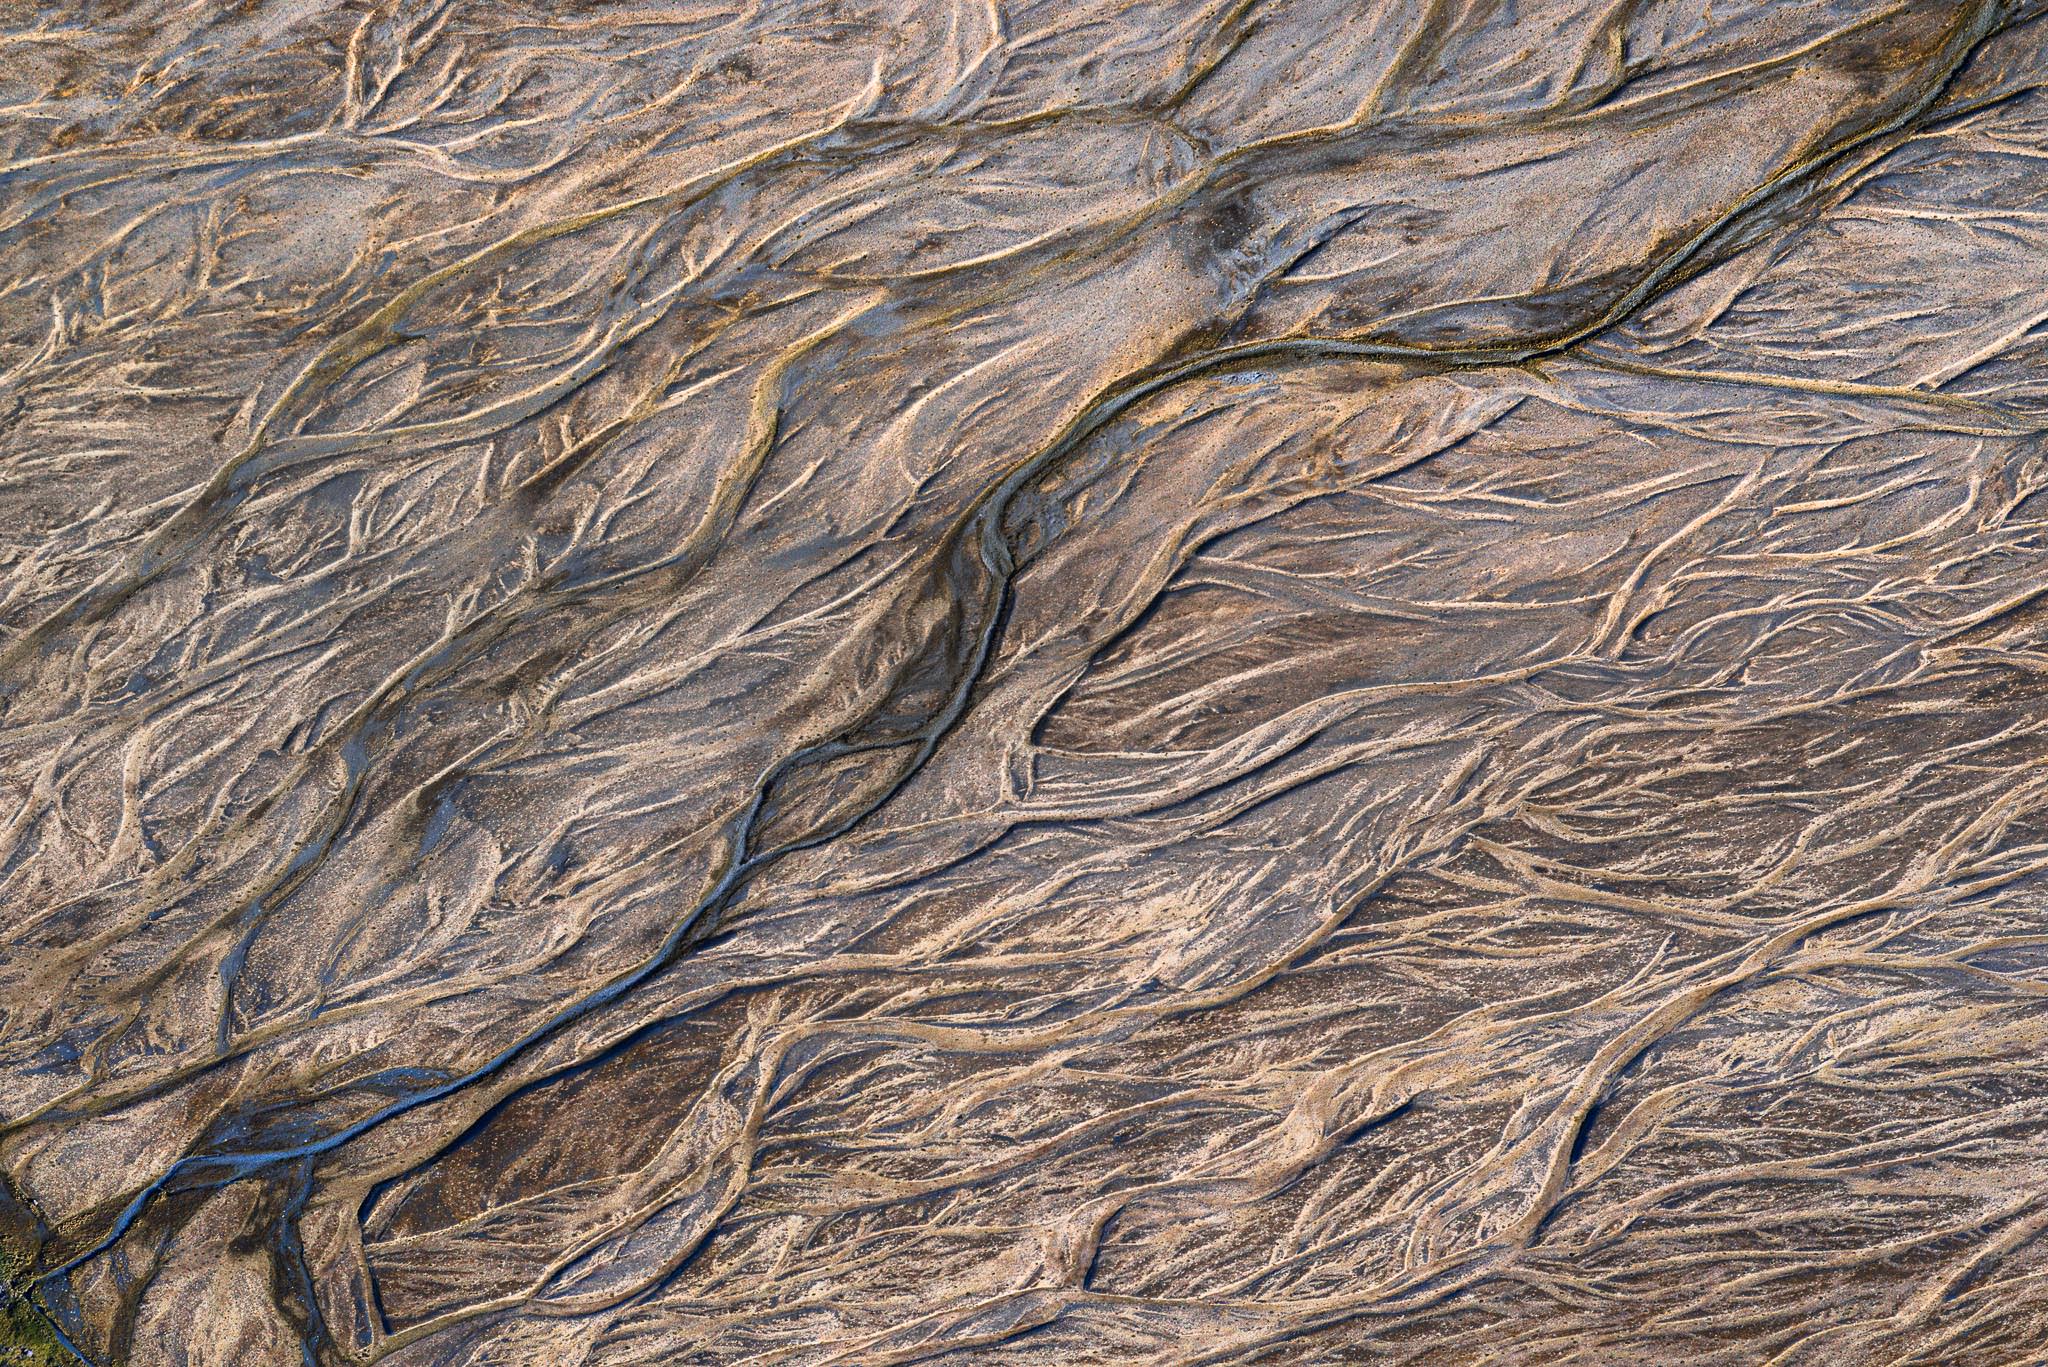
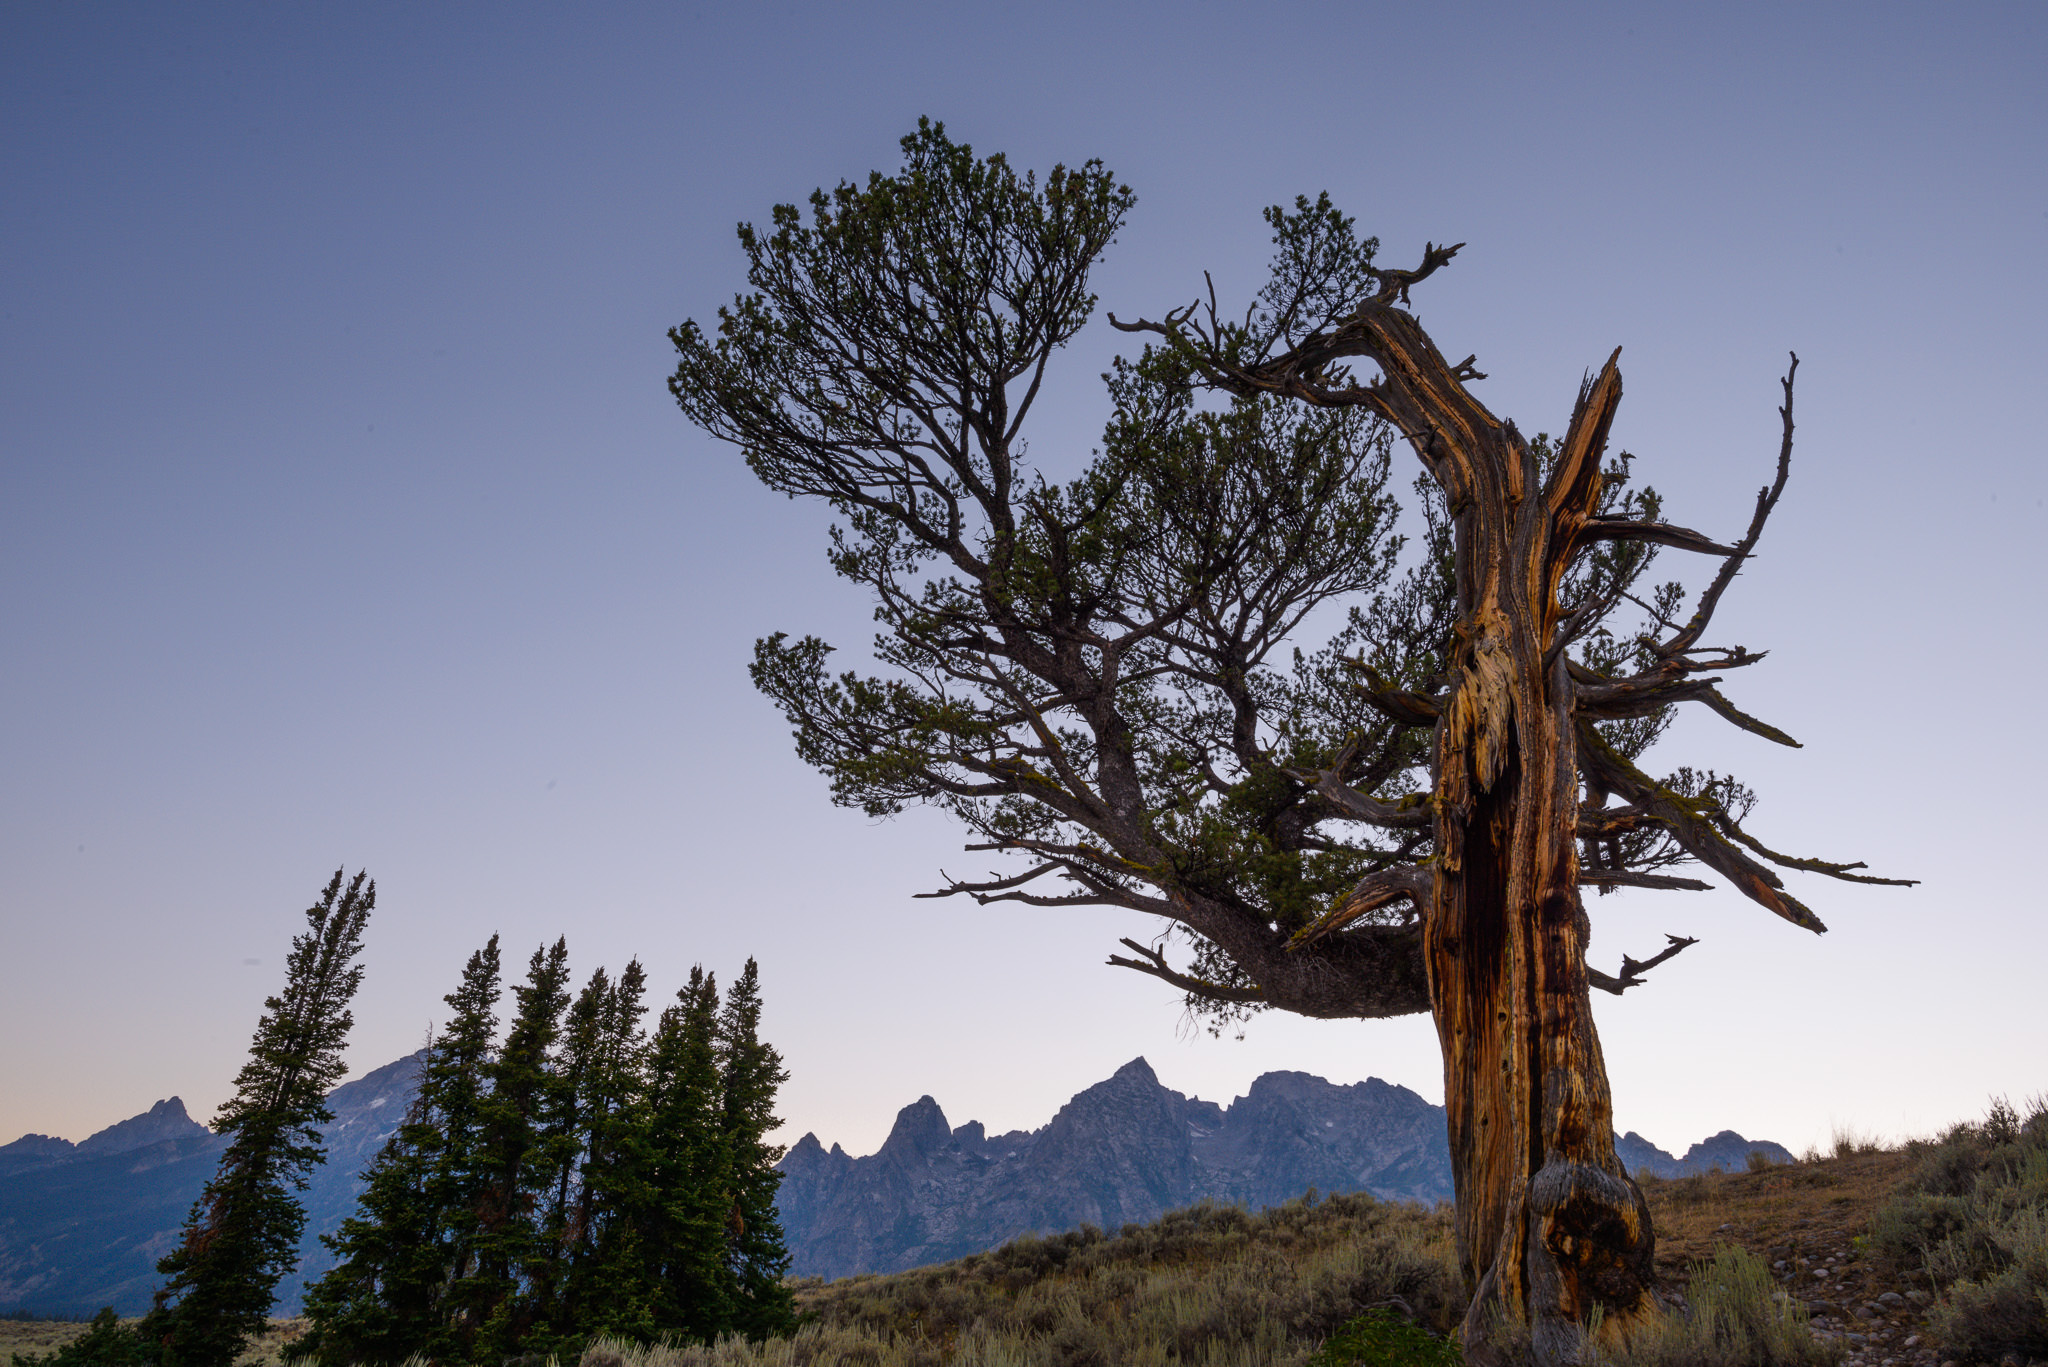
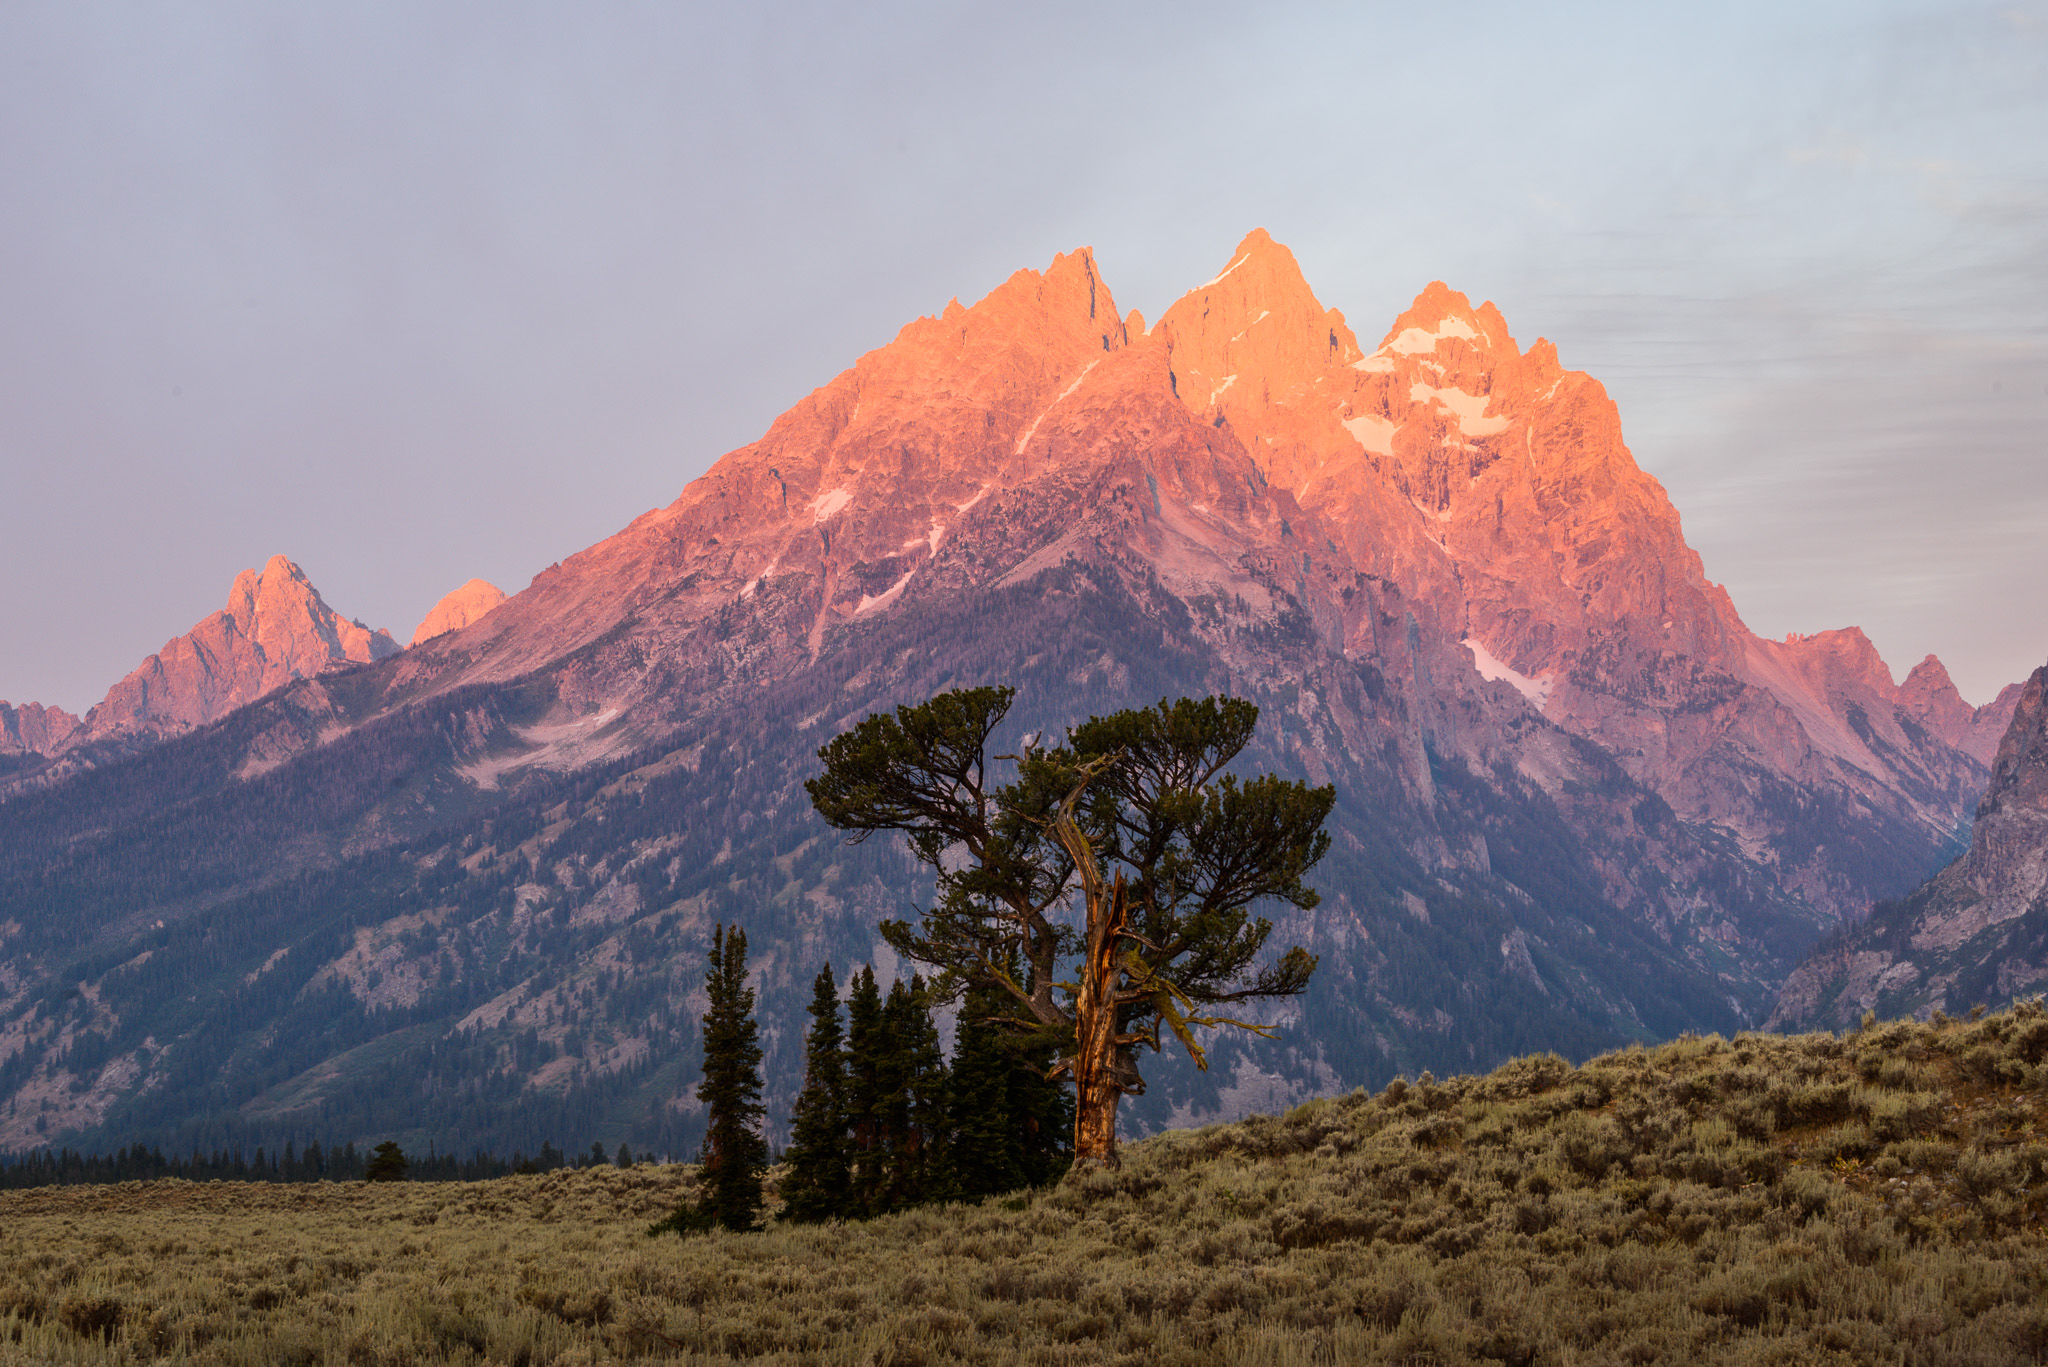
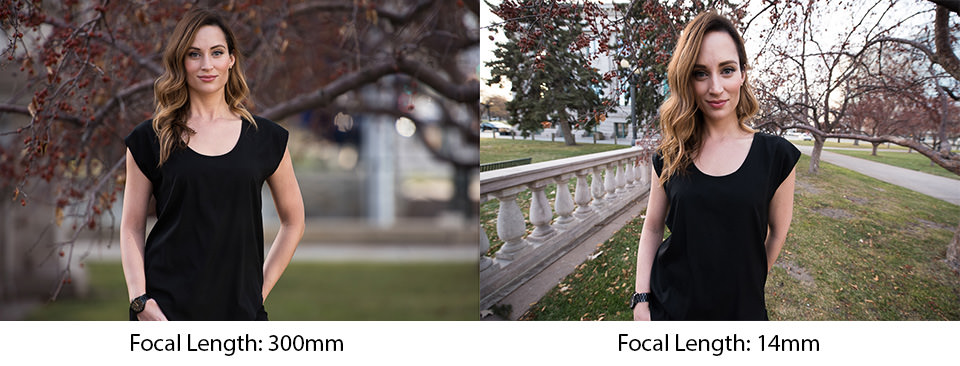
    Telephotos – lenses that are “zoomed in” to a significant degree – are wonderful tools for almost any genre of photography, but they aren’t necessarily easy to use. In particular, telephoto lenses will magnify any camera shake and provide a much thinner depth of field compared to wide angles. Don’t let that stop you, though. Telephotos have a unique way of showcasing the world – one which may be ideal for your photos. In this article, I’ll go in detail about how to use telephoto lenses, discuss some of their benefits and tips for dealing with their unique challenges. Although I personally tend to take landscape photos, the techniques in this article apply no matter what subjects you like to capture

  • #2

    جدول المحتويات

    التركيز على التفاصيل، إنشاء صور مجردة، إظهار الإحساس بالحجم، الحصول على عمق كافٍ للمجال، استخدام عمق المجال الضحل لصالحك، مراقبة اهتزاز الكاميرا، الاستنتاج

    Table of Contents

    تعليق


    • #3
      التركيز على التفاصيل

      ليس من المستغرب أن تكون العدسات المقربة مفيدة جدًا إذا كنت تريد التركيز على تفاصيل أصغر في مشهد معين.

      نظرًا لأن العدسات المقربة تتمتع بمجال رؤية ضيق، فإنها تجعل من السهل التقاط شريحة رقيقة فقط من العالم. في كل شيء بدءًا من الغابات الكثيفة وحتى المناظر المفتوحة على نطاق واسع، تتيح لك العدسة المقربة عزل التفاصيل بسهولة أكبر بكثير من العدسة ذات الزاوية المتوسطة أو الواسعة. (وهذا لا يعني أنه لا يمكنك التقاط تفاصيل صغيرة بزاوية واسعة؛ فبعض الصور المفضلة لدي تفعل ذلك بالضبط. ومع ذلك، فإن مجال الرؤية الضيق الذي توفره العدسات المقربة عادةً ما يجعل الأمر أسهل.)

      أي نوع من التفاصيل؟ يعتمد ذلك على نوع التصوير الفوتوغرافي الذي تحب القيام به. إذا كنت مصورًا فوتوغرافيًا، فيمكنك التقاط وجه شخص ما بسهولة أكبر، دون أي عناصر محيطة. بالنسبة لتصوير المناظر الطبيعية، يمكنك التركيز على قمة جبل واحدة وجعلها العنصر الأبرز في صورتك. ولا تنس أيضًا عدسات الماكرو، والتي عادةً ما تكون عدسات مقربة؛ فهي تتيح لك تصوير حتى أصغر المشاهد.


      Focus on Details


      Not surprisingly, telephoto lenses are very useful if you want to focus on smaller details in a given scene.

      Because telephoto lenses have such a narrow field of view, they make it easier to capture just a thin slice of the world. In everything from dense forests to wide-open overlooks, a telephoto lens lets you isolate details far more easily than a medium or wide angle lens. (That’s not to say you can’t capture small details with a wide angle; some of my favorite images do just that. However, the narrow field of view that telephotos have typically makes it easier.)

      What sorts of details? That depends upon the type of photography that you like to do. If you’re a portrait photographer, you can capture someone’s face more easily, without any surrounding elements. For landscape photography, you can focus on a single mountain peak and make it the most prominent item in your image. Also, don’t forget macro lenses, which are typically telephotos; they let you photograph even the tiniest of scenes.

      تعليق


      • #4

        ربما تكون هذه هي الطريقة الأكثر أهمية التي أستخدم بها العدسات المقربة. هذا ليس صحيحًا في كل المناظر الطبيعية، ولكن - في كثير من الأحيان مما يعتقده الكثير من الناس - يمكن لتفاصيل واحدة أن تكون أكثر إثارة للإعجاب من مشهد موسع. كل ما عليك فعله هو أن تراقب جيدًا وأن تكون الصورة المقربة في متناول يديك.

        كاميرا نيكون D800E + 70-200 مم f/4 @ 185 مم، ISO 100، 8/10، f/16.0

        This is perhaps the most important way in which I use telephoto lenses. It isn’t true in every landscape, but — more often than many people think — a single detail can be more impressive than an expansive scene. You just need to keep an eye out and a telephoto handy.
        NIKON D800E + 70-200mm f/4 @ 185mm, ISO 100, 8/10, f/16.0

        تعليق


        • #5
          إنشاء صور مجردة

          أحد الأسباب الشخصية المفضلة لاستخدام العدسة المقربة هو إنشاء صور مجردة أو شبه مجردة.

          نظرًا لأن الصور المقربة يمكنها عزل التفاصيل بشكل جيد، في بعض المناظر الطبيعية، ستتمكن من التقاط جزء صغير من المشهد الذي يزيل السياق تمامًا - وهو تعريف الصورة المجردة. وفي أحيان أخرى، حتى إذا لم تتمكن من إزالة السياق بالكامل، فسينتهي بك الأمر مع صورة تركز على الأشكال والأنماط بدلاً من صورة حرفية تمامًا للمشهد.

          أنا من محبي الصور المجردة. إنها تدور حول الأساسيات: الضوء واللون والأشكال والتكوين. إذا لم يتمكن المشاهد من معرفة ما تصوره الصورة فعليًا، فإن الصورة تصبح أكثر حول صفاتها الجمالية الأساسية. على سبيل المثال، إذا التقطت صورة مجردة في يوسيميتي، فإن ردود أفعال الأشخاص الأولى ستكون "رائع، هذه الأشكال مثيرة للاهتمام حقًا" بدلاً من "رائع، لقد ذهبت أيضًا إلى يوسمايت!"


          Create Abstract Photos


          One of my personal favorite reasons to use a telephoto lens is to create abstract or semi-abstract photos.

          Since telephotos can isolate details so well, in certain landscapes, you’ll be able to capture a small sliver of the scene that completely removes context — the definition of an abstract image. Other times, even if you can’t remove the context completely, you’ll still end up with a photo that focuses on shapes and patterns rather than a perfectly-literal image of a scene.

          I’m a fan of abstract photos. They’re all about the basics: light, color, shapes, and composition. If your viewer can’t tell what a photo actually depicts, then the image becomes more about its underlying aesthetic qualities. For example, if you take an abstract photo at Yosemite, people’s first reactions will be “Wow, those shapes are really interesting” rather than “Cool, I also went to Yosemite!”

          تعليق


          • #6

            بالطبع، ليس من الضروري أن تكون كل الصور مجردة، ولا يجب أن يتم التقاط كل الصور المجردة باستخدام عدسة مقربة. لا يزال بإمكانك التقاط الملخصات بزاوية واسعة، خاصة إذا كنت قادرًا على وضع الكاميرا بالقرب جدًا من موضوعك. ومع ذلك، إذا كانت الملخصات هي ما تريد تصويره، فيجب عليك الاحتفاظ بعدسة طويلة في متناول يدك. إنها إحدى أفضل الطرق لعزل أشكال وأشكال المشهد.

            كاميرا نيكون D810 + 70-200 مم f/2.8 @ 200 مم، ISO 400، 1/500، f/5.6

            Of course, not all photos need to be abstract, and not all abstract photos must be taken with a telephoto lens. You can still capture abstracts with a wide-angle, particularly if you are able to position your camera very close to your subject. However, if abstracts are what you want to photograph, you should keep a long lens handy. It’s one of the best ways to isolate the shapes and forms of a scene.
            NIKON D810 + 70-200mm f/2.8 @ 200mm, ISO 400, 1/500, f/5.6

            تعليق


            • #7
              أظهر إحساسًا بالحجم

              إذا كنت تقف بالقرب من شجرة بها جبال بعيدة، واستخدمت عدسة واسعة الزاوية، فستظهر الشجرة كبيرة جدًا مقارنة بالخلفية:

              كاميرا نيكون D800E + 20 مم f/1.8 @ 20 مم، ISO 100، 1/4، f/16.0


              Show a Sense of Scale


              If you’re standing close to a tree with mountains in the distance, and you use a wide angle lens, the tree will appear quite large compared to the background:
              NIKON D800E + 20mm f/1.8 @ 20mm, ISO 100, 1/4, f/16.0

              تعليق


              • #8
                هذا له علاقة بالمنظور. كلما اقتربت من عنصر ما، ظهر أكبر بالنسبة لخلفيته. على الرغم من أن الأمر قد يبدو كذلك، إلا أن هذا التأثير ليس له علاقة في الواقع بالعدسة التي تستخدمها - بل يتعلق بموضع الكاميرا. ومع ذلك، إذا كنت في وضع قريب جدًا من شيء ما واستخدمت عدسة واسعة الزاوية، فسيكون مجال رؤيتك واسعًا جدًا بحيث تكون هذه العلاقة أكثر وضوحًا للمشاهدين. (إذا كان هذا الأمر مربكًا، فقد كتبت إليزابيث برنامجًا تعليميًا كاملاً حول ضغط العدسة، ولدى نسيم مقالة حول البعد البؤري وتشويه الهدف الذي يجب أن تفكر في قراءته.)

                الوجه الآخر لهذه العملة هو عندما تستخدم عدسة مقربة وتقف بعيدًا في الخلف. بعد ذلك، تبدأ العناصر في الظهور بأحجامها النسبية الفعلية. سيبدو الأشخاص أمام الجبل ضخمين إذا وقفت على بعد قدمين منهم واستخدمت عدسة واسعة الزاوية، لكنهم سيكونون صغارًا إذا تراجعت وقمت بتكبير الصورة؛ وبدلاً من ذلك، سيبدو الجبل أكبر.


                This has to do with perspective. The closer that you are to an item, the larger it appears relative to its background. Although it may seem like it, this effect actually has nothing to do with the lens you use — it’s all about your camera position. However, if you are positioned very close to something and use a wide angle lens, then your field of view will be so wide that this relationship is much more obvious to viewers. (If this is confusing, Elizabeth wrote a full tutorial on lens compression and Nasim has an article about focal length and subject distortion that you should consider reading.)

                The flip side of this coin is when you use a telephoto lens and stand much farther back. Then, items start to look their actual relative sizes. People in front of a mountain will appear huge if you stand two feet away from them and use a wide angle lens, but they’ll be tiny if you stand back and zoom in; instead, the mountain will appear larger.

                تعليق


                • #9
                  عندما التقطت الصورة أعلاه، أردت التركيز على الأنماط المثيرة للاهتمام في هذه الشجرة. ومع ذلك، سرعان ما أدركت أن هذا المنظور لم يُظهر الحجم الكبير للجبال من مسافة بعيدة. لذلك، قمت بالتبديل من عدستي مقاس 20 مم إلى عدستي مقاس 70-200 مم، ثم عدت إلى الخلف. في النهاية، تمكنت من التقاط هذه الصورة بدلاً من ذلك، والتي لها إحساس مختلف تمامًا بالحجم:

                  كاميرا نيكون D800E + 70-200 مم f/4 @ 70 مم، ISO 100، 6/10، f/16.0


                  When I took the photo above, I wanted to focus on the interesting patterns in this tree. However, I soon realized that this perspective didn’t show the extreme scale of the mountains in the distance. So, I switched from my 20mm lens to my 70-200mm, and I walked farther back. Ultimately, I was able to capture this photo instead, which has a very different sense of scale:
                  NIKON D800E + 70-200mm f/4 @ 70mm, ISO 100, 6/10, f/16.0

                  تعليق


                  • #10
                    يمكن أن تكون هذه التقنية ذات قيمة في عدد من المواقف المختلفة، بدءًا من المناظر الطبيعية وحتى الرياضة وكل شيء بينهما. إذا التقطت جبلًا لا يحتوي على قوة كافية في صورة ما، أقوم دائمًا بتكبير الصورة؛ أو، إذا كان أحد العناصر الأمامية يبدو كبيرًا جدًا، فسوف أتراجع وأستخدم الصورة المقربة.

                    إن الإحساس الإضافي بالحجم في هذه الصور لا ينتج بشكل مباشر عن العدسة الأطول، ولكنه يعد عاملاً مهمًا بشكل غير مباشر. يتم تحديد منظور صورتك من خلال موضع الكاميرا، والذي، إذا كنت تستخدم عدسة مقربة، يمكن أن يكون أبعد من المعتاد.


                    This technique can be valuable in a number of different situations, from landscapes to sports, and everything in between. If I ever capture a mountain that doesn’t have enough power in an image, I always zoom in; or, if one of my foreground elements appears too large, I’ll step back and use a telephoto.

                    The extra sense of scale in these photos isn’t directly caused by your longer lens, but it indirectly is an important factor. Your photo’s perspective is determined by your camera position — which, if you use a telephoto, can be farther back than normal.

                    تعليق


                    • #11
                      غالبًا ما يستخدم مصورو الصور الشخصية هذا التأثير من أجل "تسطيح" وجه الشخص المراد تصويره وجعل ملامحه تبدو طبيعية. انظر المقارنة أدناه (صور نسيم):


                      This effect is often used by portrait photographers in order to “flatten” their subject’s face and make their features look more like normal. See the comparison below (photos by Nasim):


                      تعليق


                      • #12
                        هنا، على الرغم من أن موضع المصور هو الذي تسبب بالفعل في التغيير في المنظور، إلا أن العدسة المقربة مقاس 300 مم جعلت من الممكن التقاط صورة للرأس والكتفين (بدون اقتصاص) ذات أبعاد واقعية. بالمقارنة، تبدو الصورة مقاس 14 ملم - حيث كان المصور على بعد قدمين فقط من النموذج - مبالغًا فيها كثيرًا.

                        إذا كان هدفك هو إظهار الأحجام النسبية الواقعية للعناصر الموجودة في صورتك بأكبر قدر ممكن من الدقة، فإن مهمتك بسيطة: قم بالتكبير والرجوع للخلف وإنشاء صورتك. بالمقارنة مع الزاوية الواسعة من مسافة قريبة، ستلاحظ اختلافًا واضحًا.


                        Here, although the photographer’s position is what really caused the change in perspective, the 300mm telephoto lens made it possible to capture a head-and-shoulders portrait (without cropping) that had realistic proportions. The 14mm image, by comparison – where the photographer was only a couple feet from the model – looks much more exaggerated.

                        If your goal is to show the real-life relative sizes of the elements in your image as accurately as possible, your task is simple: zoom in, stand back, and compose your photo. Compared to a wide-angle at close range, you’ll notice a clear difference.

                        تعليق


                        • #13
                          الحصول على ما يكفي من عمق المجال

                          أثناء التكبير، سيتقلص عمق المجال بشكل كبير.

                          باستخدام عدسة فائقة الاتساع - مثل 14 مم - من السهل للغاية التقاط منظر طبيعي كامل ضمن عمق مجالك. حتى الفتحة المعتدلة مثل f/5.6 ستجعل المشهد بأكمله بمستويات عالية للغاية من التفاصيل من ثمانية أقدام إلى ما لا نهاية.

                          ومع ذلك، بمجرد التكبير إلى 50 مم - وفقًا لمعظم المعايير، ولا حتى تقريب حتى الآن - ستحتاج إلى فتحة تبلغ f/22 تقريبًا لالتقاط نفس عمق المجال. (حصلت على هذه الأرقام من مقالتي حول اختيار الفتحة الأكثر وضوحًا.)

                          تعد العدسات المقربة رائعة لتصوير المناظر الطبيعية، ولكن يجب أن يكون هدفك بعيدًا جدًا إذا كنت تريد أن يكون المشهد بأكمله واضحًا! يمكنك في بعض الأحيان التركيز على المكدس إذا لم تحصل على ما تريده تمامًا، ولكن قد يستغرق ذلك وقتًا طويلاً، وهو غير ممكن بالنسبة لبعض المناظر الطبيعية سريعة الحركة.


                          Getting Enough Depth of Field


                          As you zoom in, your depth of field will shrink dramatically.

                          With an ultra-wide lens — something like 14mm — it is incredibly easy to capture an entire landscape within your depth of field. Even a moderate aperture like f/5.6 will render the entire scene with extremely high levels of detail from eight feet to infinity.

                          However, just by zooming into 50mm — by most standards, not even a telephoto yet — you’d need an aperture of roughly f/22 in order to capture the same depth of field. (I got these numbers from my article on choosing the sharpest aperture.)

                          Telephoto lenses are amazing for landscape photography, but your subject needs to be quite far away if you want the whole scene to be sharp! You can sometimes focus stack if you don’t get quite what you want, but that can be a time-consuming technique, and it isn’t possible for some quickly-moving landscapes.

                          تعليق


                          • #14
                            كيف يمكنك التغلب على هذه المشكلة؟ إذا كانت فتحة صغيرة مثل f/11 أو f/16 لا توفر عمق المجال الذي تحتاجه، ولم تتمكن من التركيز على المكدس، فلن تكون لديك خيارات في الغالب. حاول بالتأكيد العودة إلى الوراء، إن أمكن، على الرغم من أن ذلك لن يكون ممكنًا في كل مكان.

                            ومع ذلك، لا تدع هذا يمنعك من التقاط صور للمناظر الطبيعية باستخدام عدسة مقربة! أجد أن معظم المناظر الطبيعية الجديرة بالتصوير عن بعد بعيدة بما يكفي بحيث لا يمثل عمق المجال مشكلة كبيرة - وبالنسبة لمعظم المناظر الطبيعية الأخرى، ستتمكن من التركيز على المكدس بدلاً من ذلك.


                            How do you get around this issue? If a small aperture like f/11 or f/16 doesn’t provide the depth of field you need, and you aren’t able to focus stack, you’re mostly out of options. Definitely try moving farther back, if possible, although that won’t be feasible everywhere.

                            Still, don’t let this stop you from taking landscape photos with a telephoto lens! I find that most telephoto-worthy landscapes are far enough away that depth of field isn’t a big issue — and, for most of the others, you’ll be able to focus stack instead.

                            تعليق


                            • #15
                              استخدام عمق المجال الضحل لصالحك

                              السيناريو الأسوأ - أو السيناريو الأفضل إذا كنت متفائلاً - سيتعين عليك العمل بعمق مجال ضحل.

                              يعد عمق المجال الضحل واحدًا من أكثر الأجزاء إلحاحًا في التصوير الفوتوغرافي، وفي الوقت نفسه، أكثر الأجزاء إزعاجًا فيما يتعلق بالعدسات المقربة. إذا كنت تريد أن يظهر كل شيء في صورتك بوضوح، فقد يكون هذا العمق الرقيق للمجال بمثابة صداع؛ إذا كنت تريد التقاط خلفية غير واضحة، فهذا مثالي.


                              Using Shallow Depth of Field to Your Advantage


                              Worst-case scenario — or, if you’re optimistic, best-case scenario — you’ll have to work with a shallow depth of field.

                              A shallow depth of field is one of the most compelling parts about photography, and, simultaneously, most annoying parts about telephoto lenses. If you want everything in your photo to appear sharp, this thin depth of field can be a headache; if you want to capture a softly-blurred background, it’s perfect.

                              تعليق

                              يعمل...
                              X