كيفية استخدام الركيزة الثلاثية ​​​​​​​How to Use a Tripod

تقليص
X
 
  • تصفية - فلترة
  • الوقت
  • عرض
إلغاء تحديد الكل
مشاركات جديدة

  • كيفية استخدام الركيزة الثلاثية ​​​​​​​How to Use a Tripod

    كيفية استخدام الركيزة الثلاثية
    How to Use a Tripod

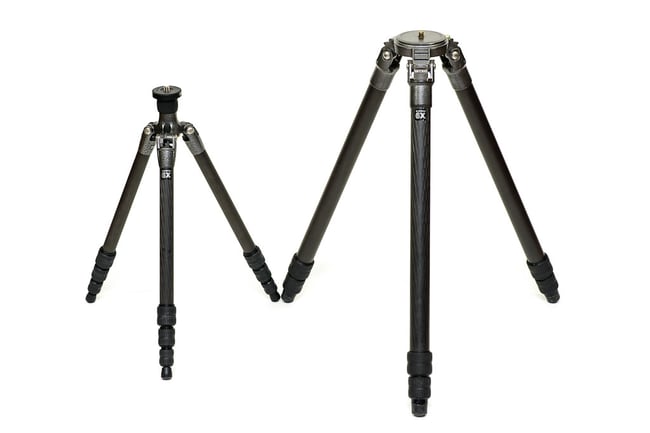
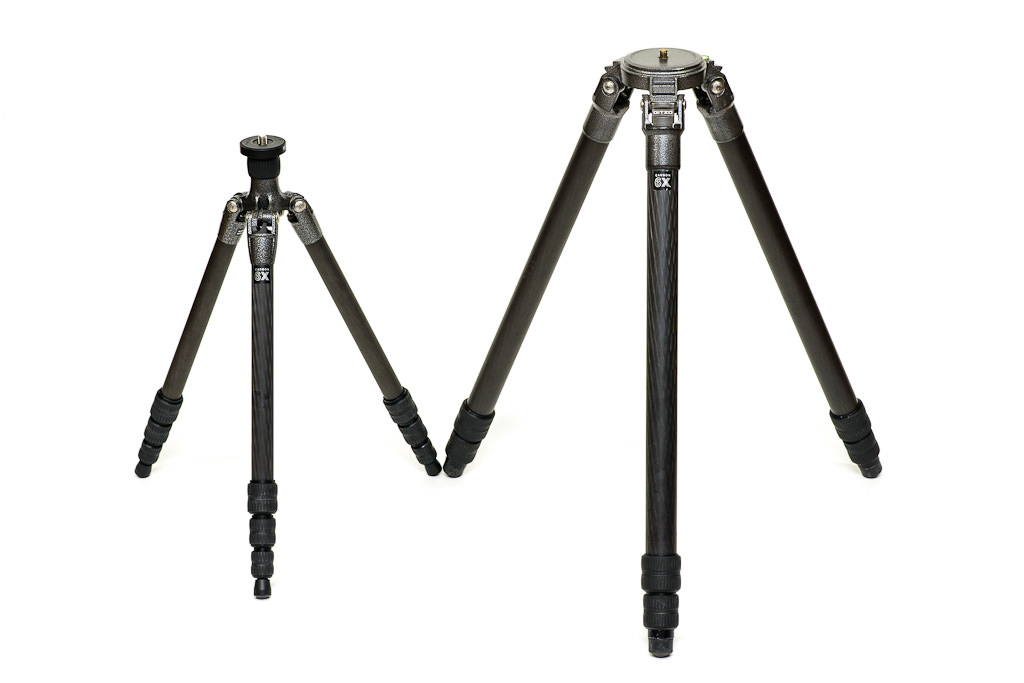
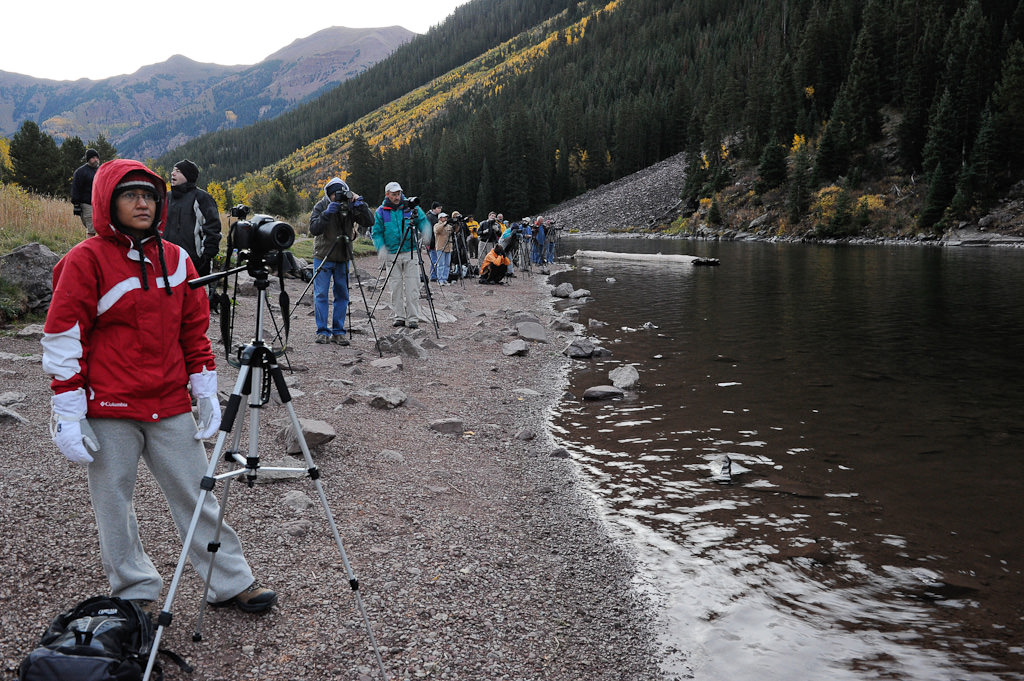
    عند التعامل مع سرعات الغالق البطيئة، يعد الحامل ثلاثي القوائم الصلب أداة ضرورية للتخلص من اهتزاز الكاميرا والتقاط صور واضحة. على الرغم من أن إعداد حامل ثلاثي الأرجل واستخدامه بشكل فعال لاحتياجات التصوير الفوتوغرافي يبدو في البداية بسيطًا وواضحًا بذاته، إلا أنني غالبًا ما أصادف مصورين لا يعرفون كيفية استخدام الحامل ثلاثي الأرجل بشكل صحيح. على الرغم من أنه يمكنك امتلاك أغلى حامل ثلاثي الأرجل في السوق وتعرف بالضبط ما يجب فعله للحصول على صور واضحة للغاية، إلا أن صورك قد لا تزال تعاني من خيارات إطارات سيئة. في هذه المقالة، أريد استكشاف التقنيات المناسبة لإعداد الحوامل الثلاثية والتعامل معها واستخدامها.

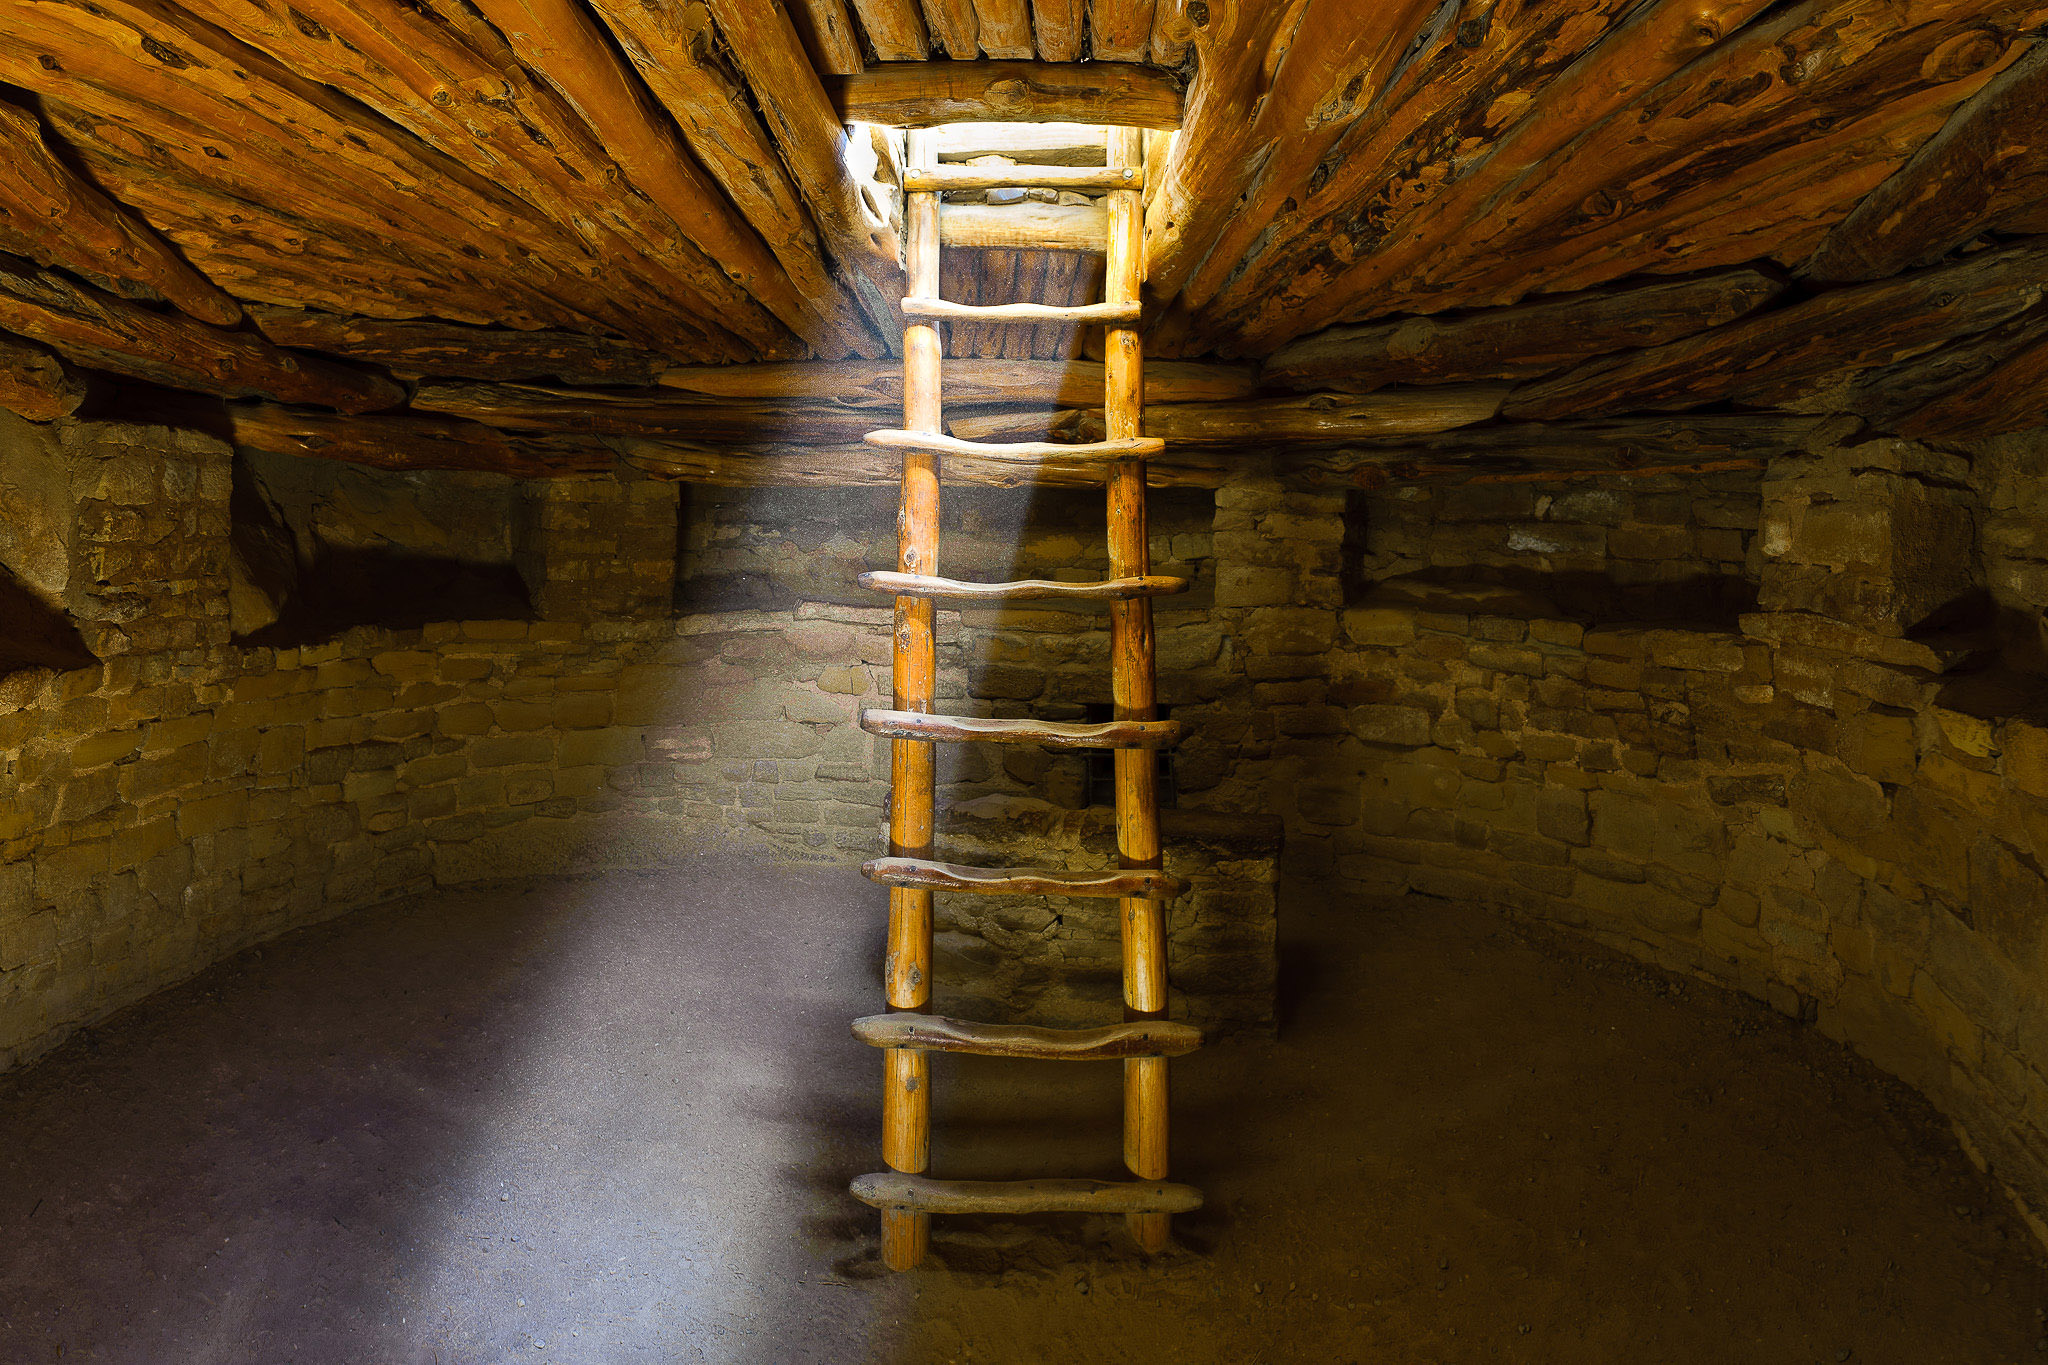
    كاميرا نيكون D800 + 85 مم f/1.8 @ 85 مم، ISO 400، 1/50، f/8.0


    When dealing with slow shutter speeds, a solid tripod is a must-have tool for eliminating camera shake and capturing sharp photographs. Although setting up a tripod and effectively utilizing it for photography needs at first sounds simple and self-explanatory, I often come across photographers that do not know how to properly use a tripod. Even though you could own the most expensive tripod on the market and know exactly what to do to yield razor sharp images, your images could still be suffering from poor framing choices. In this article, I want to explore the proper techniques for setting up, handling and using tripods.


    NIKON D800 + 85mm f/1.8 @ 85mm, ISO 400, 1/50, f/8.0
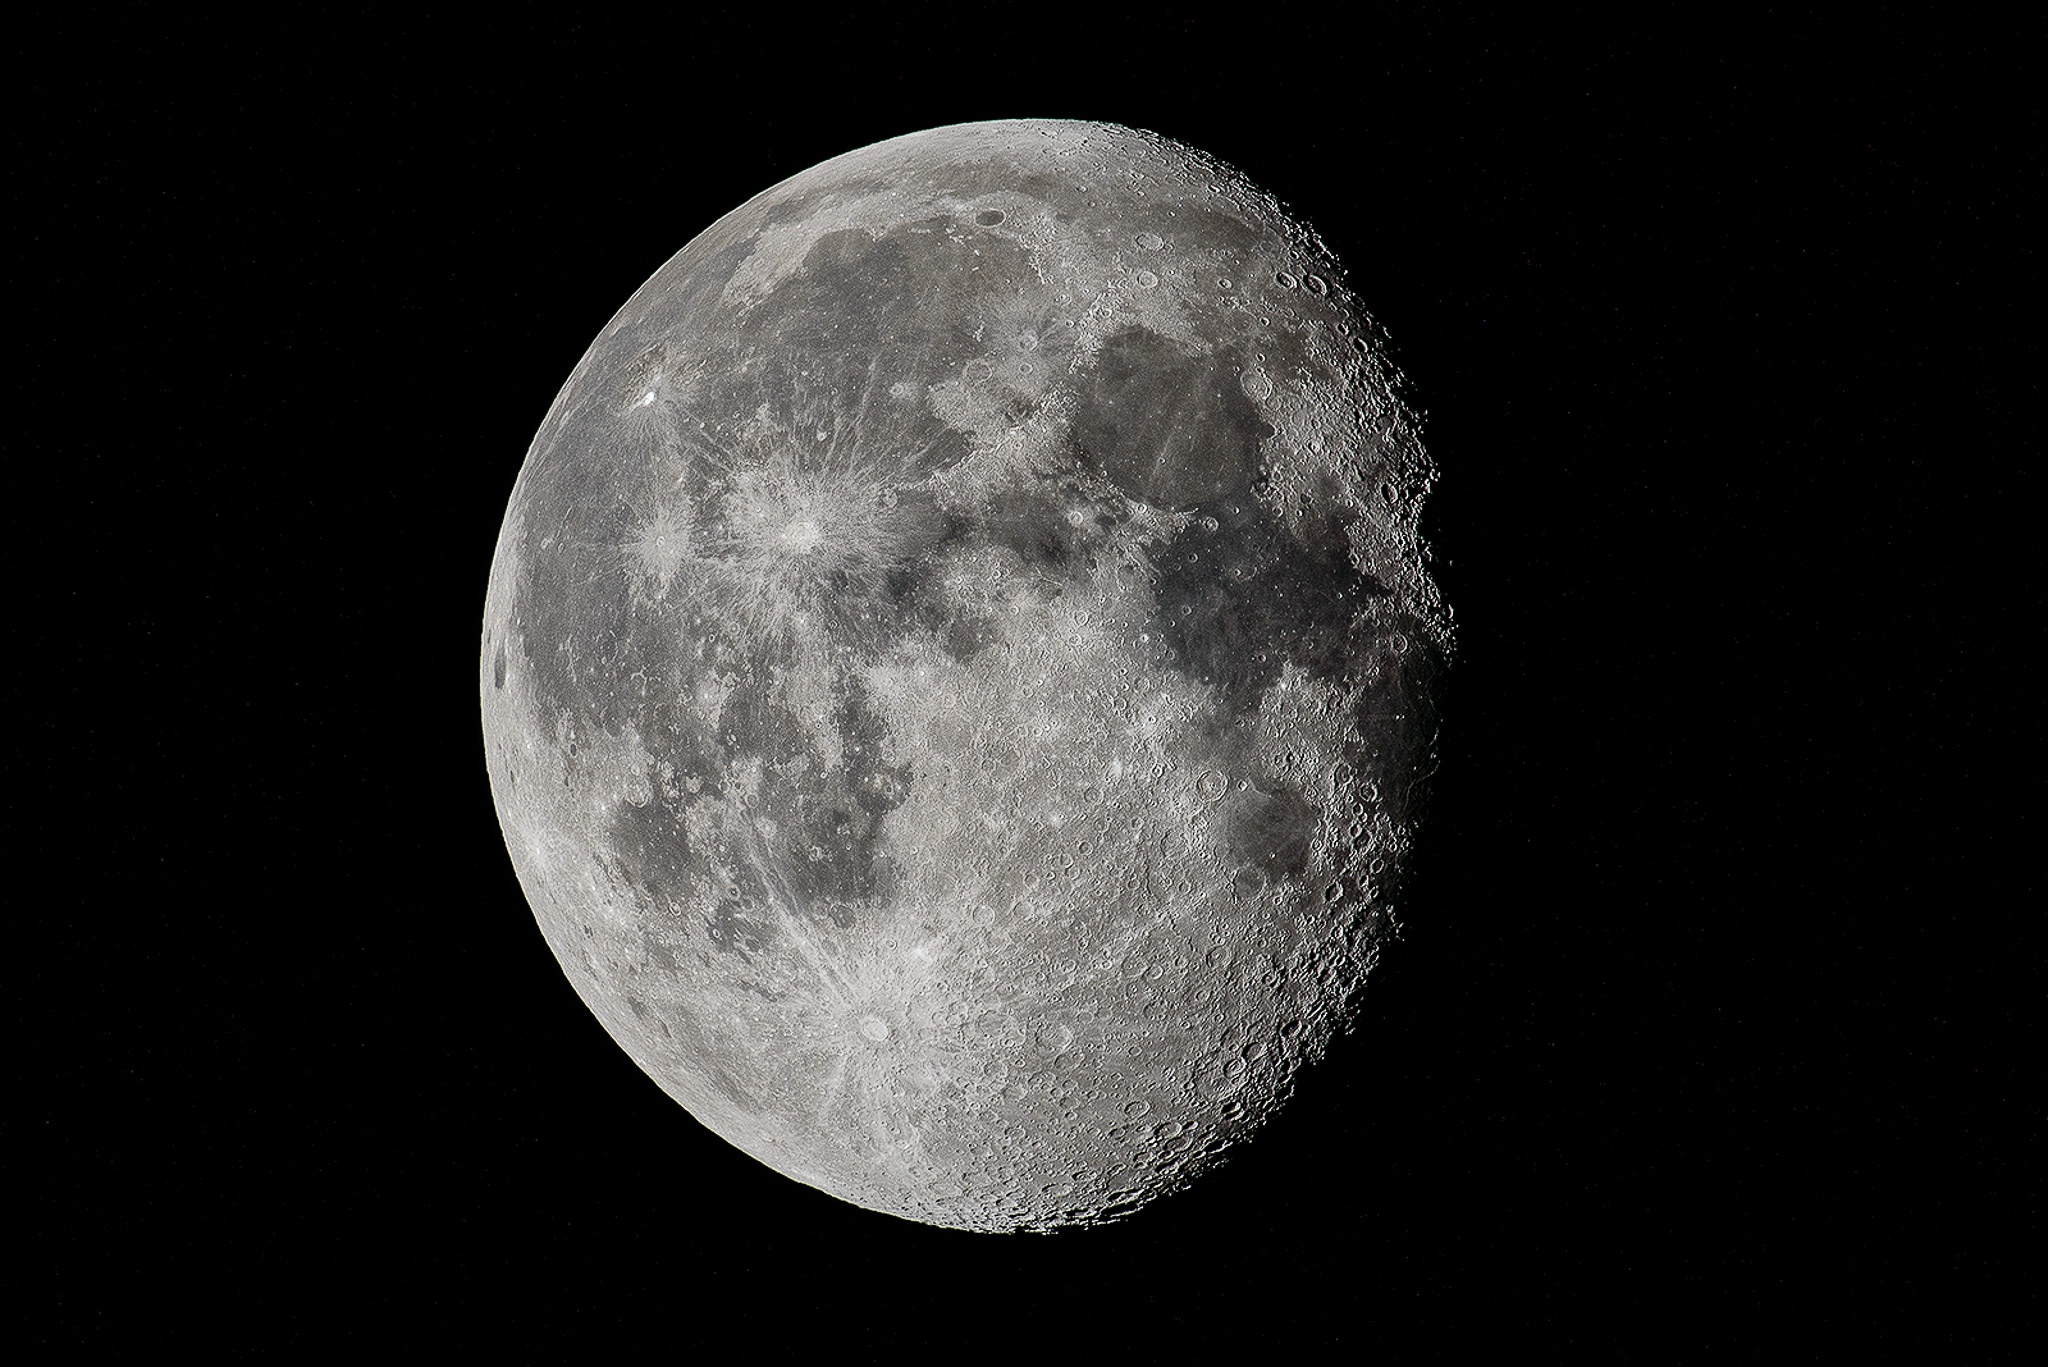
  • #2
    جدول المحتويات

    استثمر في نظام حامل ثلاثي القوائم جيدمتى تستخدم حامل ثلاثي القوائملا تدع الحامل ثلاثي القوائم الخاص بك يملي عليك الإطار والتركيبإعداد الحامل ثلاثي القوائماستخدام الحامل ثلاثي القوائم


    Table of Contents

    تعليق


    • #3
      استثمر في نظام ترايبود جيد

      قبل أن أخوض في موضوع استخدام الحوامل الثلاثية، أريد أولاً تسليط الضوء على أهمية الاستثمار في نظام ثلاثي القوائم جيد. لسوء الحظ، ينتهي الأمر بالعديد منا إلى اتخاذ خيارات سيئة عندما يتعلق الأمر بشراء الحوامل الثلاثية. أتذكر كيف بدأت مع عدد قليل من الحوامل الثلاثية الرخيصة، ثم اشتريت حامل ثلاثي الأرجل بسعر معتدل، فقط لأدرك أنني بحاجة إلى شيء أفضل. مع مرور الوقت، قضيت الكثير من الوقت في "تجربة" حوامل ثلاثية مختلفة. لا تتبع نفس العملية كما فعلت واستثمر في نظام ثلاثي القوائم جيد عاجلاً وليس آجلاً. إذا كانت الخيارات كثيرة جدًا ولا تعرف من أين تبدأ، فاطلع على مقالتي التفصيلية حول اختيار حامل ثلاثي الأرجل. ضع في اعتبارك أن الحوامل ثلاثية القوائم الجيدة غالبًا لا تأتي برأس، لذا تأكد من اختيار رأس صلب للحامل ثلاثي القوائم الخاص بك أيضًا. يعتمد نوع الرأس الذي تختاره على ما تقوم بتصويره، ولكن النوع الأكثر شيوعًا في السوق اليوم هو الرأس الكروي، والذي يناسب احتياجات التصوير الفوتوغرافي المختلفة.

      كاميرا نيكون D800E + 800 مم f/5.6 @ 1600 مم، ISO 800، 1/500، f/11.0


      Invest in a Good Tripod System


      Before I get into the topic of using tripods, I first want to highlight the importance of investing in a good tripod system. Unfortunately, many of us end up making poor choices when it comes to purchasing tripods. I remember how I started out with a few cheap tripods, then bought a moderately-priced tripod, only to realize that I needed something better. Overtime, I spent too much on “experimenting” with different tripods. Don’t go through the same process like I did and invest in a good tripod system sooner than later. If you are overwhelmed with choices and do not know where to start, see my detailed article on choosing a tripod. Keep in mind that good tripods often do not come with a head, so make sure to carefully pick a solid head for your tripod as well. The type of head you pick will depend on what you shoot, but the most common type on the market today is a ballhead, which does well for various photography needs.
      NIKON D800E + 800mm f/5.6 @ 1600mm, ISO 800, 1/500, f/11.0

      تعليق


      • #4
        متى تستخدم حامل ثلاثي الأرجل

        من المهم أن تعرف متى تحتاج إلى استخدام حامل ثلاثي الأرجل. يعد التصوير أثناء حمل الكاميرا باليد أمرًا سهلاً مقارنة بإعداد حامل ثلاثي القوائم وتثبيت الكاميرا عليه، ولهذا السبب يفضل الكثير منا (وأنا منهم) التصوير أثناء حمل الكاميرا باليد عندما يكون ذلك ممكنًا. على الرغم من أن معظم الكاميرات الحديثة قادرة على إنتاج نتائج ممتازة مع مستويات ضوضاء منخفضة جدًا عند مستويات ISO عالية، وبالتالي قللت بالتأكيد الحاجة إلى استخدام الحوامل ثلاثية القوائم، إلا أن الحوامل الثلاثية لا تزال مفضلة في مواقف الإضاءة المنخفضة، خاصة عندما يرغب المرء في الحصول على صور عالية الجودة مع القليل أو لا شيء على الإطلاق. الضوضاء على الكاميرات عالية الدقة. نظرًا لوجود العديد من المتغيرات المعنية، مثل تقنية الإمساك باليد بالكاميرا، وسرعة الغالق، وأداء ISO، وحجم المستشعر، والبعد البؤري، وتثبيت الصورة، ووضوح العدسة، ومسافة الكاميرا إلى الهدف، فلا توجد صيغة سحرية لمعرفة بالضبط متى يتم التقاط الصورة. يجب استخدام ترايبود.


        When to Use a Tripod


        It is important to know when you need to use a tripod. Shooting hand-held is effortless compared to setting up a tripod and mounting the camera on it, which is why many of us (myself included), prefer shooting hand-held when possible. Although most modern cameras are capable of producing excellent results with very low noise levels at high ISOs and thus have certainly reduced the need to use tripods, tripods are still preferred in low-light situations, especially when one desires highest quality images with little or no noise on high-resolution cameras. Since there are so many variables involved, such as camera hand-holding technique, shutter speed, ISO performance, sensor size, focal length, image stabilization, lens sharpness and camera to subject distance, there is no magic formula for figuring out exactly when a tripod must be used.

        تعليق


        • #5
          ومع ذلك، هناك بعض الاعتبارات، لذا إليك القائمة بناءً على تجربتي الشخصية:

          الوزن: إذا كانت المعدات ثقيلة جدًا، فمن الأفضل تجنب الإمساك بها باليد، خاصة عند التصوير لفترات طويلة من الوقت. إن محاولة الإمساك بعدسة مقاس 600 مم f/4 باستخدام كاميرا DSLR احترافية سوف تتعب يديك بسرعة، حتى لو كنت تمارس التمارين الرياضية كل يوم. قد تتطلب أنواع التصوير الفوتوغرافي: المناظر الطبيعية والماكرو والهندسة المعمارية وبعض أنواع التصوير الفوتوغرافي الأخرى استخدام حامل ثلاثي القوائم للحصول على الدقة والتأطير. والاتساق، حتى لو كانت ظروف الإضاءة جيدة. قد يرغب المرء في تقديم ضبابية الحركة المتعمدة، كما هو الحال عند تصوير الشلالات والسحب المتحركة والحركات الأخرى. كما أن بعض التقنيات المحددة مثل البانوراما وHDR والفاصل الزمني ومزج التعريض قد تتطلب أيضًا استخدام حامل ثلاثي الأرجل. تقنية الإمساك باليد والقاعدة التبادلية وتثبيت الصورة: معرفة كيفية الإمساك بالكاميرا بشكل صحيح أمر مهم، ولكن إذا كانت سرعة الغالق كبيرة جدًا منخفضة، ربما لا تزال تقوم بإدخال اهتزاز الكاميرا. كمبدأ توجيهي عام، تعمل القاعدة التبادلية بشكل جيد، والتي تنص بشكل أساسي على أن سرعة الغالق يجب أن تكون على الأقل نفس البعد البؤري. على سبيل المثال، إذا كنت تقوم بالتصوير باستخدام عدسة مقاس 300 مم، فيجب أن تكون سرعة الغالق 1/300 من الثانية على الأقل. إذا كانت لديك كاميرا مزودة بمستشعر اقتصاص، فتأكد من ضرب الطول البؤري بعامل الاقتصاص. أخيرًا، إذا كان لديك تثبيت الصورة في الكاميرا أو العدسة، فقم بتشغيله واعلم أنه يمكنك خفض سرعة الغالق إلى ما دون القاعدة التبادلية بمقدار توقفين أو أكثر (يعتمد على فعالية تثبيت الصورة وتقنية الإمساك باليد). أداء ISO ومستوى مقبول من الضوضاء: بعض الكاميرات الحديثة ذات الإطار الكامل قادرة على إنتاج صور رائعة بمستويات ISO عالية دون إدخال الكثير من الضوضاء، مما يؤدي إلى فقدان الكثير من النطاق الديناميكي والألوان. ومع ذلك، هناك دائمًا خط رفيع بين ما يمكن أن تفعله الكاميرا وما تفضله فيما يتعلق بما تعتبره مقبولاً. لا يمانع بعض المصورين في رؤية الكثير من الضوضاء، بينما ينزعج آخرون من مجرد تلميح منها. قرر ما تعتبره مقبولاً للكاميرا الخاصة بك وإذا كانت الظروف تتطلب قيم ISO أعلى، فستعرف متى سيكون استخدام الحامل ثلاثي القوائم إلزاميًا. حجم الطباعة / الإخراج: من المهم أيضًا الحجم الذي تخطط لطباعة صورك أو عرضها. إذا كنت بحاجة إلى جودة مذهلة على مستوى البكسل لتلك المطبوعات الكبيرة بحجم لوحة الإعلانات أو الشاشات فائقة الدقة، فقد تحتاج إلى التصوير بمستويات ISO منخفضة، مما يؤدي إلى سرعات غالق أبطأ. ومع ذلك، إذا لم تكن مهتمًا بالطباعة وتريد فقط عرض صورك على الويب، فيمكنك الاستفادة من تغيير حجم الصور أو تصغير حجمها، مما سيؤدي إلى تقليل الضبابية والتشويش والمشكلات الأخرى في الصور بشكل كبير. مسافة الموضوع: كلما كانت العدسة أطول، زادت سرعة الغالق لديك للحصول على صور واضحة عند التصوير أثناء حمل الكاميرا باليد. تعد مسافة الهدف مهمة أيضًا - إذا كان الهدف بعيدًا ويمثل جزءًا صغيرًا من إطارك، فستكون درجة الوضوح الضعيفة أكثر وضوحًا. دقة الكاميرا والعدسة: كلما زادت دقة الكاميرا، زاد الضغط على عدساتك وتقنية الإمساك باليد، لذا ضع ذلك في الاعتبار.NIKON D800E + 28-300 مم f/3.5-5.6 @ 40 مم، ISO 100، 1/4، f/8.0


          There are some considerations though, so here is the list based on my personal experience:
          • Weight: if gear is very heavy, it is best to avoid hand-holding it, especially when photographing for extended periods of time. Trying to hand-hold a 600mm f/4 lens with a professional DSLR will quickly tire your hands, even if you work out every day.
          • Photography Genres: Landscape, Macro, Architecture and some other photography genres might require tripod use for precision, framing and consistency, even if light conditions are good. One might want to introduce intentional motion blur, such as when photographing waterfalls, moving clouds and other movements. Also, some specific techniques such as Panorama, HDR, Timelapse and Exposure Blending might also require tripod use.
          • Hand-Holding Technique, Reciprocal Rule and Image Stabilization: knowing how to properly hand-hold your camera is important, but if shutter speed is too low, you might still be introducing camera shake. As a general guideline, the reciprocal rule works quite well, which basically says that your shutter speed should be at least what the focal length is. For example, if you are photographing with a 300mm lens, your shutter speed should be at least 1/300 of a second. If you have a crop sensor camera, make sure to multiply the focal length with the crop factor. Lastly, if you have image stabilization in your camera or on your lens, turn it on and know that you can lower your shutter speed below the reciprocal rule by two stops or more (depends on image stabilization effectiveness and your hand-holding technique).
          • ISO Performance and Acceptable Level of Noise: some of the modern full-frame cameras are capable of producing superb images at high ISOs without introducing too much noise, losing lots of dynamic range and colors. However, there is always a fine line between what the camera can do and what your preference is in terms of what you consider acceptable. Some photographers do not mind seeing lots of noise, while others are bothered by even a hint of it. Decide what you consider acceptable for your camera and if the conditions call for higher ISOs, you will know when tripod use will be mandatory.
          • Print / Output Size: how large you are planning to print or display your images is also important. If you need amazing pixel-level quality for those large billboard-size prints or ultra high-resolution monitors, you might need to shoot at low ISO levels, which result in slower shutter speeds. However, if you are not interested in printing and only want to showcase your images on the web, then you could take advantage of resizing / down-sampling of images, which will drastically reduce blur, noise and other problems in images.
          • Focal Length and Subject Distance: the longer the lens, the faster your shutter speed will need to be to yield sharp images when shooting hand-held. Subject distance is also important – if the subject is far away and represents a small part of your frame, poor sharpness will be much more obvious.
          • Camera and Lens Resolution: The more resolution your camera has, the more demanding it will be on your lenses and your hand-holding technique, so keep this in mind.
          NIKON D800E + 28-300mm f/3.5-5.6 @ 40mm, ISO 100, 1/4, f/8.0

          تعليق


          • #6
            لا تدع حامل ثلاثي القوائم الخاص بك يملي عليك الإطار والتركيب

            أحد الأخطاء الرئيسية في استخدام الحوامل الثلاثية هو تطوير الرؤية النفقية للتأطير والتركيب. يقوم الكثير منا بتمديد أرجل الحامل ثلاثي الأرجل بشكل كامل، وإعداد الكاميرا ثم البدء في تأطير اللقطات وتأليفها. كم مرة رأيت المصورين مكدسين بهذا الشكل:

            كاميرا نيكون D3S + 24-70 مم f/2.8 @ 32 مم، ISO 3200، 1/8، f/8.0

            Do Not Let Your Tripod Dictate Framing and Composition


            One of the major pitfalls with tripods, is developing tunnel vision for framing and composition. Many of us fully extend tripod legs, set up the camera and then start framing and composing our shots. How many times have you seen photographers stacked up like this:
            NIKON D3S + 24-70mm f/2.8 @ 32mm, ISO 3200, 1/8, f/8.0

            تعليق


            • #7
              إعداد ترايبود

              الآن بعد أن قمت بتأطير اللقطة وتركيبها، فلنتحدث الآن عن تقنيات الاستخدام المناسبة:

              وضع الحامل ثلاثي القوائم وتسويته: قبل البدء في إعداد الحامل ثلاثي القوائم، حدد أولاً المكان الذي سيتم وضعه فيه. في حين أن معظم المواقع تحتوي على أرضيات ثابتة ومسطحة مما يجعل من السهل إعداد حامل ثلاثي الأرجل، إلا أن بعض الأماكن قد تكون صعبة للغاية، مما يتطلب تمديد بعض أقدام الحامل ثلاثي الأرجل لفترة أقصر أو أطول لتكون آمنة تمامًا. تأكد دائمًا من أن قاعدة الحامل ثلاثي الأرجل مستوية بشكل صحيح - استخدم مستويات الفقاعات هذه على أرجل الحامل ثلاثي الأرجل. تريد أن يتم توزيع الحمل الموجود في منتصف الحامل ثلاثي الأرجل بالتساوي على الأرجل الثلاثة. آخر شيء تريده هو وقوع حوادث مع تعطل معداتك! كن حذرًا للغاية أيضًا بشأن وضع أقدام الحامل ثلاثي الأرجل على أي شيء يتحرك أو يمكن أن ينكسر (الجليد الرقيق والرمل وما إلى ذلك). قم بتمديد أقسام الأرجل السميكة أولاً: يتميز الحامل ثلاثي القوائم Gitzo Traveler بخفة الوزن، ولكن أرجله رفيعة جدًا من الأسفل. إذا كنت بحاجة فقط إلى استخدام قسم أو قسمين، فسوف أقوم بتمديد الأجزاء الأكثر سمكًا وترك الأجزاء الرقيقة، لأن ذلك سيجعل الحامل ثلاثي القوائم أكثر استقرارًا. الأمر نفسه ينطبق على جميع الحوامل الثلاثية الأخرى - الأجزاء العلوية ستكون دائمًا هي الأكثر سمكًا والأقوى. افتح الأرجل بالكامل: ستحتوي جميع الحوامل ثلاثية القوائم على نقاط توقف حيث لن تفتح الأرجل أكثر من ذلك. تأكد دائمًا من نشر تلك الأرجل على طول الطريق - فأنت لا تريد أن تنشر المعدات الثقيلة أرجلها فجأة عند التصوير، مما قد يؤدي إلى تدمير ليس فقط لقطتك، ولكن أيضًا معداتك.


              Setting Up Tripod


              Now that you have your shot framed and composed, let’s now talk about proper usage techniques:
              • Tripod Placement and Leveling: Before you start setting up the tripod, first identify where it will be placed. While most locations have firm and flat grounds making it easy to set up a tripod, some places can be very tricky, requiring some of the tripod feet to be extended shorter or longer to be fully secure. Always make sure that the tripod base is properly leveled – use those bubble levels on the tripod legs. You want the load in the center of the tripod to be distributed evenly to all three legs. The last thing you want is accidents with your gear crashing down! Also, be extremely careful about placing tripod feet on anything that moves or can potentially break (thin ice, sand, etc).
              • Extend Thick Leg Sections First: My Gitzo Traveler tripod is lightweight, but its legs are quite thin on the bottom. If I only need to use one or two sections, I will be extending the thicker ones and leaving out the thin ones, because it will make the tripod more stable. The same goes for all other tripods – the top sections are always going to be the thickest and the strongest.
              • Fully Open Up the Legs: All tripods will have stopping points where the legs will not open up any further. Always make sure to spread those legs all the way – you do not want heavy equipment to suddenly spread legs when shooting, potentially ruining not only your shot, but also your equipment.

              تعليق


              • #8
                وضع الأرجل: عند وضع الحامل ثلاثي القوائم، من الجيد توجيه أرجل الحامل ثلاثي الأرجل نحو منتصف الموضوع/المشهد، بحيث يمكنك الوقوف بين الساقين الأخريين. استخدم العمود الأوسط كملاذ أخير: أتجنب الأعمدة المركزية / منشورات مثل الطاعون، لكن في بعض الأحيان ليس لدي خيار آخر عندما تحتاج معداتي إلى أن تكون أعلى جسديًا. أتأكد دائمًا من تمديد جميع الأرجل أولاً، وإذا لم يكن ذلك كافيًا، فاستخدمها فقط. لماذا؟ نظرًا لأن الأعمدة المركزية تؤدي دائمًا إلى زعزعة استقرار الإعداد الخاص بك - فهي نقطة اتصال واحدة مقابل ثلاث نقاط. إذا كنت تستخدم العمود الأوسط، فتأكد دائمًا من أن قاعدة الحامل ثلاثي الأرجل مستوية، بحيث يكون العمود الأوسط في اتجاه عمودي - فأنت لا ترغب في جعله بزاوية، لأن وزن الكاميرا قد يجعل الحامل ثلاثي القوائم الخاص بك يسقط على الثقل الجانب. قم بتأمين الكاميرا / العدسة بإحكام: لتجنب الحوادث المحتملة، تأكد دائمًا من تأمين الكاميرا أو العدسة بإحكام. بمجرد تركيب معداتك، أمسكها بيديك وحاول تحريكها. يجب ألا يكون هناك أي اهتزاز أو اهتزاز من أي نوع. دعامة الكاميرا على شكل حرف L: عند تركيب الكاميرا على رأس الحامل ثلاثي الأرجل، من الجيد دائمًا استخدام دعامة على شكل حرف L بدلاً من لوحة واحدة في الجزء السفلي من الكاميرا. باستخدام اللوحة العادية، ستكون الكاميرا أثقل على جانب واحد في الاتجاه الرأسي، وهو ما قد لا يكون آمنًا. يمكن أن تكون الأقواس L باهظة الثمن، لأنها مصنوعة خصيصًا لكل كاميرا، ولكنها تستحق الاستثمار فيها على المدى الطويل. تركيب العدسات الطويلة/الثقيلة: إذا كنت تستخدم عدسة ثقيلة، فتأكد دائمًا من تركيب العدسة على حامل ثلاثي الأرجل الخاص بك باستخدام طوق الحامل ثلاثي القوائم، بدلاً من تركيب الكاميرا وترك العدسة تتدلى من الحامل. لن تحافظ على الكاميرا الخاصة بك آمنة من احتمال كسر أو ثني حامل العدسة فحسب، بل سينتهي بك الأمر أيضًا إلى إعداد أكثر استقرارًا. اعتبارات تحرير قفل الوجه: تعتبر أقفال الوجه لطيفة ومريحة، ولكن عليك دائمًا التأكد من ذلك أن تكون الألواح بالحجم المناسب لرأسك. يعد هذا أمرًا مهمًا بشكل خاص بالنسبة إلى لوحات Arca-Swiss، والتي يمكن أن تختلف في الحجم اعتمادًا على البلد والشركة المصنعة. خطاف حامل ثلاثي الأرجل: إذا كان حامل ثلاثي الأرجل الخاص بك مزودًا بخطاف في الأسفل، أو ربما في العمود الأوسط، فقم بتعليق حقيبة الكاميرا أو يمكن أن توفر حقيبة الرمل ثباتًا إضافيًا. ومع ذلك، إذا كان الجو عاصفًا جدًا ولم تكن حقيبتك ثقيلة بما يكفي، فقد يكون لها تأثير ضار، مما قد يؤدي إلى زعزعة استقرار إعدادك.NIKON D700 + 24-70 مم f/2.8 @ 24 مم، ISO 800، 1/25، f/5.6
                ​​​​​​​
                • Leg Placement: When placing your tripod, it is a good idea to point of the tripod legs towards the subject / scene middle, so that you could stand between the other two legs.
                • Use Center Column as a Last Resort: I avoid center columns / posts like plague, but sometimes I have no other choice when my equipment needs to be physically higher. I always make sure to extend all the legs first and if that’s not enough, only then use it. Why? Because center columns always destabilize your setup – it is a single point of connection versus three. If you do use the center column, always make sure that the tripod base is leveled, so that the center post is in vertical orientation – you do not want to angle it, as the weight of the camera might make your tripod fall on the heavy side.
                • Secure Your Camera / Lens Tightly: To avoid potential accidents, always make sure to secure your camera or lens tightly. Once you mount your gear, hold it with your hands and try to move it. There should be no wiggling or shaking of any sort.
                • Camera L Bracket: When mounting your camera on the tripod head, it is always a good idea to use an L Bracket instead of a single plate on the bottom of the camera. With a regular plate, your camera will be heavier on one side in portrait orientation, which might not be secure. L Brackets can be expensive, as they are made specifically for each camera, but they are worth the investment in the long run.
                • Long / Heavy Lens Mounting: If you are using a heavy lens, always make sure to mount the lens on your tripod using its tripod collar, instead of mounting your camera and letting your lens hang off the mount. Not only will you keep your camera safe from potentially breaking or bending the lens mount, but you will also end up with a much more stable setup.
                • Head Flip Lock Release Considerations: Flip locks are nice and convenient, but you always have to make sure that the plates are of the right size for your head. This is especially important for Arca-Swiss plates, which can vary in size depending on the country and manufacturer.
                • Tripod Hook: If your tripod is equipped with a hook on the bottom, or perhaps in the center column, hanging your camera bag or a sandbag can provide extra stability. However, if it is very windy and your bag is not heavy enough, it could have a detrimental effect, potentially destabilizing your setup.
                NIKON D700 + 24-70mm f/2.8 @ 24mm, ISO 800, 1/25, f/5.6

                تعليق


                • #9
                  باستخدام ترايبود

                  بعد إعداد الحامل ثلاثي القوائم والكاميرا بالكامل، حان الوقت لاستخدام تقنيات إضافية لتجنب اهتزاز الكاميرا:

                  حزام الكاميرا: من السهل وضع أحزمة الكاميرا على الكاميرا، ولكن بمجرد تركيبها على حامل ثلاثي الأرجل، يمكن أن تتسبب في اهتزاز الكاميرا في المواقف العاصفة. قم بالتصوير عند ISO الأساسي وإيقاف تشغيل ISO التلقائي: تتمتع معظم الكاميرات بأقل قدر من الضوضاء وأعلى ديناميكية النطاق عند ISO الأساسي الخاص بهم (عادةً بين ISO 64 و200)، لذا استخدم أقل إعداد أصلي. تأكد من إيقاف تشغيل ISO التلقائي. استخدم تحرير الكابل: سيؤدي الضغط على تحرير الغالق بأصابعك بالتأكيد إلى اهتزاز الكاميرا، لذلك من الجيد استخدام جهاز تحكم عن بعد / تحرير الكابل. مؤقت ذاتي: إضافة تأخير لمدة ثانيتين أو أكثر مع ضبط ذاتي -المؤقت عادة ما يكون فكرة جيدة، خاصة إذا لم يكن لديك جهاز التحكم عن بعد / تحرير الكابل. رفع المرآة: إذا كان لديك كاميرا DSLR، فإن مرآتها تسبب الكثير من الاهتزاز عندما تتحرك للأعلى قبل كل تعريض. سيؤدي استخدام Mirror Up إلى رفع المرآة أولاً، ثم يمكنك الانتظار قليلاً قبل التقاط اللقطة. يتطلب تطبيق Mirror Up إصدار جهاز التحكم عن بعد / تحرير الكابل. تأخير التعريض الضوئي: إذا كانت الكاميرا الخاصة بك تحتوي على ميزة تأخير التعريض الضوئي ولم يكن لديك جهاز تحكم عن بعد / تحرير الكابل، فيمكن أن يساعد وضع تأخير التعريض الضوئي في القضاء على اهتزاز الكاميرا بشكل فعال. مع تأخير التعريض الضوئي، ترتفع مرآة الكاميرا للأعلى، ثم تنتظر الكاميرا لفترة محددة قبل التقاط الصورة. في بعض الكاميرات، يمكنك تحديد مقدار وقت الانتظار. تسمح لك بعض الكاميرات باستخدام مؤقت ذاتي مع تأخير التعريض الضوئي. مغلاق الستارة الأمامية الإلكتروني: يحتوي عدد من كاميرات DSLR الجديدة (مثل Nikon D810) والكاميرات التي لا تحتوي على مرايا على ميزة مصراع الستارة الأمامية الإلكتروني. مع تشغيل هذه الميزة، لن تقوم الكاميرا بتشغيل آلية الغالق الخاصة بها في بداية التعريض الضوئي، مما قد يؤدي إلى التخلص تمامًا من أي نوع من اهتزاز الكاميرا. إذا كنت تقوم بالتصوير باستخدام كاميرا DSLR، فسيتعين عليك أن تكون في وضع Mirror Up وقد تكون هناك قيود أخرى. على الرغم من أن هذه الميزة تكون عادةً معطلة افتراضيًا، إلا أنني أوصي بتشغيلها واستخدامها بشكل نشط. إيقاف تشغيل تثبيت الصورة: ما لم تكن العدسة تحتوي على وضع تثبيت صورة محدد لاستخدامه على الحوامل ثلاثية القوائم، فيجب عليك دائمًا إبقائها قيد إيقاف التشغيل. عندما يكون جهازك في إعداد مستقر، فإنك لا تريد أن يحاول تثبيت الصورة التعويض عن الحركة غير الموجودة.SLT-A77V + DT 16-50mm F2.8 SSM @ 20mm، ISO 100، 1/1، f /8.0


                  Using Tripod


                  After your tripod and camera are fully set up, it is time to employ additional techniques to avoid camera shake:
                  • Camera Strap: Camera straps are convenient to have on your camera, but once mounted on a tripod, can cause camera shake in windy situations.
                  • Shoot at Base ISO and Turn Off Auto ISO: Most cameras have the least amount of noise and the highest dynamic range at their base ISO (usually between ISO 64 and 200), so use the lowest native setting. Make sure to turn off Auto ISO.
                  • Use Cable Release: Squeezing the shutter release with your fingers will surely cause camera shake, so it is a good idea to use a remote / cable release.
                  • Self-Timer: Adding a two+ second delay with self-timer is usually a good idea, especially if you do not have a remote / cable release.
                  • Mirror Up: If you have a DSLR, its mirror causes a lot of vibration when it moves up before each exposure. Using Mirror Up will raise the mirror first, then you can wait a little before taking the shot. Mirror Up requires a remote / cable release.
                  • Exposure Delay: If your camera has exposure delay feature and you do not have a remote / cable release, exposure delay mode can help effectively eliminate camera shake. With exposure delay, the camera mirror will go up, then the camera will wait for a specified time before taking a picture. On some cameras you can specify the amount of time to wait. Some cameras allow you to use a self timer in combination with exposure delay.
                  • Electronic Front Curtain Shutter: A number of new DSLRs (like Nikon D810) and mirrorless cameras have the Electronic Front Curtain Shutter feature. With this feature turned on, the camera will not operate its shutter mechanism at the beginning of the exposure, which can completely eliminate any kind of camera shake. If you are shooting with a DSLR, you will have to be in Mirror Up mode though and there might be other limitations. Although this feature is usually off by default, I would recommend to turn it on and use it actively.
                  • Turn Off Image Stabilization: Unless your lens has a specific image stabilization mode to be used on tripods, you should always keep it turned off. When your gear is on a stable setup, you do not want image stabilization to try to compensate for movement that is not there.
                  SLT-A77V + DT 16-50mm F2.8 SSM @ 20mm, ISO 100, 1/1, f/8.0

                  تعليق

                  يعمل...
                  X