تقليل اهتزاز الكاميرا على حامل ثلاثيHow to Reduce Camera Shake on a Tripod

تقليص
X
 
  • تصفية - فلترة
  • الوقت
  • عرض
إلغاء تحديد الكل
مشاركات جديدة

  • تقليل اهتزاز الكاميرا على حامل ثلاثيHow to Reduce Camera Shake on a Tripod

    كيفية تقليل اهتزاز الكاميرا على حامل ثلاثي القوائم
    How to Reduce Camera Shake on a Tripod

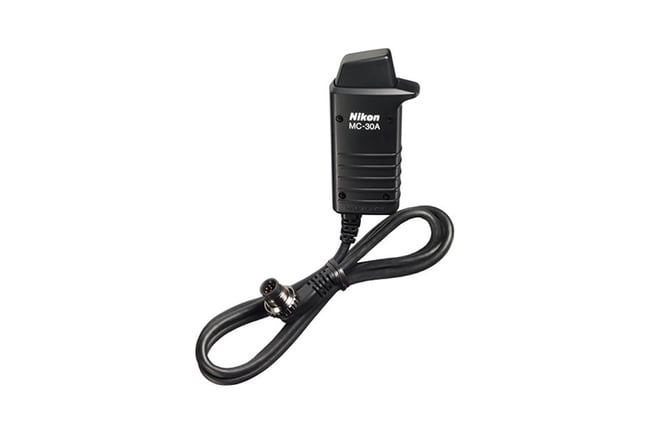
    قد يكون اهتزاز الكاميرا أمرًا مزعجًا وألمًا حقيقيًا عند إطلاق حامل ثلاثي الأرجل. في بعض الأحيان، يمكن التخلص من اهتزاز الكاميرا تمامًا من خلال بضع خطوات بسيطة، وفي أحيان أخرى، قد يكون الأمر مؤلمًا للغاية، وفي بعض الأحيان يكون من المستحيل التعامل معه. كيف يمكن تقليل اهتزاز الكاميرا؟ هل عمليات تحرير الغالق عن بعد مفيدة في تقليل اهتزاز الكاميرا؟ فهل من الممكن القضاء عليه نهائيا؟ نظرًا لأنني أرى هذه المشكلة كثيرًا في الميدان، فقد قررت أن أكتب مقالة مفصلة تتناول على وجه التحديد كيف يمكن للمرء تقليل اهتزاز الكاميرا عند التصوير على حامل ثلاثي الأرجل.


    Camera shake can be a real hassle and pain when shooing off a tripod. Sometimes camera shake can be completely eliminated with a couple of simple steps and other times, it can be quite painful and sometimes even impossible to deal with. How does one reduce camera shake? Are remote shutter releases helpful in reducing camera shake? Is it possible to eliminate it completely? Since I see this issue so often in the field, I decided to write a detailed article that specifically addresses how one can reduce camera shake when shooting on a tripod.

  • #2

    جدول المحتويات

    هل تحرير الغالق عن بعد مفيد في تقليل اهتزاز الكاميرا؟ استخدم حاملًا ثلاثيًا ثابتًا مصادر أخرى لاهتزاز الكاميراحزام الكاميرا يديكتثبيت الصورةضربة مرآة DSLRصدمة الغالقالبعد البؤري الطويلملخص البيئة المحيطة

    Table of Contents

    تعليق


    • #3
      1) هل تحرير الغالق عن بعد مفيد في تقليل اهتزاز الكاميرا؟

      بعد أن قمت بتدريس ورش العمل لعدد من السنوات (راجع صفحة Colorado Fall Workshop للحصول على مزيد من المعلومات)، لاحظت وجود نمط في الطريقة التي يتم بها استخدام إصدارات الغالق عن بعد عادةً. يبدأ العديد من المصورين باستخدام حوامل ثلاثية القوائم ورؤوس ثلاثية القوائم وألواح سريعة التحرير مما يؤدي إلى زعزعة استقرار إعدادهم بشدة، مما يؤدي إلى الكثير من الصور الباهتة عند التصوير في ظروف الإضاءة المنخفضة. ونتيجة لذلك، يعتقد الكثيرون أن شراء إصدار الغالق عن بعد سوف يخفف المشكلة بطريقة أو بأخرى وينتج صورًا أكثر وضوحًا. في الواقع، فإن إطلاق الغالق عن بعد في مثل هذه الحالات يؤدي في النهاية إلى تفاقم المشكلة. فأولاً، لا تفعل أي شيء لمعالجة المشكلة الأولية المتعلقة بتحقيق الاستقرار. ثانيًا، ينتهي بهم الأمر في بعض الأحيان إلى استهلاك وقت ثمين في الميدان للإعداد والبدء (إذا حاولت تثبيت كابل تحرير الغالق عن بعد بكاميرا DSLR متطورة في درجات حرارة أقل من درجة التجمد، فأنت تعرف بالضبط ما أعنيه). ثالثًا، إذا كان إصدار الغالق مزودًا بكابل، فهو جهاز آخر يتدلى من الكاميرا، مما قد يؤدي إلى المزيد من مشكلات الاستقرار في الظروف العاصفة. رابعًا، تميل تلك المسامير الموجودة على الكاميرا إلى الانحناء والكسر مع مرور الوقت الإضافي، مما يؤدي إلى إصلاحات باهظة الثمن وضياع الوقت في الميدان. وأخيرًا، تكون أدوات تحرير الغالق عن بعد عرضة للكسر والضياع أثناء السفر. لهذه الأسباب وغيرها، قمت شخصيًا بتقليل استخدامي لأداة تحرير الغالق عن بعد - ولا أقوم بسحبها إلا عندما أحتاج إليها بشدة.


      1) Is Remote Shutter Release Helpful in Reducing Camera Shake?


      Having been teaching workshops for a number of years (check out the Colorado Fall Workshop page for more info), I notice a pattern in the way that remote shutter releases are typically used. Many photographers start out with flimsy tripods, tripod heads and quick release plates that severely destabilize their setup, resulting in a lot of blurry images when photographing in low-light conditions. As a result, many think that buying a remote shutter release will somehow alleviate the problem and yield sharper images. In reality, remote shutter releases in such cases only end up making the problem worse. First, they do nothing to address the initial problem with stabilization. Second, they sometimes end up consuming precious time in the field to set up and get going (if you have tried to screw in a remote shutter release cable on a high-end DSLR in below freezing temperatures, you know exactly what I mean). Third, if it is a cabled shutter release, it is yet another device dangling off your camera, which can create more stabilization problems in windy conditions. Fourth, those pins on the camera do tend to bend and break off overtime, resulting in expensive repairs and lost time in the field. And lastly, remote shutter releases are prone to break and get lost when traveling. For these and other reasons, I have personally been minizing my use of the remote shutter release – I only pull it out when I absolutely need it.


      تعليق


      • #4
        والخبر السار هو، إذا كنت تقوم بالتصوير باستخدام الجيل الحالي من كاميرات DSLR أو كاميرا بدون مرآة، فمن المرجح أنك لن تحتاج إلى إصدار مصراع عن بعد مخصص بعد الآن فقط للحفاظ على ثبات الكاميرا. على الرغم من أنني كنت أحمل معي دائمًا أداة تحرير الغالق عن بعد في حقيبتي، إلا أنني الآن أحملها معي عادةً إذا كنت بحاجة إلى تصوير تعريضات ضوئية أطول من 30 ثانية. وحتى هذا القيد تم رفعه عن العديد من الكاميرات الحديثة اليوم، وذلك بفضل أوضاع المصباح الإضافية التي تسمح بالتصوير بعد عتبة التعرض التقليدية البالغة 30 ثانية. إذًا ما هي الطرق الجديدة لتثبيت الكاميرا التي تعمل بشكل جيد جدًا، وفي بعض الأحيان أفضل مما يمكن أن يقدمه تحرير الغالق عن بعد؟ لنلقي نظرة. لكن أولاً، دعونا نتحدث عن مشكلات الاستقرار وكيف يمكنك معالجتها من خلال إعداد حامل ثلاثي الأرجل ثابت. إذا كان لديك بالفعل نظام ثلاثي الأرجل رائع، فتخط القسم التالي أدناه.


        The good news is, if you are shooting with the current generation DSLR or a mirrorless camera, you most probably don’t need a dedicated remote shutter release anymore just to keep your camera steady. While I used to always carry a remote shutter release with me in my bag, I now typically take it with me if I need to shoot exposures longer than 30 seconds. And even that limitation is getting lifted on many modern cameras today, thanks to additional bulb modes that allow shooting past the traditional 30 second exposure threshold. So what are the new ways of stabilizing camera that work really well, sometimes even better than what a remote shutter release can offer? Let’s take a look. But first, let’s talk about stabilization issues and how you can address them with a steady tripod setup. If you already have a great tripod system, skip the next section below.

        تعليق


        • #5
          2) استخدم حامل ثلاثي القوائم ثابت

          قبل أن تفكر في استخدام تحرير الغالق عن بعد لأغراض التثبيت، يجب عليك أولاً تقييم إعداد الحامل ثلاثي القوائم والكاميرا لديك. أرى هذه المشكلة طوال الوقت مع المصورين - فهم ينفقون أموالاً رخيصة على إعداد حامل ثلاثي القوائم في البداية وينتهي بهم الأمر بالمرور عبر 2-3 حوامل ثلاثية القوائم قبل أن يدركوا أنهم بحاجة إلى الاستثمار في نظام حامل ثلاثي القوائم متين.

          إليك سيناريو نموذجي لشراء حامل ثلاثي القوائم. أولاً، يكتشف المصور ما هو الحامل ثلاثي الأرجل ويدرك فجأة أنه يريده. يخرجون ويحصلون على أرخص حامل ثلاثي القوائم من الألومنيوم من Walmart أو Best Buy ويلتقطون أول لقطات التعرض الطويلة. ثم يدركون أن صورهم تبدو رائعة، لكنها ضبابية. بعد إجراء بعض الأبحاث، اكتشفوا أن مصدر المشكلة هو نفس الجهاز الذي اشتروه، لذلك بدأوا في البحث عن بدائل. بحلول ذلك الوقت، يكون الحامل ثلاثي القوائم قد انتهى بالفعل من فترة الإرجاع، لذا ينتهي الأمر بالحامل ثلاثي القوائم في الكومة "الاحتياطية" بالخزانة. عندما يفكرون في شراء حامل ثلاثي القوائم جديد، يدركون أنه يمكنهم إنفاق ما لا يقل عن 50 دولارًا أمريكيًا لشراء حامل ثلاثي القوائم آخر وما يصل إلى 1000 دولار أمريكي لشراء حامل ثلاثي القوائم فاخر. تبدو فكرة إنفاق المزيد من المال على حامل ثلاثي الأرجل أكثر مما أنفقوه على الكاميرا الخاصة بهم محيرة للعقل، لذا فإنهم ينفقون 200 دولار على حامل ثلاثي الأرجل من المفترض أنه أفضل بكثير. بعد أن قاموا بتصوير بعض الإطارات، أصبحوا سعداء لأن الحامل ثلاثي الأرجل الجديد أفضل بكثير من الحامل القديم الضعيف، والذي يتراكم عليه الغبار الآن في وحدة التخزين. مرت ستة أشهر أخرى وأدركوا أن الحامل ثلاثي القوائم الجديد ليس ثابتًا كما كانوا يعتقدون، خاصة مع وجود معدات أثقل مثبتة عليه. لا يبدو أن الرأس يحافظ على الإطار المقصود، ويبدو أن أرجل الحامل ثلاثي القوائم تتفكك، ويبدو أن الحامل ثلاثي القوائم ثقيل جدًا بحيث لا يناسب احتياجات السفر. هم الآن مرة أخرى على وشك شراء حامل ثلاثي القوائم آخر. هذه المرة، لن يرتكبوا نفس الخطأ! الآن سوف يقومون بشراء حامل ثلاثي الأرجل من ألياف الكربون الصلبة وسوف يستثمرون في رأس كروي جيد جدًا. هذه المرة، يستثمرون 500 دولار لشراء الحامل ثلاثي القوائم الذي يحلمون به. وعلى الرغم من كل الجهود، ينتهي بهم الأمر بشراء Gitzo أو حامل ثلاثي القوائم RRS مع ملحقاته على أي حال، وإنفاق آلاف الدولارات التي لم يتوقعوا أبدًا أنهم سينفقونها في المقام الأول. يبدوا مألوفا؟ من المؤكد أن هذا ينطبق علي، لأن هذا هو بالضبط ما مررت به عندما بدأت. الآن قم بإضافة جميع الأرقام وكل الوقت الذي يتم إهداره في الميدان للحصول على تلك اللقطات الباهتة في تلك الرحلات الباهظة الثمن التي لا تتكرر إلا مرة واحدة في العمر، وسوف تدرك لماذا يستحق الحامل ثلاثي القوائم القوي الاستثمار.


          لا ترتكب نفس الخطأ – قم بشراء حامل ثلاثي القوائم متين مرة واحدة وإلى الأبد. لقد كنت أستخدم جهاز Gitzo Systematic منذ عشر سنوات ولم يخذلني أبدًا. عندما أقوم بتنظيفه، يبدو جيدًا كالجديد - أعلم أنه سيخدمني لسنوات عديدة قادمة. لقد وضعت عليها كل شيء، بما في ذلك كاميرا Nikon مقاس 800 مم وببؤرة f/5.6E VR الرائعة (التي أطلق عليها جون شيرمان اسم "Baby Jesus". "بهذا السعر، من الأفضل أن تحقق المعجزات!") وقد تعاملت معها كبطل. لقد أساءت استخدامه حرفيًا، من خلال أخذه إلى الصحاري والمحيطات ودرجات حرارة أقل من درجة التجمد. وينطبق الشيء نفسه على Gitzo Traveler، الذي أحمله معي في كل مرة أسافر فيها على متن طائرة. عندما تستثمر في نظام ثلاثي الأرجل متين، لن تضطر إلى العودة والاستمرار في شراء المزيد - فهو سيدفع ثمنه بسرعة.

          إذا كنت تتسوق لشراء حامل ثلاثي القوائم متين اليوم، فاطلع على مقالتي حول كيفية شراء حامل ثلاثي الأرجل. إذا كنت جادًا بشأن التصوير الفوتوغرافي الخاص بك، فاشتر أداة يمكنك الاعتماد عليها دائمًا، وليس إلقاء اللوم عليها.

          2) Use a Steady Tripod


          Before you even consider using a remote shutter release for stabilization purposes, you should first evaluate your tripod and camera setup. I see this issue all the time with photographers – they cheap out on a tripod setup initially and end up going through 2-3 tripods before realizing that they need to invest in a solid tripod system.

          Here is a typical tripod purchase scenario. First, photographer discovers what a tripod is and suddenly they realize that they want one. They go out and get the cheapest aluminum tripod from Walmart or Best Buy and take their first long exposure shots. Then they realize that their images look cool, but they are blurry. After doing some research, they discover that the source of the trouble is the very device they bought, so they start looking at alternatives. By then, the tripod is already out of the return period, so the tripod ends up in the “backup” pile of the closet. As they look at buying a new tripod, they realize that they can spend as little as $50 for another crap tripod and as much as $1000 on a fancy tripod. The idea of spending more money on a tripod than what they spent on their camera sounds mind boggling, so they spend $200 on a supposedly much better tripod. After they shoot a few frames, they are happy that the new tripod is so much better than the old flimsy one, which now gathers dust in the storage. Another six months go by and they realize that the new tripod isn’t as steady as they thought it would be, especially with heavier gear mounted on it. The head does not seem to be keeping the intended framing, tripod legs seem to be falling apart, and the tripod seems to be too heavy for travel needs. They are now again at a point of purchasing another tripod. This time, they won’t make the same mistake! Now they will be buying a solid carbon fiber tripod and they will be investing in a pretty good ballhead. This time, they are putting in $500 towards purchasing the tripod of their dreams. And despite all efforts, they end up purchasing a Gitzo or an RRS tripod with accessories anyway, spending the thousand dollars they never thought they would spend in the first place. Sounds familiar? It sure does for me, since that’s exactly what I went through when starting out. Now add all the numbers up and all the time that is wasted in the field getting those blurry shots in those expensive, once-in-a-lifetime trips and you will realize why a solid tripod is worth the investment.


          Don’t make the same mistake – buy a solid tripod once and for all. I have been using my Gitzo Systematic for ten years and it has never failed me. When I clean it up, it looks as good as new – I know it will serve me for many more years to come. I have put everything on it, including the exotic Nikon 800mm f/5.6E VR (dubbed “Baby Jesus” by John Sherman. “At this price, it’d better perform miracles!”) and it has handled it like a champ. I have literally abused it, by taking it into deserts, oceans and below freezing temperatures. The same goes for my Gitzo Traveler, which I have taken with me every time I travel on an airplane. When you invest in a solid tripod system, you do not have to go back and keep buying more – it will pay for itself quickly.

          If you are shopping for a solid tripod today, check out my article on how to buy a tripod. If you are serious about your photography, buy a tool you can always rely on, not put blame on.

          تعليق


          • #6
            3) مصادر أخرى لاهتزاز الكاميرا

            بمجرد أن يكون لديك نظام ثلاثي القوائم متين، يجب أن تكون مهمتك التالية هي تقييم المصادر المحتملة الأخرى لاهتزاز الكاميرا. من أين يأتي اهتزاز الكاميرا؟ لنلقي نظرة:

            حزام الكاميرا، يديك، تثبيت الصورة، صفعة مرآة DSLR، صدمة المصراع، البعد البؤري الطويل، البيئة المحيطة (الرياح، الماء، الرمال، إلخ)

            في حين أنه من السهل جدًا التعامل مع بعض هذه الأمور (إزالة حزام الكاميرا المتدلي، وإيقاف تشغيل تثبيت الصورة عند تركيب الكاميرا على حامل ثلاثي الأرجل، وما إلى ذلك)، إلا أن بعضها الآخر يمكن أن يمثل مشكلة، خاصة عند التصوير بأطوال بؤرية طويلة جدًا. دعونا نلقي نظرة على بعض أساليب العمل الحقيقية لتقليل اهتزاز الكاميرا.

            3.1) حزام الكاميرا

            على الرغم من أن أحزمة الكاميرا يمكن أن تكون رائعة حقًا عند الإمساك بالكاميرا، إلا أنها تصبح مزعجة بمجرد تثبيت الكاميرا على حامل ثلاثي الأرجل، خاصة عند التصوير في ظروف عاصفة. عندما تبدأ الرياح في الهبوب بقوة، قد يبدأ حزام الكاميرا في الاصطدام بالكاميرا أو بقاعدة الحامل ثلاثي القوائم، مما يتسبب في زعزعة استقرار الإعداد، مما يؤدي إلى الحصول على صور ضبابية. لهذا السبب، من الأفضل إما استخدام أحزمة الكاميرا التي يمكن إزالتها بسهولة من خلال آلية التحرير السريع (دون ترك آذان متدلية)، أو استخدام مقابض يد واحدة لا تتفاعل مع الرياح، أو عدم استخدام أحزمة الكاميرا على الإطلاق. يمكن أن تحتوي بعض أحزمة الكاميرا على حامل ثلاثي القوائم، مما يسمح بتركيب حامل ثلاثي القوائم بسرعة وإزالة الحزام، وقد يكون من السهل جدًا استخدامه أيضًا.

            3.2) يديك

            يمكن أن تلعب يديك وأصابعك دورًا كبيرًا في زعزعة استقرار الكاميرا، لذا من الأفضل عدم تشغيلها مطلقًا لتحرير غالق الكاميرا في المقام الأول. إذا وجدت نفسك تلتقط صورًا عن طريق الضغط على زر تحرير الغالق في الكاميرا، حيث يتم تشغيل الكاميرا بمجرد الضغط على الزر، فأنت تقوم بذلك بشكل خاطئ. إذا وجدت نفسك تحمل الكاميرا أثناء التقاط صورة من حامل ثلاثي الأرجل، فأنت تقوم بذلك بشكل خاطئ. وينطبق الشيء نفسه على الإمساك بالحامل ثلاثي القوائم – أبقِ يديك وأصابعك بعيدًا عن الإعداد قبل وأثناء عملية التقاط الصور.

            هناك حالة واحدة فقط حيث يكون من المقبول استخدام أصابعك لتحرير الكاميرا، وذلك عندما تستخدم مؤقتًا ذاتيًا – المزيد عن ذلك أدناه.

            3) Other Sources of Camera Shake


            Once you have a solid tripod system in place, your next task should be to evaluate other potential sources of camera shake. Where else does camera shake come from? Let’s take a look:
            1. Camera Strap
            2. Your Hands
            3. Image Stabilization
            4. DSLR Mirror Slap
            5. Shutter Shock
            6. Long Focal Length
            7. Surrounding Environment (Wind, Water, Sand, etc)

            While some of these are very easy to deal with (remove dangling camera strap, turn off image stabilization when mounting your camera on a tripod, etc), others can be problematic, especially when shooting at very long focal lengths. Let’s take a look at some real working methods to reduce camera shake.
            3.1) Camera Strap


            While camera straps can be really nice to have when hand-holding your camera, they become a hassle once you mount your camera on a tripod, especially when shooting in windy conditions. When wind starts to blow hard, your camera strap might start to hit your camera or your tripod feet, causing your setup to destabilize, resulting in blurry images. For this reason, it is best to either use camera straps that can be easily removed through a quick-release mechanism (without leaving dangling ears), use one hand grips that do not react to wind, or not use camera straps at all. Some sling camera straps can have tripod mounts on them, allowing for quick tripod mounting and removal of the strap and those could be quite handy to use as well.
            3.2) Your Hands


            Your hands and fingers can play a huge part in destabilizing your camera, so it is best to never engage them to release the camera shutter in the first place. If you find yourself taking pictures by pressing the shutter release on your camera, where the camera fires as soon as you press the button, you are doing it wrong. If you find yourself holding your camera while a picture is being taken off a tripod, you are doing it wrong. The same goes for holding your tripod – keep your hands and fingers away from the setup right before and during the process of taking pictures.

            There is only one case where it is acceptable to use your fingers to release the camera, and that’s when you use a self-timer – more on that further down below.

            تعليق


            • #7
              3.3) تثبيت الصورة

              في حين أن بعض الكاميرات لديها طرق لاكتشاف استخدام الحامل ثلاثي القوائم، فمن الأفضل دائمًا إلغاء تثبيت الصورة عند التصوير باستخدام حامل ثلاثي الأرجل. عندما يكون الإعداد والنظام الأساسي الذي تقف عليه مستقرين، يمكن أن يكون تثبيت الصورة ضارًا جدًا لصورك. لذا، إذا كان لديك مفتاح تثبيت الصورة على عدستك، فتأكد من نقله إلى وضع "إيقاف التشغيل" عند التصوير. عادةً ما يكون لديك مفتاح على جانب العدسة للقيام بذلك، كما هو موضح في الصورة أدناه (لاحظ مفتاح تشغيل/إيقاف VR):


              إذا كانت لديك كاميرا مزودة بتقنية تثبيت الصورة داخل الجسم (IBIS)، فتأكد من إيقاف تشغيلها من قائمة الكاميرا. يمكن تسمية تثبيت الصورة بأشياء مختلفة اعتمادًا على العلامة التجارية. في عدسات نيكون يطلق عليه "تقليل الاهتزاز". في البعض الآخر قد يطلق عليه "تعويض الاهتزاز" أو "تثبيت الصورة البصري" أو "SteadyShot"، على سبيل المثال، إذا قمت بالتصوير باستخدام كاميرا Sony بدون مرآة تحتوي على IBIS، سيكون لديك خيار "SteadyShot" في قائمة الكاميرا - تأكد من ضبطه على "إيقاف" قبل التصوير.

              هناك حالات نادرة قد تحتاج فيها إلى الاستمرار في تشغيل ميزة تثبيت الصورة. على سبيل المثال، تم تصميم تثبيت الصورة في بعض عدسات التقريب الفائقة من Nikon لاستخدامه على حامل ثلاثي الأرجل. وفي أحيان أخرى، يمكن أن يكون تثبيت الصورة على حامل ثلاثي الأرجل مفيدًا عند التصوير من منصة غير مستقرة، مثل القارب. ارجع إلى أدلة الكاميرا والعدسة الخاصة بك لمعرفة المواقف التي ينبغي أو لا ينبغي فيها تشغيل تثبيت الصورة.

              3.4) صفعة مرآة DSLR

              إذا كنت تستخدم كاميرا DSLR، فقد يكون ارتطام المرآة مصدرًا لاهتزاز الكاميرا عند التصوير في مواقف الإضاءة المنخفضة. من دواعي سرورنا أن العديد من كاميرات DSLR الحديثة لديها طرق لمنع ارتطام المرآة من التسبب في اهتزاز الكاميرا. إحدى هذه الطرق هي استخدام وضع Mirror Up. في هذا الوضع، يؤدي تحرير غالق الكاميرا إلى رفع المرآة أولاً، ثم يؤدي التحرير الثاني إلى بدء التعريض الضوئي. في حين أن وضع Mirror Up يمكن أن يعمل بشكل رائع للتخلص من صفعة المرآة، إلا أنه يتطلب إلى حد كبير استخدام تحرير الغالق عن بعد. للأسف، لا تعمل معظم تطبيقات Mirror Up مع مؤقت ذاتي، مما يجعل هذا الوضع عمليًا فقط للاستخدام مع تحرير الغالق عن بعد.

              هناك طريقة أخرى، أفضلها شخصيًا وأستخدمها على الأرجح بنسبة 90% من الوقت، وهي وضع تأخير التعرض. مع تشغيل وضع تأخير التعريض الضوئي، ستقوم الكاميرا برفع المرآة، والانتظار لفترة محددة من الوقت، وعندها فقط تلتقط صورة، مما يمكن أن يقلل بشكل فعال وربما يزيل صفعة المرآة. لا يتوفر هذا الوضع في كل كاميرا، ولكن إذا كان متاحًا في كاميرتك، فيمكنك استخدامه مع مؤقت ذاتي، والذي يمكن أن يعمل بشكل جيد (المزيد حول ذلك أدناه) في المواقف التي لا يتوفر لديك فيها جهاز تحكم عن بعد تحرير مصراع معك، أو لم يكن لديك الوقت لإعداده.

              3.3) Image Stabilization


              While some cameras have ways to detect tripod use, it is best to always disengage image stabilization when you shoot off a tripod. When your setup and the platform you are standing on is stable, image stabilization can be quite harmful to your images. So if you have an image stabilization switch on your lens, make sure to move it to “Off” position when shooting. You will usually have a switch on the side of the lens for that, as shown in the image below (note the VR On/Off Switch):


              If you have a camera with in-body image stabilization (IBIS), make sure to turn it off from the camera menu. Image stabilization can be named different things depending on brand. On Nikon lenses it is called “Vibration Reduction”. On others it might be called “Vibration Compensation”, “Optical Image Stabilization” or “SteadyShot”, For example, if you shoot with a Sony mirorrless camera that has IBIS, you will have an option for “SteadyShot” in the camera menu – make sure to set it to “Off” before shooting.

              There are rare conditions in which you might need to keep image stabilization turned on. For example, image stabilization on some of the Nikon super telephoto lenses is designed to be used on a tripod. Other times, image stabilization on a tripod can be helpful when shooting from a non-stable platform, such as a boat. Refer to your camera and lens manuals to see in which situations image stabilization should and should not be engaged.
              3.4) DSLR Mirror Slap


              If you use a DSLR camera, the mirror slap can be a source of camera shake when shooting in low-light situations. Gladly, many modern DSLRs have ways to prevent mirror slap from causing camera shake. One of such methods is to use the Mirror Up mode. In this mode, releasing the camera shutter will first raise the mirror, then the second release will start the exposure. While the Mirror Up mode can work great to eliminate mirror slap, it pretty much requires the use of a remote shutter release. Sadly, most Mirror Up implementations do not work with a self-timer, which makes this mode only practical to use with a remote shutter release.

              Another method, which I personally prefer and use probably 90% of the time, is Exposure Delay Mode. With the Exposure Delay Mode turned on, the camera will raise the mirror, wait for a specified amount of time, and only then take a picture, which can effectively reduce and potentially even eliminate mirror slap. This mode is not available on every camera, but if it is available on yours, you can use it in combination with a self-timer, which can work out really well (more on that below) in situations where you do not have a remote shutter release with you, or do not have the time to set it up.

              تعليق


              • #8
                3.5) صدمة مصراع

                اتضح أن مصدرًا كبيرًا آخر لاهتزاز الكاميرا يمكن أن يكون في الواقع آلية الغالق، والتي يشير إليها بعض الأشخاص باسم "صدمة الغالق". في حين أن معظم كاميرات DSLR لديها طرق للتعامل مع Mirror Slap، إلا أن القليل من الكاميرات توفر بالفعل طريقة للتعامل مع صدمة الغالق. تعد صدمة الغالق مشكلة حقيقية وليس فقط في كاميرات DSLR - فقد يكون التعامل معها أمرًا مؤلمًا حتى في الكاميرات التي لا تحتوي على مرايا! المشكلة في صدمة الغالق هي أن الغالق يتحرك مباشرة قبل بدء التعريض الضوئي، لذلك يمكن أن يكون سببًا لصور ضبابية أكثر من آلية المرآة.

                يمكن أن تكون صدمة الغالق مدمرة جدًا للصور، خاصة عند سرعات غالق معينة. إليك ما حدث لكاميرا Sony A7R الأصلية عندما تم استخدامها بسرعات غالق مثل 1/10 من الثانية:


                وكل هذا التمويه على الجانب الأيمن من الصورة جاء من آلية الغالق!

                أفضل طريقة للتعامل مع الاهتزازات الصادرة عن آلية الغالق هي استخدام ميزة تسمى "غالق الستارة الأمامية الإلكتروني" أو "الستارة الأولى الإلكترونية" أو "الوضع الصامت للعرض المباشر". للأسف، معظم الكاميرات ذات المستوى المبدئي والمتوسط ​​في السوق اليوم لا يتوفر لديها مثل هذا الوضع، وهو أمر مخيب للآمال. وفي حالة مثال Sony A7R المذكور أعلاه، لم تكن الكاميرا تحتوي على ميزة EFCS، والتي تبين أنها تمثل مشكلة كبيرة (لحسن الحظ، عالجت سوني المشكلة في كاميرا A7R II، كما هو مفصل في مراجعة Sony A7R II)

                لذا، إذا قمت بالاطلاع على قائمة الكاميرا ودليل الكاميرا، ولم تتمكن من العثور على مثل هذا الخيار، فلن يحالفك الحظ وسيكون خيارك الوحيد هو إما استخدام وضع "Mirror Up" الموضح أعلاه، أو مزيج من التعرض التأخير + الموقت الذاتي، والذي سيتم مناقشته بمزيد من التفصيل في المقالة.

                إذا كان لديك وضع غالق الستارة الأمامية الإلكتروني (EFCS) المتوفر في كاميرتك، فمن خلال مجموعة من ميزات الكاميرا، يمكنك التخلص تمامًا من أي اهتزازات ناجمة عن الكاميرا. بشكل أساسي، عند تشغيل EFCS، لا تقوم الكاميرا بتشغيل آلية الغالق في بداية التعريض الضوئي - يكون الغالق مفتوحًا بالفعل ولا تقوم الكاميرا بتشغيل الغالق إلا في نهاية التعريض الضوئي. وهذا يعني أن الكاميرا يجب أن تكون في وضع معين حتى تعمل EFCS فعليًا. في كاميرا DSLR، يمكن أن يعمل EFCS إما مع وضع Mirror Up (الإصدار الأول يرفع كلاً من آليات المرآة والغالق والإصدار الثاني يبدأ التعريض الضوئي) أو في وضع Live View. إذا كنت تقوم بالتصوير باستخدام كاميرا بدون مرآة، فما عليك سوى التأكد من تشغيل EFCS ويجب ضبطه - يجب ألا تسمع أي ضجيج عندما ينطفئ الغالق، فقط صوت واحد بعد التقاط الصورة. فيما يلي بعض الأمثلة على الاستخدام السليم لـ EFCS على عدد قليل من الكاميرات.

                3.5) Shutter Shock


                It turns out that another big source of camera shake can actually be the shutter mechanism, which some people refer to as “shutter shock”. While most DSLRs have ways to deal with Mirror Slap, few cameras actually provide a way to deal with the shutter shock. Shutter shock is a real problem and not just in DSLR cameras – it can actually be a pain to deal with even on mirrorless cameras! The problem with shutter shock, is that the shutter moves right before the exposure starts, so it can be more of a cause for blurry images than the mirror mechanism.

                Shutter shock can be quite devastating to images, especially at certain shutter speeds. Here is what happened to the original Sony A7R when it was used at shutter speeds like 1/10th of a second:


                And all this blur on the right side of the image came from the shutter mechanism!

                The best way to deal with vibrations from the shutter mechanism is to use a feature called “Electronic Front Curtain Shutter“, “Electronic First Curtain” or “Live View Silent Mode”. Sadly, most entry-level and mid-level cameras on the market today do not have such mode available, which is disappointing. And in the case of the Sony A7R example provided above, the camera did not have an EFCS feature, which turned out to be a big problem (thankfully, Sony addressed the issue on the A7R II, as detailed in my Sony A7R II review)

                So if you go through your camera menu and your camera manual, and you cannot find such an option, you are basically out of luck and your only choice will be to either use a “Mirror Up” mode described above, or a combination of Exposure Delay + Self Timer, which is discussed further down in the article.

                If you do have the Electronic Front Curtain Shutter (EFCS) mode available in your camera, then with a combination of camera features, you can completely eliminate any camera-induced vibrations. Basically, when EFCS is engaged, the camera does not trigger the shutter mechanism at the start of the exposure – the shutter is already open and the camera only engages the shutter at the very end of exposure. This means that the camera must be in a particular mode for EFCS to actually work. In a DSLR camera, EFCS can work either with Mirror Up mode (first release raises both the mirror and the shutter mechanisms and the second release starts the exposure) or in Live View mode. If you shoot with a mirrorless camera, just make sure that EFCS is turned on and you should be set – you should not hear any noise when your shutter goes off, only one sound after the picture is taken. Below are some examples of proper use of EFCS on a few cameras.

                تعليق


                • #9
                  قائمة الإعدادات المخصصة->مغلاق الستارة الأمامية الإلكتروني a5->تشغيل (يتم إيقاف تشغيله افتراضيًا):


                  هناك طريقة أخرى وهي استخدام طريقة العرض المباشر. نظرًا لأنه يجب عليك دائمًا بذل قصارى جهدك لتحقيق الوضوح اللازم من خلال تشغيل المنظر المباشر وتكبير الموضوع، فلماذا لا تقوم بتشغيل الكاميرا باستخدام Live View؟ الحيلة الوحيدة هنا هي أنه يجب عليك استخدام وضع Mirror Up حتى يعمل هذا الأمر، وهو أمر غبي جدًا، كما أعلم! هذا هو المكان الذي أخطأت فيه شركة Nikon ولا تريد إصلاحه بتحديث البرنامج الثابت! إذا لم تقم بالتصوير في وضع Mirror Up، فسوف تقوم الكاميرا بتشغيل آلية الغالق الخاصة بها قبل التقاط الصورة في المنظر المباشر، مما يجعل EFCS عديمة الفائدة تمامًا.

                  نظرًا لأن وضع Mirror Up يفترض استخدام إصدار الغالق عن بعد للتشغيل السليم، فماذا تفعل إذا لم يكن لديك إصدار غالق عن بعد، أو لا تريد أن تهتم بإعداد واحد؟ حسنًا، هناك حل - فقط استخدم وضع تأخير التعرض مع وضع المرآة لأعلى. إليك كيفية إعداده:

                  قم بتمكين EFCS أولاً (انظر أعلاه) اضبط وضع تحرير الكاميرا على Mirror Up (Mup على القرص العلوي) قائمة الإعداد المخصص->التصوير/العرض->d4 وضع تأخير التعريض->3s


                  Custom Setting Menu->a5 Electronic front-curtain shutter->On (it is off by default):


                  Another method is to engage Live View. Since you should always do your best to achieve critical sharpness by engaging live view and zooming in to your subject, why not fire your camera using Live View? The only trick here, is that you must use the Mirror Up mode for this to work, which, I know, is quite stupid! This is where Nikon royally screwed up and does not want to fix with a firmware update! If you do not shoot in Mirror Up mode, the camera will engage its shutter mechanism before an image is taken in live view, making EFCS completely useless.

                  Since the Mirror Up mode assumes the use of a remote shutter release for proper operation, what do you do if you do not have a remote shutter release, or do not want to bother with setting up one? Well, there is a solution – just use Exposure Delay Mode in combination with the Mirror Up mode. Here is how you set it up:
                  1. Enable EFCS first (see above)
                  2. Set camera release mode to Mirror Up (Mup on the top dial)
                  3. Custom Setting Menu->Shooting/Display->d4 Exposure Delay Mode->3s

                  تعليق


                  • #10

                    من الآن فصاعدًا، إذا كنت تستخدم الكاميرا في الوضع العادي، ففي المرة الأولى التي تقوم فيها بتحرير الغالق سترفع كلاً من المرآة وآليات الغالق، وفي المرة الثانية التي تقوم فيها بتحرير الغالق، ستنتظر الكاميرا لمدة 3 ثوانٍ قبل بدء التعريض الضوئي، والتي ينبغي أن تقضي على جميع اهتزازات الكاميرا. فقط تأكد من أن الكاميرا ثابتة - إذا اهتزت الكاميرا لأكثر من 3 ثوانٍ على حامل ثلاثي الأرجل، فلن يساعد ذلك كثيرًا. راجع القسم رقم 2 حول استخدام إعداد الحامل ثلاثي الأرجل المناسب إذا كان الأمر كذلك.

                    إذا قررت استخدام Live View لالتقاط الصور، فلا تتفاجأ أنه في المرة الأولى التي تقوم فيها بتحرير الغالق، لن يحدث شيء لفترة من الوقت - وهذا ما من المفترض أن يحدث، نظرًا لأن كلاً من المرآة والغالق مرفوعان بالفعل! ومع ذلك، في المرة الثانية التي تقوم فيها بتحرير الغالق، تكون عندما تنتظر الكاميرا لمدة 3 ثوانٍ، وبعد ذلك ستبدأ التعريض الضوئي بصمت. ثم بمجرد انتهاء التعريض الضوئي، ستنخفض آلية الغالق لإنهاء التعريض الضوئي، ثم تعود للأعلى مرة أخرى لتعود إلى وضع العرض المباشر. مرة أخرى، إذا لم تقم بتشغيل وضع Mirror Up، فلن يعمل EFCS في العرض المباشر.

                    للأسف، لا يعمل وضع Mirror Up مع Self Timer، لذا فإن خيارك الوحيد لالتقاط الصور بدون جهاز تحرير الغالق هو تشغيل وضع Exposure Delay Mode مع كاميرات DSLR هذه.

                    تذكر دائمًا: وضع تأخير التعريض الضوئي مخصص للمرآة، بينما EFCS مخصص لآلية الغالق. الاستثناء الوحيد هو عند التصوير في وضع العرض المباشر - وذلك عندما يصبح وضع تأخير التعريض الضوئي مؤقتًا ذاتيًا، وإن كان يقتصر على 3 ثوانٍ.

                    كل هذا يبدو متضمنًا جدًا لجعل EFCS يعمل بشكل صحيح؟ للأسف، هذه هي الطريقة التي صممت بها شركة Nikon أحدث كاميرات DSLR، ويبدو أنه سيتعين علينا انتظار الكاميرات المستقبلية لمعالجة هذه المشكلة، وهو أمر سيئ. ومع ذلك، فإن صدمة الغالق ليست عدوك دائمًا - ففي بعض الأحيان يكون مجرد الجمع بين وضع تأخير التعريض الضوئي والمؤقت الذاتي كافيًا للتخلص من اهتزاز الكاميرا، خاصة عند استخدام عدسات ذات طول بؤري قصير (الزاوية العريضة إلى القياسية).

                    From now on, if you use the camera in regular mode, the first time you release the shutter will raise both the mirror and the shutter mechanisms and the second time you release the shutter, the camera will wait for 3 seconds before the exposure starts, which should eliminate all camera vibrations. Just make sure that your camera is steady – if your camera wobbles for more than 3 seconds on a tripod, this won’t do much to help. See section #2 on using a proper tripod setup if that’s the case.

                    If you decide to use Live View to take images, don’t be surprised that the first time you release the shutter nothing will happen for a while – that’s what is supposed to happen, since both the mirror and the shutter are already raised! The second time you release the shutter, however, is when the camera will wait for 3 seconds, after which it will silently start the exposure. Then once the exposure ends, the shutter mechanism will come down to end the exposure, then come back up again to come back to live view mode. Again, if you do not engage the Mirror Up mode, EFCS will not work in live view.

                    Sadly, Mirror Up mode does not work in combination with Self Timer, so your only option for taking pictures without a shutter release device is to engage Exposure Delay Mode with these DSLRs.

                    Always remember: Exposure Delay Mode is for the Mirror, whereas EFCS is for the shutter mechanism. The only exception is when shooting in Live View mode – that’s when the Exposure Delay Mode essentially becomes a Self Timer, albeit limited to 3 seconds.

                    All this sounds pretty involved to get EFCS working right? Sadly, that’s the way Nikon designed these latest DSLRs and it looks like we will have to wait for future cameras to get this issue addressed, which sucks. However, shutter shock is not always your enemy – sometimes just the combination of the Exposure Delay Mode with a Self Timer are enough to eliminate camera shake, especially when using short focal length lenses (wide-angle to standard).

                    تعليق


                    • #11
                      3.5.2) كاميرات السلسلة Nikon D5xx وD5xxx وD7xxx وD6xx وD7xx وD8xx وDx (بدون EFCS)

                      إذا كانت كاميرا Nikon DSLR الخاصة بك حديثة إلى حد ما ولم يكن لديك EFCS، فمن المرجح أن يكون لديك وضع تأخير التعريض العادي المتاح للاستخدام. إذا كان الأمر كذلك، فمن خلال استخدام مجموعة المؤقت الذاتي مع وضع تأخير التعريض الضوئي، يمكنك بشكل فعال تقليل اهتزاز الكاميرا الناتج عن آلية المرآة أو يديك، دون استخدام تحرير الغالق عن بعد. إليك كيفية إعداد هذا:

                      اضبط وضع تحرير الكاميرا على مؤقت ذاتي (اضبط القرص العلوي على مؤقت) اضبط المؤقت الذاتي على فترة أقصر، بين 2 إلى 5 ثوانٍ. قائمة الإعدادات المخصصة->قفل المؤقتات/التعريض الضوئي التلقائي->المؤقت الذاتي->تأخير المؤقت الذاتي->2 ثانية/5 ثوانٍ قائمة الإعدادات المخصصة->التصوير/العرض->وضع تأخير التعريض الضوئي->تشغيل (أو حدد 3 ثوانٍ، إذا كان متاحًا)

                      بمجرد القيام بذلك، إليك ما سيحدث عند تحرير مصراع الكاميرا:

                      ستشغل الكاميرا الموقت الذاتي وتنتظر لمدة ثانيتين أو 5 ثوانٍ، وهو ما يجب أن يزيل اهتزاز يديك. ستسمع أول ضجيج بعد ذلك، وذلك عندما يرفع وضع تأخير التعريض مرآة الكاميرا. ستنتظر الكاميرا لمدة ثانية أو مهما كانت المدة التي تريدها. اضبط وضع تأخير التعريض الضوئي، والذي من شأنه أن يقلل من اهتزاز الكاميرا من المرآة. بعد ذلك يتم رفع ستارة الغالق وبدء التعريض الضوئي، وتعود ستارة الغالق للأسفل بعد التقاط الصورة

                      ضع في اعتبارك أن هذا سيؤدي إلى إفساد عملية التصوير عندما تكون محمولاً باليد! تأكد من العودة إلى وضع التصوير العادي (فصل الموقت الذاتي) وإيقاف تشغيل وضع تأخير التعريض من قائمة الكاميرا بعد إخراج الكاميرا من الحامل ثلاثي الأرجل!

                      إذا كانت لديك كاميرا مثل Nikon D750 بها وضعي التصوير U1 وU2، فيمكنك برمجة ما ورد أعلاه في أحد الأوضاع والتبديل ببساطة ذهابًا وإيابًا، مما سيوفر لك الكثير من الوقت!

                      3.5.2) Nikon D5xx, D5xxx, D7xxx, D6xx, D7xx, D8xx and Dx Series Cameras (No EFCS)


                      If your Nikon DSLR is fairly recent and you do not have EFCS, you most likely have the regular Exposure Delay Mode available to use. If that’s the case, by using the combination of a Self-Timer with the Exposure Delay Mode, you can effectively reduce camera shake caused by the mirror mechanism or your hands, without using a remote shutter release. Here is how to set this one up:
                      1. Set camera release mode to Self-Timer (set top dial to Timer)
                      2. Set Self-Timer to a shorter period, between 2 to 5 seconds. Custom Setting Menu->Timers/AE lock->Self-timer->Self-timer delay->2s/5s
                      3. Custom Setting Menu->Shooting/display->Exposure Delay Mode->On (or select 3 seconds, if available)

                      Once you do this, here is what’s going to happen when you release the camera shutter:
                      1. The camera will engage the self-timer and wait either 2 or 5 seconds, which should eliminate shake from your hands
                      2. You will hear the first noise afterwards, which is when Exposure Delay Mode raises the camera mirror
                      3. The camera will wait for a second or however long you set the Exposure Delay Mode to be, which should reduce camera shake from the mirror
                      4. After this the shutter curtain is raised and the exposure starts
                      5. Shutter curtain comes back down after the image is captured

                      Keep in mind that this will mess up your shooting when going hand-held! Make sure to come back to normal shooting mode (disengage self-timer) and turn off Exposure Delay Mode from the camera menu after you take your camera off the tripod!

                      If you have a camera like the Nikon D750 that has U1 and U2 shooting modes, you can program the above into one of the modes and simply switch back and forth, which will save you a lot of time!

                      تعليق


                      • #12
                        3.5.3) كانون ريبل، 40D/50D/60D/70D/80D، 6D، 7D Mark I/II، 5D Mark II/III/IV (EFCS)

                        إذا قمت بالتصوير باستخدام كاميرا Canon DSLR حديثة، فمن المرجح أن يكون لديك خيار ضمن أيقونة الكاميرا ضمن "Lv func". يسمى "Silent LV Shoot." وهو في الأساس EFCS. تأكد من تمكينه وضبطه على الوضع 1، كما هو موضح أدناه:

                        القائمة->وظيفة المستوى المنخفض.->تصوير العرض المباشر.->تمكينالقائمة->وظيفة المستوى المنخفض.->تصوير الوضع المنخفض الصامت.->الوضع 1التصوير في وضع العرض المباشر

                        تذكر، لكي يعمل EFCS على كاميرات Canon DSLR، يجب عليك التصوير من وضع العرض المباشر. الخبر الرائع لمصوري Canon هو أنه يمكنك استخدام مجموعة من الموقت الذاتي مع EFCS، والتي يمكن استخدامها للتخلص تمامًا من اهتزاز الكاميرا. إليك كيف يمكنك تحقيق ذلك:

                        اضبط خيارات التصوير EFCS / Silent LV المذكورة أعلاه، اضغط على الزر "Q" للتبديل إلى القائمة السريعة، انتقل إلى وضع القيادة وحدد "المؤقت الذاتي: 2 ثانية/عن بعد"

                        بمجرد القيام بذلك، عندما تقوم بتحرير الغالق في وضع العرض المباشر، ستنتظر الكاميرا لمدة ثانيتين، ثم تبدأ التعريض الضوئي مع رفع المرآة والغالق بالفعل. بمجرد انتهاء التعريض الضوئي، سينخفض ​​الغالق لإنهاء التعريض الضوئي ويعود للأعلى للعودة إلى وضع العرض المباشر.

                        إنه لأمر صادم حقًا أن تجد أن Canon كانت تدفع EFCS إلى كاميرات DSLR الخاصة بها لفترة من الوقت الآن، في حين أن رماة Nikon DSLR لا يمتلكونها إلا على عدد قليل من الكاميرات (نيكون، تلميح، تلميح!).

                        3.5.4) سوني A6xxx، A7/A7 II، A7R II، A7S /A7S II

                        إذا قمت بالتصوير باستخدام أحدث جيل من كاميرات Sony غير المزودة بمرآة، فكلها تأتي مزودة بـ EFCS. كل ما عليك فعله هو التأكد من تمكين EFCS من قائمة الكاميرا:

                        القائمة->رمز الإعداد->إغلاق الستارة الأمامية الإلكترونية.->تشغيل

                        من هنا، لا تحتاج إلى تحرير الغالق عن بعد - ما عليك سوى وضع الكاميرا على وضع محرك المؤقت الذاتي (اضبطها على ثانيتين أولاً) والتقط الصور بعيدًا! ستقوم الكاميرا دائمًا بالتصوير مع تقدم EFCS للأمام، سواء نظرت من خلال عدسة الكاميرا أو استخدمت شاشة LCD.

                        قد تحتوي الكاميرات الأخرى التي لا تحتوي على مرايا على EFCS أيضًا - أوصي بمراجعة دليل الكاميرا لمعرفة ما إذا كان هذا الوضع متاحًا.

                        3.5.3) Canon Rebel, 40D/50D/60D/70D/80D, 6D, 7D Mark I/II, 5D Mark II/III/IV (EFCS)


                        If you shoot with a modern Canon DSLR, you most likely will have an option under the Camera icon under “Lv func.” called “Silent LV shoot.”, which is basically EFCS. Make sure that it is enabled and set to Mode 1, as explained below:
                        1. Menu->Lv func.->Live View shoot.->Enable
                        2. Menu->Lv func.->Silent LV shoot.->Mode 1
                        3. Shoot in Live View mode

                        Remember, in order for EFCS to work on Canon DSLRs, you must shoot from Live View mode. The great news for Canon shooters, is that you can use a combination of a self-timer along with the EFCS, which can be used to completely eliminate camera shake. Here is how you can achieve that:
                        1. Set the above-mentioned EFCS / Silent LV shooting options
                        2. Press the “Q” button to switch to quick menu
                        3. Go to Drive Mode and select “Self-timer: 2sec/remote”

                        Once you do that, when you release the shutter in Live View mode, the camera will wait for 2 seconds, then start the exposure with the mirror and shutter already raised. Once the exposure ends, the shutter will come down to end the exposure and come back up to get back into Live View mode.

                        It is actually pretty shocking to find that Canon has been pushing EFCS to its DSLRs for a while now, while Nikon DSLR shooters only have it on a select few cameras (Nikon, hint, hint!).
                        3.5.4) Sony A6xxx, A7/A7 II, A7R II, A7S /A7S II


                        If you shoot with the latest generation Sony mirrorless cameras, they all come with EFCS. All you have to do is make sure that EFCS is enabled from the camera menu:
                        1. Menu->Setup Icon->e-Front Curtain Shut.->On

                        From here, you don’t need a remote shutter release – simply put the camera to Self Timer drive mode (set it up to 2s first) and shoot away! The camera will always shoot with EFCS going forward, whether you look through the viewfinder, or use the LCD.

                        Other mirrorless cameras might have EFCS as well – I would recommend to check the camera manual to see if such a mode is available.

                        تعليق


                        • #13
                          3.6) البعد البؤري الطويل

                          إذا سبق لك أن قمت بالتصوير بطول بؤري طويل جدًا، خاصة عند ربط العدسات المقربة الفائقة مع محولات التقريب، فربما لاحظت أن الكاميرا الخاصة بك سوف تهتز بجنون وتستمر في القيام بذلك لفترة من الوقت بعد لمسها. يكون هذا ملحوظًا بشكل خاص عند التصوير من إعداد حامل ثلاثي القوائم غير مستقر. السبب وراء صعوبة الأطوال البؤرية الأطول هو أن الاهتزاز يكون أكثر وضوحًا عند الأطوال البؤرية الأطول من الأطوال الأقصر، نظرًا لأنك تقوم بتكبير هذا الجزء الصغير من الإطار. من الأفضل توضيح السبب باستخدام الرسم التوضيحي أدناه:

                          هنا يمكنك أن ترى كيف تزداد إمكانية الاهتزاز مع زيادة البعد البؤري. الخطوط المنقطة باللون الأحمر التي تمثل الحد المحتمل لمدى اهتزاز الكاميرا عند حملها باليد، لها نطاق أقصر بكثير يبلغ 80 مم مقارنة بـ 400 مم. وذلك لأن اهتزاز الكاميرا يتم تضخيمه مع زيادة البعد البؤري.

                          كما ترون، عند الأطوال البؤرية الأقصر، لا تواجه الكاميرا الكثير من التحديات مع الاهتزازات الطفيفة، ولكن بمجرد استخدام أطوال بؤرية طويلة جدًا (200 مم وما فوق)، يصبح اهتزاز الكاميرا أكثر وضوحًا. إذا كنت ترغب في تقييم إعداد الحامل ثلاثي القوائم لديك، فقم بتركيب عدسة تقريب فائقة وحاول تكبير المنظر المباشر بنسبة 100% بأطوال بؤرية تزيد عن 200 مم. ثم شاهد مدى جنون الاهتزازات بعد لمس الكاميرا! حتى مع إعداد الحامل ثلاثي القوائم + الرأس الكروي، واجهت وقتًا عصيبًا في تثبيت العدسة مقاس 800 مم f/5.6 عندما كان لدي محول تقريب 2x! اضطررت إلى استخدام Mirror Up والانتظار لمدة تزيد عن 5 ثوانٍ للحصول على صورة أقل ضبابية إلى حد ما من الصور الأخرى عند تصوير البدر. بعد التقاط لقطة واحدة، اضطررت إلى إعادة صياغة الصورة، حيث كان القمر في ذلك الوقت خارج الإطار تقريبًا. هنا هي اللقطة الناتجة:

                          كاميرا نيكون D800E + 800 مم f/5.6 @ 1600 مم، ISO 800، 1/800، f/13.0

                          على الرغم من أنها كانت حادة إلى حد ما، إلا أنني كنت أتمنى لو كانت معي كاميرا D810 المزودة بـ EFCS في ذلك الوقت، نظرًا لأن وضع EFCS كان سينتج صورة أكثر وضوحًا. بعد أن قمت بتقليل عينة الصورة قليلاً وزيادة وضوحها في Photoshop، أصبحت الصورة جيدة بشكل عام، لكنني كنت أعلم أنه كان بإمكاني الحصول على صورة أكثر وضوحًا إذا تمكنت من فك تعشيق غالق كاميرا D800E قبل بدء التعريض الضوئي. في مثل هذه الحالات، يمكن أن تكون EFCS لا تقدر بثمن حقًا. لذا ضع ذلك في الاعتبار عند استخدام أطوال بؤرية طويلة جدًا.

                          3.6) Long Focal Length


                          If you have ever shot at a very long focal length, especially when coupling super telephoto lenses with teleconverters, you might have noticed that your camera will shake like crazy and continue to do so for a while after you touch it. This is especially noticeable when shooting from an unstable tripod setup. The reason why longer focal lengths are challenging, is because vibration is much more pronounced at longer focal lengths than shorter ones, since you are magnifying such a tiny portion of the frame. It is best to explain the reason using the below illustration:
                          Here you can see how the potential for the shake is increased with the increase in focal length. The red-dotted lines that represent the potential limit of how much the camera can shake when hand-held have a much shorter span at 80mm than at 400mm. That’s because camera shake is magnified with increase in focal length.
                          As you can see, at shorter focal lengths the camera does not have much challenges with slight vibrations, but once very long focal lengths are involved (200mm and beyond), camera shake gets much more pronounced. If you ever want to evaluate your tripod setup, mount a super telephoto lens and try zooming into live view at 100% at 200mm+ focal lengths. Then see how crazy the vibrations get after you touch the camera! Even with the top of the line tripod + ballhead setup, I had a rough time getting the 800mm f/5.6 lens to stabilize when I had a 2x teleconverter on it! I had to use Mirror Up and wait for 5+ seconds to get an image that was somewhat less blurry than others when shooting the full moon. After taking a single shot, I had to reframe my image, since the moon by then was already pretty much out of the frame. Here is the resulting shot:
                          NIKON D800E + 800mm f/5.6 @ 1600mm, ISO 800, 1/800, f/13.0
                          While it turned out to be fairly sharp, I wish I had the D810 with the EFCS with me at the time, since the EFCS mode would have yielded a much sharper image. After I down-sampled the image a bit and sharpened it in Photoshop, the image turned out OK overall, but I knew that I could have gotten even a sharper image if I could disengage the shutter of my D800E before the exposure started. In such situations, EFCS can be truly invaluable. So keep this in mind when using very long focal lengths.

                          تعليق


                          • #14
                            3.7) البيئة المحيطة

                            بمجرد الاهتمام بجميع مشكلات التثبيت الناجمة عن الحامل ثلاثي الأرجل والعدسة والكاميرا، من المهم أيضًا التحقق مما إذا كانت بيئتك قد تسبب اهتزاز الكاميرا. على سبيل المثال، من المتوقع أنه إذا قمت بالتصوير في ظروف عاصفة جدًا، فقد تهتز الكاميرا نتيجة هبوب الرياح القوية. إذا قمت بالتصوير والحامل ثلاثي القوائم الخاص بك مغموسًا في البحر/المحيط، فقد تضرب الأمواج أرجل الحامل ثلاثي القوائم وتتسبب في اهتزاز الكاميرا.

                            لاحظ اهتزاز الكاميرا بسبب ارتطام الأمواج بأقدام الحامل ثلاثي القوائم (حقوق الطبع والنشر لسبنسر كوكس)
                            نيكون D800E + 20 مم f/1.8 @ 20 مم، ISO 100، 16/10، f/5.6

                            إذا كنت تقوم بالتصوير من بيئة غير مستقرة للغاية مثل الكثبان الرملية، فقد يبدأ الحامل ثلاثي القوائم في الانخفاض ببطء، مما يتسبب في حدوث ضبابية في التعريضات الضوئية الطويلة. قد تكون هناك عوامل أخرى مؤثرة أيضًا، مثل لمس جسم ما فعليًا لإعداد الكاميرا. قم دائمًا بتقييم بيئتك أيضًا واحتفظ بالكاميرا والحامل ثلاثي القوائم بعيدًا عن أي أشياء أخرى، مع التأكد من إعدادك على منصة ثابتة وغير متحركة.

                            3.7) Surrounding Environment


                            Once you take care of all tripod, lens and camera-induced stabilization issues, it is also important to check if your environment might be causing camera shake. For example, it is expected that if you shoot in very windy conditions, your camera might shake as a result of strong wind gusts. If you shoot with your tripod dipped into the sea / ocean, the waves might be hitting your tripod legs and causing camera shake.
                            Notice camera shake due to waves hitting the tripod feet (Copyright Spencer Cox)
                            NIKON D800E + 20mm f/1.8 @ 20mm, ISO 100, 16/10, f/5.6
                            If you shoot from a very unstable environment such as sand dunes, your tripod might start slowly sinking, causing blur in long exposures. There might be other factors at play as well, such as an object physically touching your camera setup. Always assess your environment as well and keep both your camera and tripod away from any other objects, making sure that you are set up on a stable, non-moving platform.

                            تعليق


                            • #15
                              4) ملخص

                              كما ترون، في حين أن تقليل اهتزاز الكاميرا على حامل ثلاثي الأرجل قد يبدو وكأنه موضوع بسيط، فإنه يمكن أن يصبح معقدًا إلى حد ما مع كل الميزات والتطورات التي نشهدها في تكنولوجيا الكاميرا. والخبر السار هو أن لديك الكثير من الخيارات لتحقيق الاستقرار في الإعداد الخاص بك والعودة بصور واضحة. الخبر السيئ هو أنك في بعض الأحيان قد تنسى أشياء بسيطة ولا تتاح لك الفرصة للتفاعل بسرعة كافية مع البيئات المتغيرة. تعرف دائمًا على ميزات الكاميرا الخاصة بك واكتب المعلومات الهامة مثل تلك المعروضة أعلاه، حتى تتمكن من نشر الحل المناسب للمشكلة في الميدان بسرعة. بعد أن تفعل ذلك مرارًا وتكرارًا، ستصبح ذاكرة عضلية وستعود دائمًا بصور حادة!

                              وضع تأخير التعرض + الموقت الذاتي للإنقاذ

                              كما ذكرت أعلاه، فإنني أعتمد على وضع تأخير التعرض + الموقت الذاتي بنسبة 90% على الأرجح عند تصوير المناظر الطبيعية. يعمل هذا الوضع بشكل جيد للغاية للتخلص من ارتطام المرآة، وعند التصوير باستخدام أحدث كاميرات Nikon DSLR، لا أرى تأثير صدمة الغالق بنفس القدر، نظرًا لأن آلية الغالق مبللة بشكل أفضل مقارنة بالطرز القديمة. إذا كانت الكاميرا الخاصة بك لا تحتوي على غالق الستارة الأمامية الإلكتروني، فإن استخدام وضع تأخير التعريض + الموقت الذاتي من المفترض أن يعمل بشكل جيد في معظم الحالات، وغالبًا ما يؤدي إلى القضاء على اهتزاز الكاميرا.

                              ومع ذلك، هناك بعض الحالات التي يلزم فيها استخدام EFCS - إذا كنت تقوم بالتصوير باستخدام عدسات تقريب فائقة على حامل ثلاثي الأرجل وتريد أفضل دقة عند التصوير في مواقف الإضاءة المنخفضة (على سبيل المثال لتصوير القمر أو الأهداف البعيدة)، فيمكن أن تساعدك EFCS حقًا في ذلك. تخلص تمامًا من أي اهتزاز ناتج عن الكاميرا، والذي يتضمن الاهتزاز من كل من آليات المرآة والغالق. أتمنى حقًا أن تستمر شركة Nikon في إضافة هذه الميزة المهمة إلى جميع كاميرات DSLR المستقبلية ومعالجة القيود الحالية عند التصوير في وضع العرض المباشر، كما هو موضح في المقالة.

                              أتمنى أن تجد هذه المقالة حول كيفية تقليل اهتزاز الكاميرا على حامل ثلاثي الأرجل مفيدة

                              4) Summary


                              As you can see, while reducing camera shake on a tripod might sound like a simple topic, it can get somewhat complex with all the features and advancements we are seeing in camera technology. The good news is, you have plenty of options to stabilize your setup and come back with sharp images. The bad news is, sometimes you might forget simple things and not have a chance to react quick enough to changing environments. Always learn your camera features and write down critical information such as the one presented above, so that you can quickly deploy the right solution to the problem in the field. After you do it over and over again, it will become muscle memory and you will always come back with tack sharp images!

                              Exposure Delay Mode + Self-Timer to the Rescue

                              As I have stated above, I rely on the Exposure Delay Mode + Self-Timer probably 90% of the time when shooting landscapes. This mode works very well for eliminating mirror slap and when shooting with the latest Nikon DSLR cameras, I don’t see the effect of the shutter shock as much, since the shutter mechanism is dampened better compared to older models. If your camera does not have the Electronic Front Curtain Shutter, using the Exposure Delay Mode + Self-Timer should still work really well in most cases, often eliminating camera shake.

                              However, there are some cases where EFCS is needed – if you shoot with super telephoto lenses on a tripod and you want the best sharpness when shooting in low-light situations (say for photographing the moon or distant subjects), EFCS can really help to completely eliminate any camera-induced shake, which includes shake from both the mirror and the shutter mechanisms. I really hope Nikon will continue adding this important feature to all future DSLRs and addresses the current limitations when shooting in Live View mode, as described in the article.

                              I hope you found this article on how to reduce camera shake on a tripod useful

                              تعليق

                              يعمل...
                              X