رحلة تصوير الحياة البرية What to Take on a Wildlife Photography Trip

تقليص
X
 
  • تصفية - فلترة
  • الوقت
  • عرض
إلغاء تحديد الكل
مشاركات جديدة

  • رحلة تصوير الحياة البرية What to Take on a Wildlife Photography Trip

    ما يجب القيام به في رحلة تصوير الحياة البرية
    What to Take on a Wildlife Photography Trip


    في إحدى المرات، عندما كنت أحزم أمتعتي لرحلة تصوير للحياة البرية، كتبت قائمة بمعداتي على قطعة من الورق - كاملة مع العدسات والبطاريات والملابس وما إلى ذلك. كنت أرغب في الحصول على مرجع مفيد للرحلة القادمة، ولكن بعد ذلك جاءت "الرحلة التالية" ولم أتمكن من العثور على الورقة! لذا، اتبعت نهجًا أكثر حداثة وكتبت مستندًا مرجعيًا على جهاز الكمبيوتر الخاص بي. والآن بعد أن حصلت على هذه القائمة، لماذا لا أشاركها معك؟ قد يكون هذا مفيدًا في المرة القادمة عندما تقوم برحلة تصوير للحياة البرية.

    في انتظار الماناكين في Cahuita NP في كوستاريكا. نيكون D300 @ 200 مم، ISO 800، 1/50، f/4.0


    One time when I was packing for a wildlife photography trip, I wrote a list of my equipment on a piece of paper – complete with lenses, batteries, clothing, and so on. I wanted to have a useful reference for the next trip, but then the “next trip” came along and I couldn’t find the paper! So, I took a more modern approach and wrote a reference document on my computer. Now that I have such a list, why not share it with you? It might come in handy next time that you’re going on a wildlife photography trip.
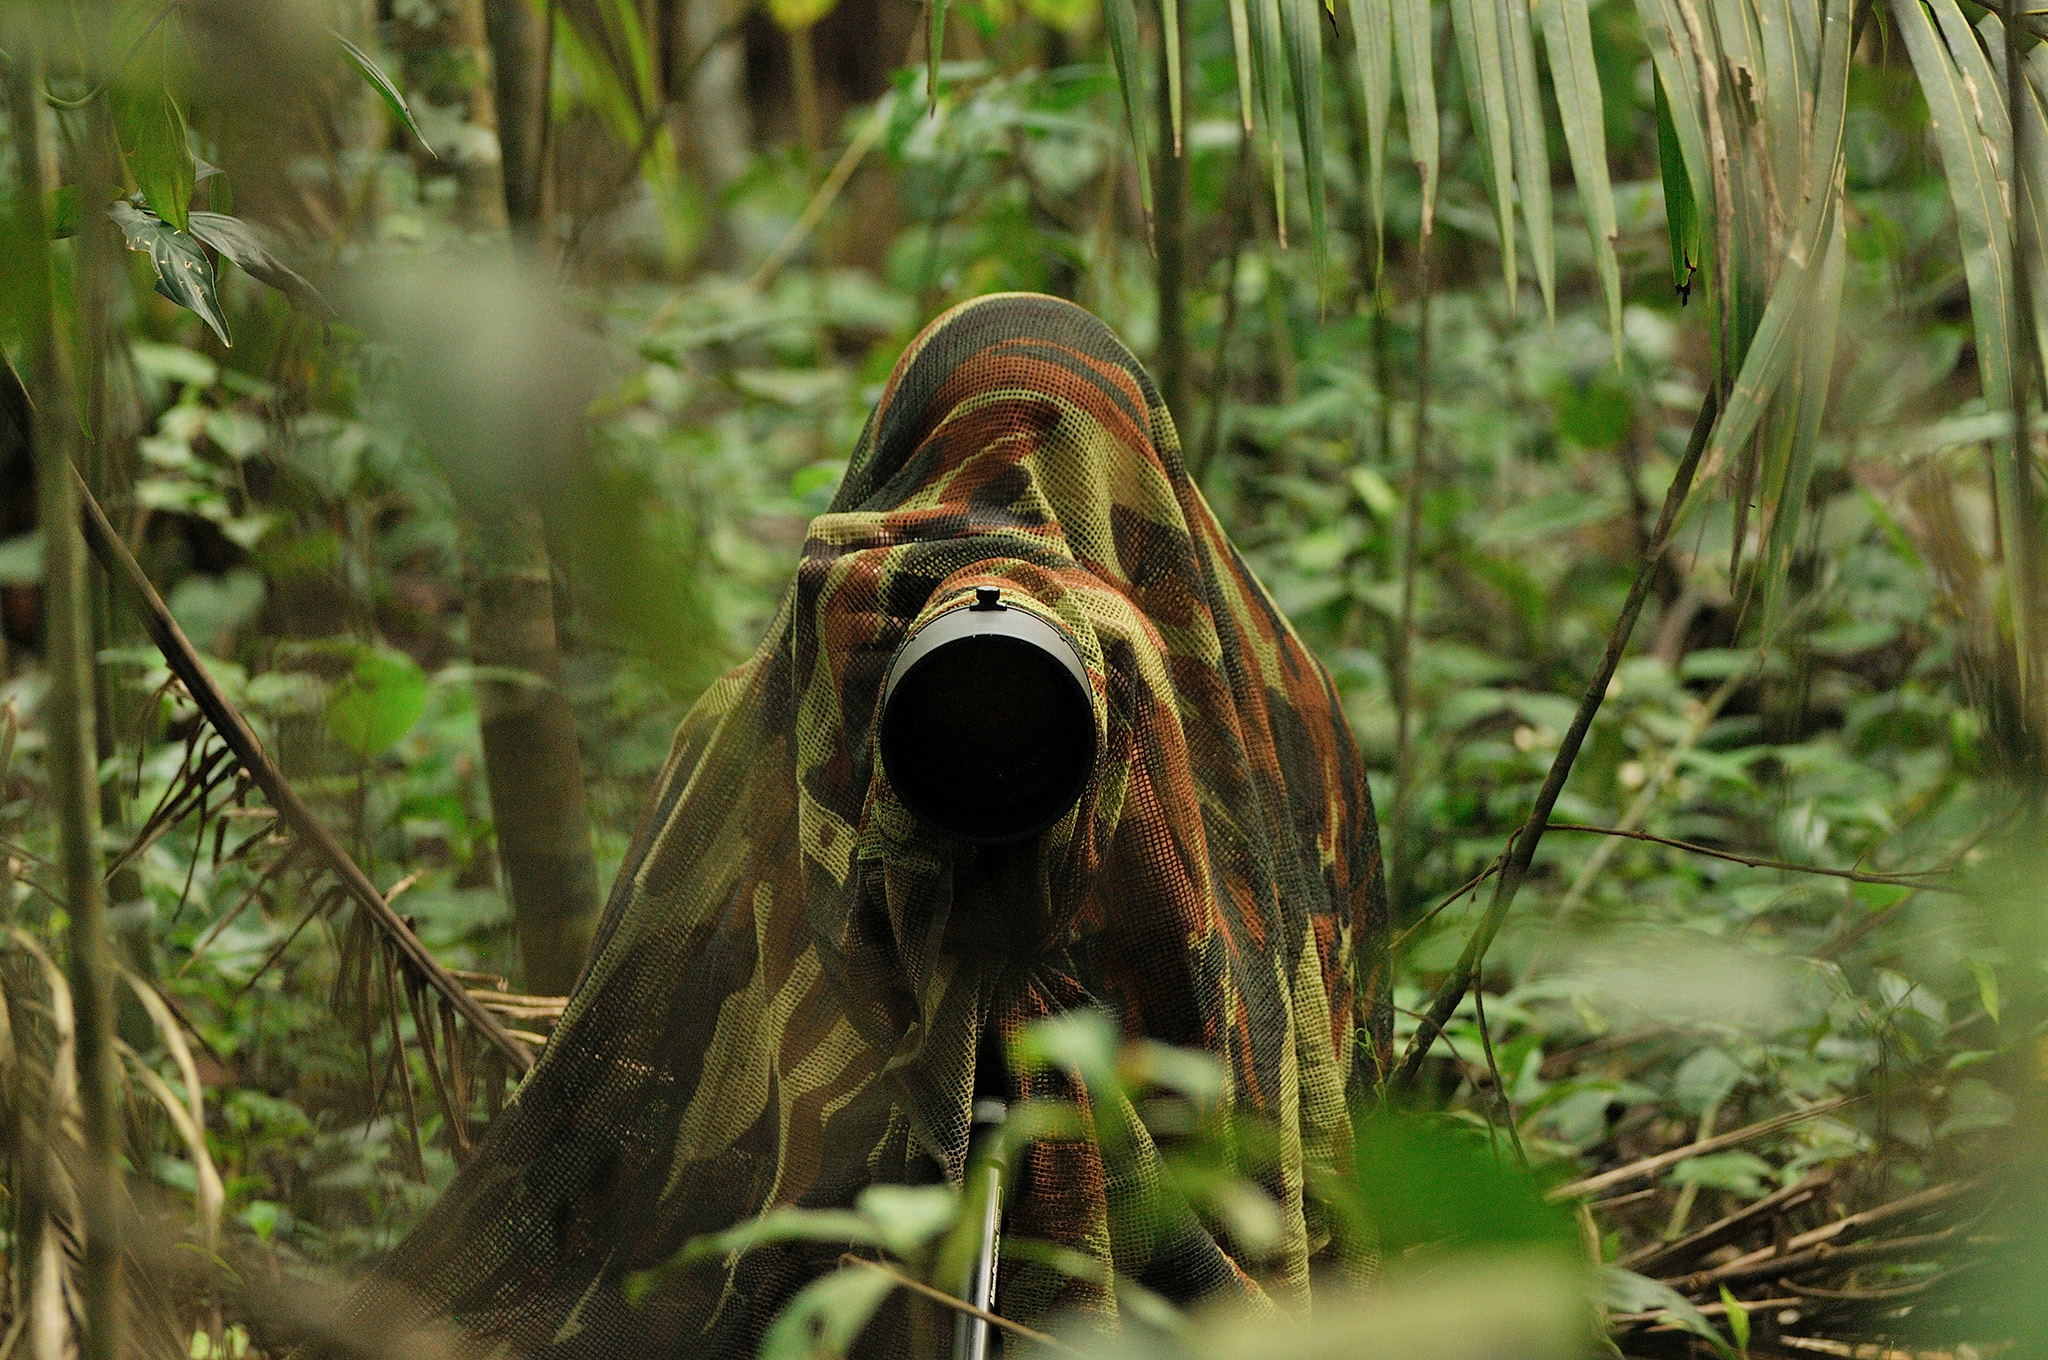
    Waiting for manakins in Cahuita NP in Costa Rica. NIKON D300 @ 200mm, ISO 800, 1/50, f/4.0

  • #2
    بالطبع، لا توجد قائمة عالمية تناسب جميع رحلات تصوير الحياة البرية. على سبيل المثال، إذا كنت ستقوم بالتصوير في سفالبارد، أضف بندقية، وجهاز إنذار للدب القطبي، وملابس أكثر دفئًا إلى القائمة. إذا كنت تخطط للمغامرة في المناطق الصحراوية في أفريقيا أو أستراليا، فمن المحتمل أن تترك المنجل في المنزل.

    نظرًا لأنني أميل إلى زيارة الغابات المطيرة لتصوير الحياة البرية، فإن قائمتي تنحرف إلى حد ما في هذا الاتجاه (على الرغم من وجود العديد من الأماكن التي تحتاج إلى أخذ المطر والحشرات بعين الاعتبار). سأقسم قائمتي إلى فئتين: معدات التصوير الفوتوغرافي ومعدات أخرى. دعنا نذهب اليها.


    Of course, there is no universal list that fits all wildlife photography expeditions. For example, if you’re going to photograph in Svalbard, add a rifle, a polar bear alarm, and warmer clothing to the list. If you plan to venture into the desert regions of Africa or Australia, you can probably leave the machete at home.

    Since I tend to visit the rainforest for wildlife photography, my list skews somewhat in that direction (although there are many places where you need to consider rain and bugs). I’ll divide my list into two categories: photography equipment and other gear. Let’s get to it.

    تعليق


    • #3

      جدول المحتويات

      معدات التصوير الفوتوغرافي عدسات الكاميرا محولات البعد المرشحات الفلاشات والناشرات البطاريات والشواحن والكابلات بطاقات الذاكرة حوامل ثلاثية القوائم ورؤوس ثلاثية الأرجل معدات أخرى مسجل الصوت كاميرا الحركة الكمبيوتر أو الكمبيوتر اللوحي ومحركات أقراص SSD حقائب الظهر والمنظمات والحقائب أشياء تافهة أخرى مهمة الملابس أدوات النظافة الشخصية أدوات الإسعافات الأولية الأشياء التي لا يمكنك تركها بدونها

      Table of Contents

      تعليق


      • #4
        معدات التصوير

        آلة تصوير

        كاميرا واحدة جيدة، لكن اثنتين هي رهان أكثر أمانًا. أنت لا تعرف أبدًا متى سيحدث خطأ ما. وإذا حدث خطأ ما، فلن يحدث ذلك عادة عندما تكون في المنزل تلتقط صورًا للسناجب.

        يجب أن تحتوي كلتا الكاميرتين على نفس التركيب، ونفس نوع البطارية، إن أمكن. عندما تتعطل الكاميرا الرئيسية، يمكن أن تعمل الكاميرا الاحتياطية مع جميع الملحقات الخاصة بك.

        تصنع بعض العلامات التجارية كاميرات مكملة للميزات. على سبيل المثال، قد تكون إحدى الكاميرات خيارًا أبطأ للدقة العالية، بينما تتمتع الأخرى بمعدل إطار أسرع ولكن بدقة أقل. بدلاً من التفكير فيهما ككاميرات "رئيسية واحتياطية"، فكر في كيفية استكمالهما بعدستين مختلفتين.

        من أمثلة هذه الأزواج التكميلية Fujifilm X-H2 وX-H2S أو Nikon Z7 II وZ6 II. لا تحتوي جميع الكاميرات على شقيق واضح، لذا إذا كنت بحاجة إلى تعيين كاميرا واحدة ككاميرا احتياطية، فليكن.

        تتضمن بعض أفضل كاميرات تصوير الحياة البرية اليوم Nikon Z9، وCanon EOS R3، وCanon EOS R5، وCanon EOS R6 II، وSony A1، وسلسلة Sony A9، وSony A7R V. وهناك أيضًا العديد من خيارات مستشعرات المحاصيل الجيدة من Fujifilm و نظام OM (Olympus)، ناهيك عن كاميرات DSLR المتنوعة التي تمثل صفقة رائعة في سوق الأجهزة المستعملة اليوم. وهذا لا يؤدي إلا إلى خدش السطح، فمن الصعب أن نخطئ.


        Photography Equipment

        Camera


        One camera is fine, but two is a safer bet. You never know when something will go wrong. And if something does go wrong, it usually won’t be when you’re at home taking pictures of squirrels.

        Both cameras should have the same mount and, if possible, the same battery type. When the main camera fails, the backup can work with all of your accessories.

        Some brands make cameras that are complementary in features. For example, one camera may be a slower-paced option for high resolution, while the other has a faster frame rate but lower resolution. Rather than thinking of them as “main and backup” cameras, think how to complement them with two different lenses.

        Examples of such complementary pairs might be the Fujifilm X-H2 and X-H2S or the Nikon Z7 II and Z6 II. Not all cameras have an obvious sibling, so if you need to designate one camera as your backup, so be it.

        Some of the best wildlife photography cameras today include the Nikon Z9, Canon EOS R3, Canon EOS R5, Canon EOS R6 II, Sony A1, Sony A9 series, and Sony A7R V. There are also many good crop-sensor options from Fujifilm and OM System (Olympus), not to mention various DSLRs that represent a great bargain on the used market today. And this only scratches the surface – it’s hard to go wrong.


        تعليق


        • #5

          العدسات

          عندما يتعلق الأمر بالعدسات، فالأقل يعني الكثير في كثير من الأحيان. وليس فقط لأنه سيكون لديك حقيبة أخف. إذا قمت بتحديد خيارات العدسات الخاصة بك، فستعرف ما يجب عليك إخراجه من حقيبتك فور رؤية هدف جيد - لن يضيع أي وقت في اختيار العدسات.

          ضع في اعتبارك أيضًا حدود الحجم والوزن التي تضعها شركات الطيران على الأمتعة المحمولة. في رحلة جوية أخيرة من الإكوادور، طُلب مني أن أضع حقيبتي على الميزان الموجود على المنضدة. قرأت شيئًا مثل 19 كجم. هذا أكثر من ضعف الحد الأقصى للوزن! لحسن الحظ، علقت المضيفة قائلة: "un poco pesado, pero bien" (ثقيل بعض الشيء، لكن حسنًا). لقد سمعت قصصًا أخرى، ولا أريد أن أغري القدر كثيرًا. إذًا، ما هي العدسات التي يجب أن تحضرها معك؟

          العدسات ذات الزاوية الواسعة: بالنسبة لتصوير الحياة البرية، قد لا تحتاج إلى عدسة واسعة الزاوية في كثير من الأحيان، ولكنني لا أريد أبدًا أن أكون بدون واحدة على أي حال. أفضّل السفر باستخدام عدسة تكبير f/4 خفيفة الوزن، أو عدسة أساسية f/1.8 خفيفة الوزن، ولكن ليس كليهما معًا. يعتمد ذلك على مدى قاتمة بيئتك. تعجبني مرونة التكبير/التصغير، لكن فتحة العدسة f/1.8 تجمع الكثير من الضوء في الغابات المعتمة.

          العدسات العادية: ستندهش من عدد المرات التي أستخدم فيها العدسات العادية لتصوير الحياة البرية. ربما يرجع ذلك إلى أنني أصبحت أستمتع بالتقاط صور للحياة البرية القريبة، مثل الثعابين والسحالي. حتى لو لم ينطبق ذلك عليك، ستكون العدسة العادية مفيدة لالتقاط الصور أثناء التنقل والصور الوثائقية لرحلتك. أنا شخصيًا أستخدم عدسة Nikon Z مقاس 24-120 مم f/4 S (راجع مراجعتنا) ولدى معظم الشركات شيء مماثل.

          العدسات المقربة: إذا كان لديك حقيبة ظهر واحدة فقط للصور - وهو ما أوصي به - فمن المحتمل أنك لن تجد مساحة لعدستين تقريب كبيرتين. هذا ينطبق بشكل خاص على أنظمة الكاميرا ذات الإطار الكامل. ومع ذلك، يمكنك دائمًا حمل عدسة مقربة أصغر للأطوال البؤرية الأكثر اعتدالًا، مثل Canon RF 70-200mm f/4، أو Sony 70-300mm f/4.5-5.6، أو Nikon F 300mm f/4 PF.

          Lenses


          Where lenses are concerned, less often means more. And not just because you’ll have lighter bag. If you limit your lens choices, you’ll know what to pull out of your bag immediately upon seeing a good subject – no time wasted picking lenses.

          Also keep in mind the size and weight limits of airlines on carry-on luggage. On a recent flight from Ecuador, I was asked to put my carry-on on the scale at the counter. It read something like 19kg. That’s more than double the weight limit! Fortunately, the flight attendant commented, “un poco pesado, pero bien” (a bit heavy, but okay). I have heard other stories though, and I don’t want to tempt fate too much. So, what lenses to bring with you?

          Wide-angle lenses: For wildlife photography, you may not need a wide-angle lens very often, but I would never want to be without one anyway. I prefer traveling with either a lightweight f/4 zoom, or a lightweight f/1.8 prime – not both, though. It depends on how dim your environment will be. I like the flexibility of zooms, but an f/1.8 aperture gathers a lot of light in dim forests.

          Normal lenses: You’d be surprised how often I use normal lenses for wildlife photography. Maybe that’s because I’ve grown to enjoy taking photos of nearby wildlife, like snakes and lizards. Even if that doesn’t apply to you, a normal lens will be useful for on-the-go and documentary photos of your trip. I personally use the Nikon Z 24-120mm f/4 S lens (see our review) and most companies have something similar.

          Telephoto lenses: If you only have one photo backpack – which I recommend – you probably won’t find room for two large telephoto lenses. This is especially true for full-frame camera systems. However, you could always carry a smaller telephoto for the more moderate focal lengths, such as the Canon RF 70-200mm f/4, Sony 70-300mm f/4.5-5.6, or Nikon F 300mm f/4 PF.

          تعليق


          • #6
            بعد ذلك، بالنسبة للعدسة المقربة الرئيسية، يمكنك إضافة أي شيء في نطاق 400 مم إلى 800 مم. لقد كتب جايسون بالفعل دليلاً رائعًا لاختيار العدسات الجيدة لتصوير الحياة البرية، لذا لن أخوض في الكثير من التفاصيل هنا. ويكفي أن نقول أن هناك مقايضة بين السعر، والحد الأقصى للفتحة، والبعد البؤري الذي يصعب تجنبه. سيكون الاختيار المتطور مثل 400 مم f / 2.8 أغلى بكثير وأثقل من 500 مم f / 5.6 على سبيل المثال. إذا كانت ميزانيتك محدودة، فهناك أيضًا خيارات من شركات خارجية مثل Sigma وTamron.

            NIKON Z 9 + NIKKOR Z مقاس 400 مم f/2.8 TC VR S @ 560 مم، ISO 3200، 1/1600، f/5.0

            عدسات الماكرو: هناك خياران أساسيان هنا. عدسات ماكرو ذات أطوال بؤرية أطول (عادة حوالي 100 مم) وعدسات ماكرو واسعة الزاوية (حوالي 15 مم). النوع الأول هو الأكثر شيوعًا ويسمح لك بالتقاط صور ماكرو كلاسيكية بخلفيات ضبابية. لقد كنت أمتلك حتى وقت قريب عدسة Sigma 105mm f/2.8 EX DG OS HSM في حقيبتي. ومع ذلك، في بعثتي الأخيرة، استبدلتها بكاميرا Nikon Z MC مقاس 105 مم f/2.8 VR S.

            ومع ذلك، تكتسب عدسات الماكرو واسعة الزاوية شعبية - مثل Venus Optics Laowa مقاس 15 مم f/4 (للإطار الكامل) أو Panasonic Leica DG Summilux 9 مم f/1.7 ASPH (لـ Micro 4/3). تُظهر هذه العدسات الكثير من المناطق المحيطة والسياق، على الرغم من أنها تتطلب منك الاقتراب بشدة من موضوعك.

            DC-G9 + LEICA DG SUMMILUX 9 مم F1.7 @ 9 مم، ISO 100، 1/250، f/11.0 © نيكولاس هيس


            Then, for your main telephoto lens, you can add anything in the 400mm to 800mm range. Jason has already written a great guide to choosing good lenses for wildlife photography, so I won’t go into too much detail here. Suffice to say that there is a tradeoff between price, maximum aperture, and focal length that is hard to avoid. A high-end choice like a 400mm f/2.8 will be a lot more expensive and heavy than, say, a 500mm f/5.6. If you’re on a budget, there are also choices from third-party companies like Sigma and Tamron.
            NIKON Z 9 + NIKKOR Z 400mm f/2.8 TC VR S @ 560mm, ISO 3200, 1/1600, f/5.0
            Macro lenses: There are basically two options here. Macro lenses with longer focal lengths (typically around 100mm) and wide-angle macro lenses (around 15mm). The first type is much more popular and allows you to take classic macro photographs with blurry backgrounds. I myself until recently had a Sigma 105mm f/2.8 EX DG OS HSM in my backpack. However, on my last expedition, I replaced it with the Nikon Z MC 105mm f/2.8 VR S.

            Wide-angle macro lenses are gaining popularity, however – such as the Venus Optics Laowa 15mm f/4 (for full-frame) or the Panasonic Leica DG Summilux 9mm f/1.7 ASPH (for Micro 4/3). These lenses show a lot more surroundings and context, although they require you to get extremely close to your subject.
            DC-G9 + LEICA DG SUMMILUX 9mm F1.7 @ 9mm, ISO 100, 1/250, f/11.0 © Nicholas Hess

            تعليق


            • #7
              المحولات عن بعد

              يتيح لك محول التقريب إمكانية تمديد البعد البؤري للعدسة المقربة بمقدار 1.4 إلى 2.0 مرة (بشكل عام). على الرغم من أن هذا يبدو مغريًا، إلا أنك ستدفع الثمن في شكل فتحة عدسة منخفضة وجودة صورة أسوأ. كلما زاد تكبير محول التقريب الخاص بك، أصبحت هذه المشكلات أكثر وضوحًا. تميل الإصدارات الأحدث من محولات التقريب أيضًا إلى أن تكون أفضل من الإصدارات القديمة.

              NIKON Z 9 + NIKKOR Z مقاس 400 مم وبفتحة f/2.8 TC VR S Z TC-2x عند 800 مم، ISO 2000، 1/50، f/6.3


              Teleconverters


              A teleconverter allows you to extend the focal length of your telephoto lens by (generally) 1.4 to 2.0 times. While that sounds tempting, you’ll pay the price in the form of reduced lens aperture and worse image quality. The higher the magnification of your teleconverter, the more these issues become apparent. Newer versions of teleconverters also tend to be better than older ones.
              NIKON Z 9 + NIKKOR Z 400mm f/2.8 TC VR S Z TC-2x @ 800mm, ISO 2000, 1/50, f/6.3

              تعليق


              • #8

                المرشحات

                لا يُعرف تصوير الحياة البرية عمومًا باستخدام المرشحات. ما زلت أحمل في بعض الأحيان مستقطبًا دائريًا بالإضافة إلى حلقات تصاعدية، لكنني لا أستخدمه إلا في حالات معينة جدًا (مثل أن يكون هدفي على الماء في ظروف مشرقة). قد يكون مرشح الأشعة فوق البنفسجية مفيدًا أيضًا إذا كنت تقوم بالتصوير في ظروف قاسية، مثل الرمال التي تهب في رياح شديدة.

                بشكل عام، ما لم تكن لديك صورة معينة في ذهنك، فلا أرى سببًا كبيرًا لاستخدام مساحة الحقيبة للمرشحات كمصور للحياة البرية. ومع ذلك، إذا كنت تقوم أيضًا بتصوير المناظر الطبيعية، فقد ترغب في إضافة مجموعة من مرشحات ND وGrad ND لتكملة المستقطب.

                Filters


                Wildlife photography is not generally known for the use of filters. I still sometimes carry a circular polarizer plus step up rings, but I only use it in very particular cases (like, my subject is on the water in bright conditions). A UV filter may also be useful if you’re photographing in extreme conditions, like sand blowing in a fierce wind.

                In general, unless you have a particular photo in mind, I don’t see much reason to use bag space for filters as a wildlife photographer. However, if you are also doing landscape photography, you may want to add in a set of ND and Grad ND filters to supplement the polarizer.

                تعليق


                • #9
                  ومضات والناشرون

                  لقد مرت بضع سنوات منذ آخر مرة استخدمت فيها فلاش الكاميرا! ومع ذلك، فأنا أستخدم الفلاش بعيدًا عن الكاميرا في كثير من الأحيان. وينطبق هذا بشكل خاص على التصوير الفوتوغرافي الماكرو والتقاط الحياة البرية في الليل.

                  أفضل استخدام فلاش الراديو - مع زوج من جهاز الإرسال وجهاز الاستقبال - بدلاً من أي طريقة مزامنة أخرى. هذه الطريقة موثوقة، ولا يلزم أن تكون الومضات على مرمى البصر من قائد الأشعة تحت الحمراء.

                  إذا لم يكن لديك أي فلاشات حتى الآن، فإنني أوصي بشراء تلك التي تحتوي بالفعل على جهاز استقبال مدمج. فهي أكثر ملاءمة للعمل معها. ما عليك سوى توصيل وحدة التحكم بالكاميرا وستكون جاهزًا للبدء. بالإضافة إلى الحلول الأصلية التي تقدمها الشركات المصنعة للكاميرات نفسها، هناك أيضًا بدائل أرخص ولكن عالية الجودة. على سبيل المثال، هذا الفلاش من Godox ووحدة التحكم المصاحبة له.

                  كاميرا نيكون D750 عند 105 ملم، ISO 250، 1/250، f/20.0

                  عادةً ما يكون الضوء المنبعث من الفلاش العاري قاسيًا للغاية ويبدو غير طبيعي ومشتتًا للانتباه في الصورة. ولذلك فمن المستحسن لتخفيف الضوء. هناك العديد من أجهزة النشر لهذا الغرض. من الخيارات الجيدة للفلاش الموجود على الكاميرا هو موزع Beetle. بالنسبة للفلاش الموجود خارج الكاميرا، هناك مجموعة واسعة من أجهزة النشر المختلفة بأحجام مختلفة (إليك واحدًا عشوائيًا لإظهار كيف يجب أن يبدو).

                  أقترح اختيار ناشر يمكن طيه ونقله بسهولة في حقيبة الظهر

                  Flashes and Diffusers


                  It’s been a few years since I last used on-camera flash! I use the flash off-camera quite often, though. This is especially true for macro photography and for capturing wildlife at night.

                  I prefer to use a radio flash – with a pair of transmitter and receiver – rather than any other sync method. This method is reliable, and the flashes do not need to be within the sight of the infrared commander.

                  If you don’t have any flashes yet, I recommend buying ones that already have a receiver built in. They are much more convenient to work with. You just connect the control unit to the camera and you’re ready to start. In addition to the original solutions offered by the camera manufacturers themselves, there are also cheaper but still high-quality alternatives. For example, this flash from Godox and an accompanying control unit.
                  NIKON D750 @ 105mm, ISO 250, 1/250, f/20.0
                  The light emitted by a bare flash is usually too harsh and looks unnatural and distracting in the photo. It is therefore desirable to soften the light. There are various diffusers for this purpose. A good option for on-camera flash is the Beetle diffuser. For off-camera flash, there is a wide variety of different diffusers of different sizes (here’s one at random to show how it should look).

                  I suggest choosing a diffuser that can be easily folded and transported in a backpack

                  تعليق


                  • #10
                    البطاريات والشواحن والكابلات

                    قد يبدو الأمر واضحًا، لكن أحضر ما يكفي من البطاريات! أنت دائمًا تريد قطعة احتياطية مشحونة بالكامل في حقيبتك، على الأقل. قد تكون بطاريتين كافيتين إذا كان لديك كاميرا عالية السعة مثل Nikon Z9 أو DSLR. من ناحية أخرى، أريد 3-4 بطاريات مع كاميرا مثل Nikon Z6 II أو Z7 II.

                    لشحن بطاريات متعددة، احصل على شاحن مثل هذا الذي يمكنه شحن بطاريات متعددة في وقت واحد عبر USB. وهذا يجعل من السهل حقًا ملء البطاريات الخاصة بك طوال الليل أو حتى في سيارة مستأجرة.

                    تأكد من أن لديك طريقة احتياطية لشحن بطاريات الكاميرا! من الممكن أن ينكسر أي شاحن بطارية أو يُترك في الفندق السابق عن طريق الخطأ. إذا كانت الكاميرا الخاصة بك تسمح بالشحن المباشر عبر USB، فهذا يعمل. بخلاف ذلك، أوصي بشدة بإحضار شاحنين.

                    لا تنس جميع البطاريات الأخرى التي تستخدمها لأجهزتك. حاول تقليل عدد أجهزة الشحن، على سبيل المثال، باستخدام محول مثل هذا عند السفر إلى الخارج.

                    وأخيرًا، لا تتوفر الكهرباء في الفندق دائمًا، لذا يمكن أن يكون بنك الطاقة مفيدًا. بالإضافة إلى ذلك، إذا كان عليك الشحن في مكان عام، فإن بنك الطاقة يتيح لك شحن أجهزتك القريبة مع تقليل خطر السرقة.

                    كاميرا نيكون D300 بمقاس 18 مم، ISO 500، 1/25، f/6.3


                    Batteries, Chargers, and Cables


                    It may sound obvious, but bring enough batteries! You always want a fully-charged spare in your bag, at least. Two batteries may be enough if you have a high-capacity camera like the Nikon Z9 or a DSLR. On the other hand, I’d want 3-4 batteries with a camera like the Nikon Z6 II or Z7 II.

                    For charging multiple batteries, get a charger like this one that can charge multiple batteries simultaneously over USB. This makes it really easy fill up your batteries overnight or even in a rental car.

                    Make sure to have a backup way to charge your camera batteries! Any battery charger could break – or be left behind at the previous hotel on accident. If your camera allows direct charging over USB, that works. Otherwise, I highly recommend bringing two chargers.

                    Don’t forget all the other batteries you use for your devices. Try to reduce the number of chargers by, for example, taking an adapter like this one when you travel abroad.

                    Finally, electricity in the hotel isn’t always a given, so a power bank can come in handy. Plus, if you have to charge in a public place, a power bank lets you charge your devices nearby with less risk of being stolen.
                    NIKON D300 @ 18mm, ISO 500, 1/25, f/6.3

                    تعليق


                    • #11
                      بطاقات الذاكرة

                      من الأفضل أن تأخذ عدة بطاقات أصغر من بطاقة واحدة كبيرة. لقد أدركت هذه الحقيقة تمامًا عندما ذهبت إحدى بطاقات CFexpress-B الجديدة بسعة 256 جيجابايت إلى جنة السيليكون. لحسن الحظ، لم يكن لدي سوى ساعتين من التصوير الفوتوغرافي. على أية حال، هذه الحادثة هزت إيماني بخلود بطاقات الذاكرة، حتى أحدث خيارات CF Express. والآن سأستخدم دائمًا الفتحة المزدوجة للنسخ الاحتياطي، وليس التجاوز.

                      أما بالنسبة لسرعة بطاقات الذاكرة الخاصة بك، فالأمر كله يعتمد على ما تخطط للقيام به بها. هل ستقوم بتصوير الحيوانات باستخدام رشقات نارية مستمرة عالية السرعة؟ أو تسجيل مقاطع فيديو بدقة 8K؟ إذن ستحتاج إلى شيء سريع جدًا. لا تبخل هنا! تذكر أيضًا تضمين قارئ وحافظة آمنة لبطاقاتك.


                      Memory Cards


                      It’s better to take several smaller cards than one large one. I fully realized this fact when one of my new 256GB CFexpress-B cards went to silicon heaven. Fortunately, I had “only” two hours of photography on it. Anyway, this incident shook my faith in the immortality of memory cards, even the newest CF Express options. And now I’m always going to use the dual slot for backup, not overflow.

                      As for the speed of your memory cards, it all depends on what you plan to do with them. Are you going to photograph animals using high-speed continuous bursts? Or record 8K videos? Then you’ll need something really, really fast. Don’t skimp here! Also, remember to include a reader and a secure case for your cards.

                      تعليق


                      • #12
                        حوامل ثلاثية ورؤوس ترايبود

                        للسفر، من المنطقي اختيار حامل ثلاثي القوائم خفيف الوزن وقوي من ألياف الكربون. من المؤكد أن نماذج سبائك الألومنيوم ستؤدي الغرض أيضًا، لكنها أثقل من نماذج ألياف الكربون لنفس المستوى من الثبات. إذا لم تكن متأكدًا مما يجب مراعاته عند اختيار واحد، فيمكن أن تساعدك مقالتنا كيفية اختيار حامل ثلاثي الأرجل وشرائه.

                        لقد ناقشت اختيار الرأس المناسب لتصوير الحياة البرية في بداية تقييمي لـ LensMaster RH-2. بشكل عام، تعد رؤوس المحورين هي الأفضل للعمل مع العدسات المقربة الطويلة. ومع ذلك، فهذه رؤوس كبيرة ومتخصصة.

                        أنا لا أعارض استخدام رأس كروي عندما تقوم بالتصوير تحت 300 ملم. وبدلاً من ذلك، هناك عدد قليل من الرؤوس الكروية التي تحتوي على بعض الميزات المشابهة للمحور الثنائي، مثل هذا من Acratech وهذا من FlexShooter.

                        بالإضافة إلى الحامل ثلاثي الأرجل للكاميرا، آخذ معي أيضًا حاملين ثلاثي القوائم صغيرين، بما في ذلك هذا الحامل الرخيص. أستخدمها للومضات ولتركيب مسجل الصوت (المزيد حول ذلك بعد قليل)، بالإضافة إلى أشياء مثل مقاطع الفيديو ذات اللقطات المتتابعة باستخدام هاتفي.

                        كاميرا نيكون D500 + 11-16 مم f/2.8 @ 16 مم، ISO 1250، 1/125، f/7.1


                        Tripods and Tripod Heads


                        For travel, it makes the most sense to pick a lightweight and strong carbon fiber tripod. Aluminum alloy models will certainly also serve the purpose, but they are heavier than carbon fiber models for the same level of stability. If you’re not sure what to consider when choosing one, our article How to Choose and Buy a Tripod can help.

                        I discussed choosing the right head for wildlife photography at the beginning of my LensMaster RH-2 review. Generally speaking, gimbal heads are best for working with long telephoto lenses. However, these are large, specialized heads.

                        I’m not opposed to a ballhead when you’re shooting under 300mm. Alternatively, there are a few ballheads with some gimbal-like features, like this one from Acratech and this one from FlexShooter.

                        In addition to the camera tripod, I also take two mini tripods with me, including this cheap one. I use these for flashes and to mount an audio recorder (more on that in a moment), as well as things like timelapse videos with my phone.
                        NIKON D500 + 11-16mm f/2.8 @ 16mm, ISO 1250, 1/125, f/7.1

                        تعليق


                        • #13


                          معدات أخرى

                          مسجل الصوت

                          في الماضي، قمت بتسجيل أصوات الطيور والطبيعة بدلاً من التقاط الصور أثناء بحثي الميداني. في الوقت الحاضر أصبح الأمر على العكس من ذلك، لكني ما زلت أحب تسجيل أصوات الطبيعة في المواقع التي أزورها. في الصباح، وأنا لا أزال في ظلام دامس، أستيقظ وأذهب لوضع مسجل الصوت. أثناء التصوير، تقوم ميكروفونات الاستريو بتسجيل جوقة فجر الغابة. أستخدم التسجيلات الناتجة لمتعتي الخاصة أو كخلفية صوتية لمحاضراتي. هل تعلم أن أغاني الطيور تشفي؟ جربها!

                          كاميرا نيكون D300 + 11-16 ملم f/2.8 @ 11 ملم، ISO 400، 1/40، f/4.5

                          Other Gear

                          Audio Recorder


                          In the past, I have recorded the sounds of birds and nature rather than taking photographs during my field research. Nowadays it’s the other way around, but I still like to record the sounds of nature at the locations I visit. In the morning, still in deep darkness, I get up and go to place the audio recorder. While I’m shooting, the stereo microphones record the forest dawn chorus. I use the resulting recordings for my own enjoyment or as a sound backdrop for my lectures. Did you know that bird-songs heal? Try it!
                          NIKON D300 + 11-16mm f/2.8 @ 11mm, ISO 400, 1/40, f/4.5

                          تعليق


                          • #14
                            كاميرا العمل

                            عندما أتردد في أخذ الكاميرا الخاصة بي، فإنني أميل إلى إحضار كاميرا مخصصة للحركة. لن تتطابق جودة الصورة مع كاميرا DSLR المناسبة أو مجموعة أدوات بدون مرآة، ولكن من الأفضل أن تحصل على صورة بدلاً من العودة إلى المنزل خالي الوفاض! أستخدم ميزتي للتصوير تحت الماء، بالإضافة إلى تصوير الأفلام بفواصل زمنية ومقاطع فيديو بطيئة الحركة. من الأجهزة الكلاسيكية التي أثبتت جدواها في هذا المجال هي كاميرا GoPro، ولكن هناك العديد من الإمكانيات.

                            الكمبيوتر أو الكمبيوتر اللوحي ومحركات أقراص SSD

                            ستحتاج إلى كمبيوتر محمول أو جهاز لوحي لإجراء نسخ احتياطي لصورك بشكل منتظم أثناء السفر. الوزن الخفيف، وعمر البطارية الطويل، والشاشة ذات الجودة الجيدة هي أولوياتي الثلاث. من بين أجهزة الكمبيوتر المحمولة التي تعمل بنظام التشغيل Windows، أوصي بجهاز Dell XPS 13، على سبيل المثال. في حالة نظام التشغيل Mac OS، فإن جهاز Apple MacBook Air مصمم للسفر. وبدلاً من ذلك، باستخدام جهاز iPad Pro المزود بشريحة M2، يمكنك تقليل الوزن قليلاً مع الحفاظ على الأداء الكافي.

                            أحد أسوأ الأشياء التي يمكن أن تحدث لك كمصور هو فقدان صورك. القاعدة الذهبية هي عمل نسخة احتياطية لصورك الثمينة يوميًا أثناء سفرك. تعد محركات أقراص SSD السريعة ذات السعة الكافية هي الأفضل لهذا الغرض. بالنسبة لرحلة استكشافية مدتها أسبوعين باستخدام كاميرا عالية الدقة، أوصي بمحركين أقراص بسعة 2 تيرابايت. إذا كانت دقة الكاميرا الخاصة بك حوالي 20 ميجابكسل، فمن المحتمل أن يكون نصف هذه السعة كافيًا.

                            إنها عادة جيدة أن تحتفظ برحلة واحدة في غرفتك بالفندق وتحمل الأخرى في حقيبة ظهرك. إذا زار لص فندقك، فلا يزال لديك قرص واحد معك. في حال أكل تمساح أنت وحقيبة ظهرك، على الأقل ستترك وراءك بعض الصور الجميلة.

                            كاميرا نيكون D300 + 17-50 مم f/2.8 @ 17 مم، ISO 400، 1/13، f/8.0


                            Action Camera


                            Where I’d hesitate to take my camera, I tend to bring along a dedicated action camera. The image quality won’t match a proper DSLR or mirrorless kit, but it’s better to get a photo than come home empty-handed! I use mine to shoot underwater, as well as film time lapses and slow motion videos. A proven classic in this field is the GoPro but there are many possibilities.
                            Computer or Tablet and SSD Drives


                            You’ll need a laptop or tablet to back up your photos regularly while you travel. Light weight, long battery life, and a good quality monitor are my three priorities. Of the laptops that run on Windows, I would recommend the Dell XPS 13, for example. In the case of Mac OS, the Apple MacBook Air is made for travel. Alternatively, with an iPad Pro equipped with the M2 chip, you shave the weight down a bit more while keeping the performance sufficient.

                            One of the worst things that can happen to you as a photographer is losing your photos. The golden rule is to back up your precious photos daily while you travel. Fast SSDs with sufficient capacity are best for this. For a two-week expedition with a high-resolution camera, I recommend two 2TB drives. If your camera has a resolution somewhere around 20MP, half that capacity will probably be sufficient.

                            It’s a good habit to keep one drive in your hotel room and carry the other in your backpack. If your hotel is visited by a thief, you still have one disk with you. In case you and your backpack are eaten by a crocodile, at least you’ll leave behind some nice photos.
                            NIKON D300 + 17-50mm f/2.8 @ 17mm, ISO 400, 1/13, f/8.0

                            تعليق


                            • #15
                              حقائب الظهر والمنظمين والحقائب

                              حقيبة ظهر للصور

                              اختيار حقائب الظهر المصورة كبير، على أقل تقدير. على المستوى الأساسي، يجب عليك اختيار طراز يمكنه حمل معداتك ولا يتجاوز الأبعاد المسموح بها لحقائب اليد على متن الطائرة.

                              أفضّل حقائب الظهر التي تفتح من "الجانب القريب" الذي يلامس ظهرك. بهذه الطريقة، يمكنك الوصول إلى معداتك أثناء وضع حقيبة الظهر على الأرض، دون أن يتراكم الطين أو الأوساخ على الجزء الذي يلامس ظهرك. وبالطبع، يجب أن تتحمل حقيبة الظهر المطر أو على الأقل تحتوي على معطف واق من المطر عالي الجودة.

                              شخصيًا، أستخدم حاليًا حقيبة الظهر للسفر من Peak Design. تُصنع Shimoda أيضًا حقائب ظهر رائعة.

                              الأمتعة الرئيسية

                              إلى جانب حقيبة الصور الخاصة بك، أوصي أيضًا بإحضار حقيبة أخرى لأمتعتك الرئيسية. في حين أن الحقيبة الكلاسيكية ذات المقبض والعجلات تعتبر مريحة في الحضارة، إلا أن جرها خلفك في الوحل ليس بالأمر المثالي. يعتمد ذلك على المكان الذي تسافر إليه. ولكن بشكل عام، أوصي بحقيبة الظهر أو القماش الخشن الذي يمكن حمله بسهولة. أنا أيضًا من أشد المعجبين بمكعبات التعبئة مثل هذه المكعبات للحفاظ على تنظيم أغراضك.

                              حقيبة ظهر خفيفة

                              إذا كنت تريد فقط الذهاب للنزهة، أو شراء الهدايا التذكارية، أو السفر بكاميرا خفيفة الوزن ليوم واحد، فقد تكون حقيبة الظهر الصغيرة مفيدة. هناك العديد من الخيارات. تتضمن تلك التي أثبتت جدواها تلك الموجودة في Osprey أو Sea to Summit.


                              Backpacks, Organizers, and Pouches


                              Photo Backpack

                              The selection of photo backpacks is large, to say the least. At the most basic level, you should choose a model that can hold your gear and does not exceed the dimensions allowed for hand luggage on the plane.

                              I prefer backpacks that open from the “near side” that touches your back. This way, you can access your gear while the backpack is laying on the ground, without getting mud or dirt on the part that touches your back. And of course, the backpack should withstand rain or at least have a good quality raincoat.

                              Personally, I currently use a Peak Design Travel Backpack. Shimoda also makes great backpacks.

                              Main Luggage

                              Alongside your photo backpack, I also recommend bringing another bag for your main luggage. While a classic suitcase with a handle and wheels is convenient in civilization, dragging it behind you in the mud is not ideal. It depends on where you’re traveling. But in general, I recommend a backpack or duffel that can be carried easily. I’m also a big fan of packing cubes like this one to keep your things organized.

                              Ultralight Backpack

                              If you just want to go for a walk, buy souvenirs, or travel with a lightweight camera for a day, a tiny backpack can come in handy. There are many options. Proven ones include those from Osprey or Sea to Summit.

                              تعليق

                              يعمل...
                              X