إعدادات نيكون D750 الموصى بها Recommended Nikon D750 Settings

تقليص
X
 
  • تصفية - فلترة
  • الوقت
  • عرض
إلغاء تحديد الكل
مشاركات جديدة

  • إعدادات نيكون D750 الموصى بها Recommended Nikon D750 Settings

    إعدادات نيكون D750 الموصى بها
    Recommended Nikon D750 Settings
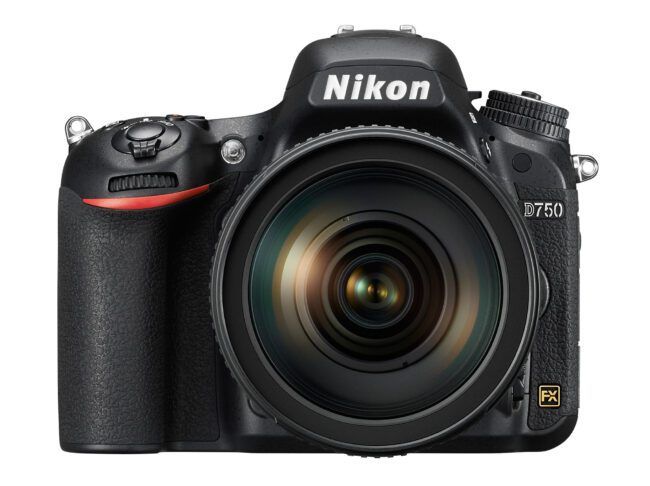
    تُعد كاميرا Nikon D750 كاميرا متقدمة تحتوي على العديد من القوائم والإعدادات المختلفة، ويمكن أن تكون مربكة لكثير من المصورين في البداية. لذا، في هذه المقالة، أريد شرح جميع إعدادات الكاميرا على كاميرا Nikon D750 وتقديم بعض التوصيات حول كيفية ضبط الكاميرا بشكل صحيح. من فضلك ضع في اعتبارك أنه على الرغم من أن هذه الإعدادات تناسبني، إلا أن هذا لا يعني أنه يجب على الجميع التصوير بنفس الإعدادات تمامًا. يتم توفير المعلومات الواردة أدناه كدليل لأولئك الذين يريدون فقط البدء بالفهم الأساسي للكاميرا وميزاتها العديدة.


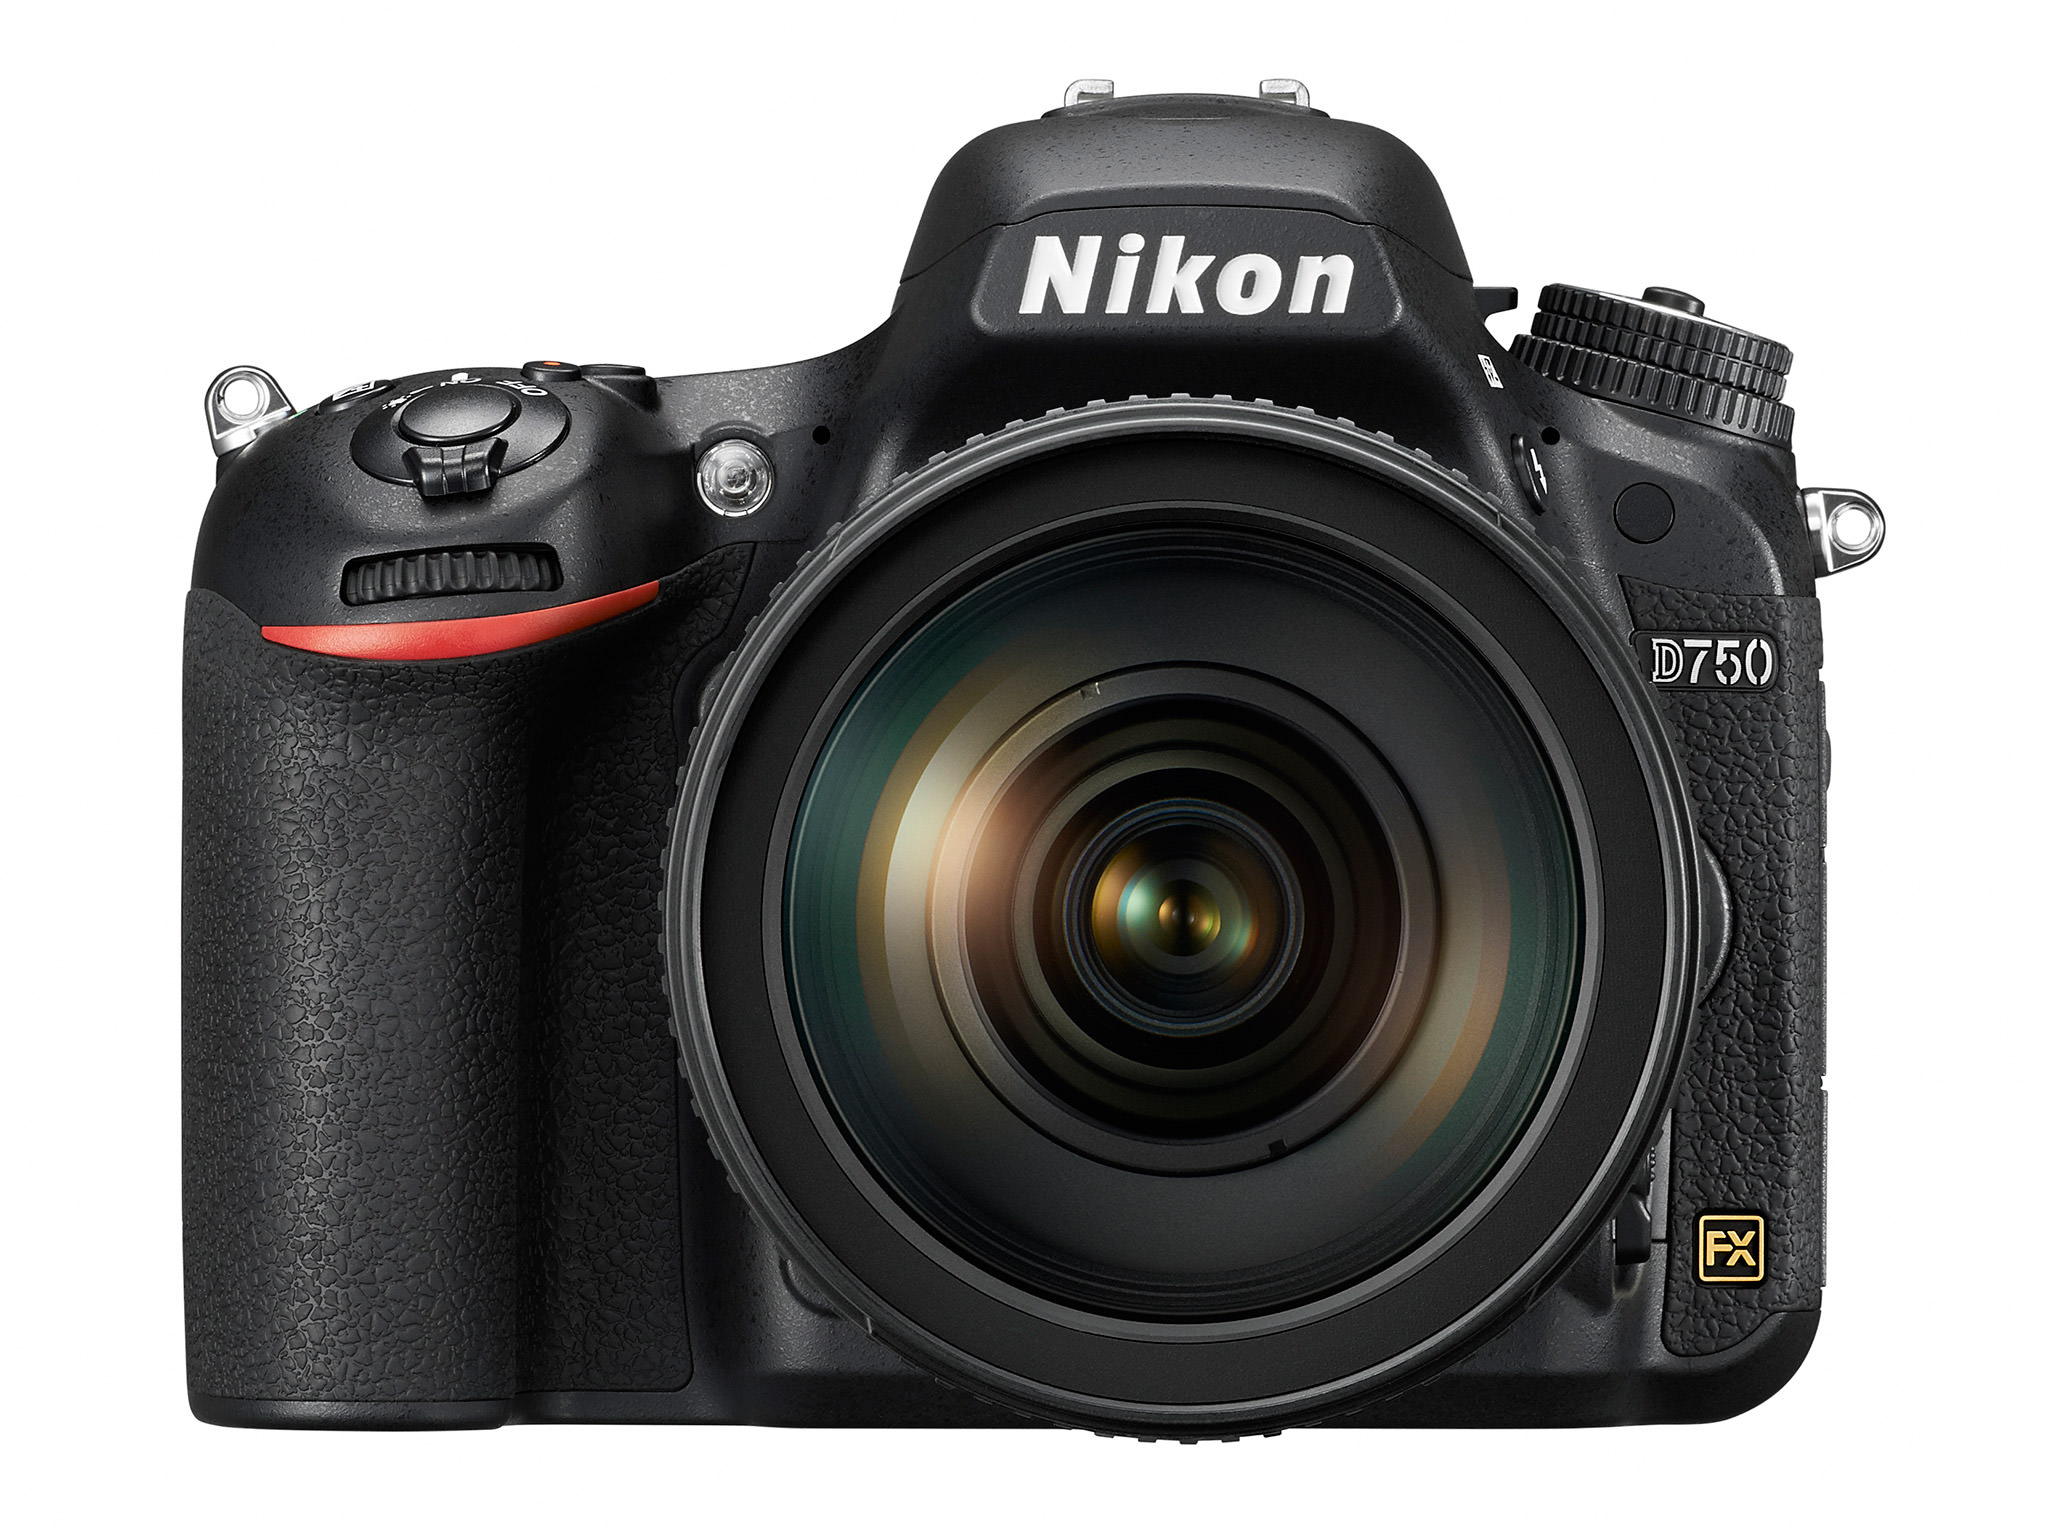
    قبل الدخول إلى قائمة الكاميرا، فلنبدأ أولاً في عناصر التحكم الخارجية. تحتوي كاميرا D750 على الكثير من خيارات القائمة، ولكن هناك بعض الأشياء التي لا يمكنك التحكم فيها إلا باستخدام عناصر التحكم الخارجية.


    The Nikon D750 is an advanced camera with many different menus and settings, and it can be overwhelming for a lot of photographers at first. So, in this article, I want to explain all the camera settings on the Nikon D750 and provide some recommendations for how to set your camera properly. Please do keep in mind that while these settings work for me, it does not mean that everyone else should be shooting with exactly the same settings. The below information is provided as a guide for those that just want to get started with a basic understanding of the camera and its many features.


    Before going into the camera menu, let’s first get started on the exterior controls. The D750 has a lot of menu options, but there are some things that you can only control with external controls.

  • #2
    أوضاع التركيز التلقائي، والتصحيح، والفلاش

    في الجزء الأمامي الأيسر من الكاميرا، ستجد رافعة تنتقل من AF إلى M، مع وجود زر في المنتصف (دائرة حمراء كبيرة في الصورة أدناه). تأكد من إبقاء هذا الرافعة على وضع "AF"، وإلا فلن تقوم العدسة بالتركيز التلقائي. إذا توقفت عدستك عن التركيز لسبب ما، فهذا هو ما يجب عليك التحقق منه أولاً. يتيح لك الضغط على الزر الموجود في منتصف الذراع الاختيار بين أوضاع التركيز المختلفة.


    لتنشيط هذا التغيير، تحتاج إلى الضغط مع الاستمرار على الزر، ثم تدوير القرص الخلفي بإبهامك. أثناء قيامك بذلك، انظر إلى شاشة LCD العلوية وستقوم الكاميرا بالتبديل بين AF-A وAF-S وAF-C. لن أخوض في الكثير من التفاصيل حول كل وضع من أوضاع التركيز، حيث تم شرح كل ذلك بالتفصيل في هذه المقالة التي كتبتها منذ فترة. هنا خلاصة سريعة:

    AF-S - يُسمى هذا الوضع "Single-servo AF" ويستخدم فقط للأهداف الثابتة التي لا تتحرك. عندما تضغط نصف زر على زر الغالق، يتم قفل التركيز البؤري التلقائي على الهدف وإذا تحرك الهدف، فلن يتغير التركيز، مما يؤدي إلى صورة ضبابية. استخدم هذا الوضع فقط لتصوير الأهداف الثابتة (المناظر الطبيعية، والهندسة المعمارية، وما إلى ذلك). AF-C - المعروف باسم "التركيز البؤري التلقائي المستمر" في لغة نيكون، يُستخدم هذا الإعداد لتصوير الأهداف المتحركة. عندما تضغط نصف زر على زر الغالق ويتحرك هدفك، ستعيد الكاميرا التركيز. أحتفظ عادةً بالكاميرا في وضع التركيز البؤري التلقائي AF-C عند تصوير الأشخاص، وخاصة أطفالي وهم يركضون. AF-A - هذا الوضع موجود فقط في الكاميرات المنخفضة الجودة لتسهيل الأمر على المبتدئين. في الأساس، إنه مزيج من الوضعين المذكورين أعلاه في إعداد واحد. تقوم الكاميرا بتقييم الموضوع/المشهد والتبديل تلقائيًا بين الوضعين المذكورين أعلاه اعتمادًا على ما تقوم بتصويره.

    إذا كنت لا تعرف من أين تبدأ، فاحتفظ بالإعداد على AF-A، مما سيتيح للكاميرا أن تقرر كيفية التركيز في المواقف المختلفة.


    Autofocus Modes, Bracketing and Flash


    On the front left of the camera, you will find a lever that goes from AF to M, with a button in the middle (big red circle in the image below). Make sure to keep that lever on “AF”, or your lens will not autofocus. If for some reason your lens stops focusing, this is what need to check first. Pressing the button in the middle of the lever allows to choose between different focus modes.


    To activate this change, you need to press and hold the button, then rotate the rear dial with your thumb. As you do this, look at the top LCD and the camera will switch between AF-A, AF-S and AF-C. I won’t go into too much detail about each focus mode, since it is all explained in detail in this article that I wrote a while ago. Here is a quick recap:
    1. AF-S – this mode is called “Single-servo AF” and it is used only for stationary subjects that do not move. When you half-press the shutter button, autofocus lock on the subject and if the subject moves, the focus will not change, resulting in a blurry picture. Only use this mode for photographing stationary subjects (landscapes, architecture, etc).
    2. AF-C – known as “Continuous-servo AF” in Nikon’s lingo, this setting is used for photographing moving subjects. When you half-press the shutter button and your subject moves, the camera will re-acquire focus. I usually keep my camera in AF-C autofocus mode when photographing people, especially my kids running around.
    3. AF-A – this mode is only present on lower-end cameras to make it easier for beginners. Basically, it is a combination of the above two modes in one setting. The camera evaluates the subject/scene and automatically switches between the above two modes depending on what you are photographing.

    If you don’t know where to start, keep the setting on AF-A, which will let the camera decide on how to focus in different situations.

    تعليق


    • #3

      الآن إذا قمت بتدوير القرص الأمامي بإصبع السبابة أثناء الضغط على نفس الزر، فستحصل على العديد من الخيارات المختلفة مثل "S"، "D 9"، "D 21"، "D 51"، "3D"، "Grp" و"أوت". توجد هذه الإعدادات للتحكم في نقاط التركيز التي تراها داخل عدسة الكاميرا. مرة أخرى، تم بالفعل شرح معظم هذه الأمور بالتفصيل في المقالة الموضحة لأوضاع التركيز التلقائي، لذلك لن أخوض في الكثير من التفاصيل هنا. إذا كنت لا تعرف من أين تبدأ، فاحتفظ به على "S" (مفرد)، والذي يتيح لك اختيار نقطة تركيز واحدة ستستخدمها الكاميرا للتركيز. دعنا ننتقل إلى الضوابط الخارجية الأخرى.

      ستجد أعلى ذراع التركيز البؤري التلقائي / M زرين إضافيين: زر الفلاش، الذي يسمح لك بضبط تعويض الفلاش بدقة وتعيين معلمات الفلاش الأخرى مثل مزامنة الفلاش الأمامي/الخلفي، وزر BKT (تقوس) للإعداد بين قوسين على الكاميرا. إعدادات الفلاش لا تهم حقًا، ولكن في الوقت الحالي تأكد فقط من إيقاف تشغيل كل شيء وإظهار "0.0" عند الضغط عليه مع الاستمرار. وبالمثل، تأكد من إيقاف تشغيل الأقواس أيضًا بالضغط على الزر والتحقق من شاشة LCD الخلفية. يجب أن يظهر "0F" على الجانب الأيسر، مما يعني أنه تم إيقاف تشغيل التصحيح (يجب أن تختفي أحرف "BKT" أيضًا). سيسمح استخدام القرص الأمامي بتغيير خطوات التصحيح وسيغير القرص الخلفي عدد الإطارات التي تم التقاطها في تسلسل بين قوسين. تسمح كاميرا D750 بوضع ما يصل إلى 9 إطارات على حدة وما يصل إلى 3 نقاط توقف (EV).


      Now if you rotate the front dial with your index finger while holding the same button, you will get many different options like “S”, “D 9”, “D 21”, “D 51”, “3D”, “Grp” and “Aut”. These settings are there for controlling the focus points that you see inside the viewfinder. Once again, most of these are already explained in detail in my autofocus modes explained article, so I won’t go into too much detail here. If you don’t know where to start, keep it on “S” (Single), which lets you choose one single focus point that the camera will use for focusing. Let’s move on to other external controls.

      Right above the AF / M lever, you will find two additional buttons: the Flash button, which allows you to fine-tune flash compensation and set other flash parameters like front/rear flash sync, and the BKT (Bracketing) button to set up bracketing on the camera. Flash settings don’t really matter, but for now just make sure that everything is turned off and shows “0.0” when you press and hold it. Similarly, make sure that bracketing is also turned off by holding the button and checking the rear LCD. It should show “0F” on the left side, which means that bracketing is turned off (the “BKT” letters should also disappear). Using the front dial will allow changing bracketing steps and the rear dial will change the number of frames shot in a bracketing sequence. The D750 allows bracketing up to 9 frames and up to 3 stops (EV) apart.

      تعليق


      • #4
        وضع التصوير وأقراص وضع الكاميرا

        ستجد في الجانب العلوي الأيسر من الكاميرا قرصًا مزدوجًا - الجزء العلوي يسمح بالتبديل بين أوضاع الكاميرا المختلفة (يُشار إليه غالبًا باسم قرص "PASM")، بينما يسمح الجزء السفلي بالتبديل بين أوضاع التصوير المختلفة. لقد قمت بضبط القرص العلوي على "A" (وضع أولوية فتحة العدسة) بنسبة 90% من الوقت، لأن الكاميرا تقوم بعمل رائع في إعطائي تعريضات ضوئية جيدة. بمجرد التعرف على الكاميرا بشكل أفضل، أوصي باستكشاف إعدادات "U1" / "U2" (المزيد حول هذا أدناه ضمن قائمة الإعداد)، لأنها يمكن أن توفر لك الوقت عند التبديل بين بيئات التصوير المختلفة (على سبيل المثال، عند التبديل بين بيئات التصوير المختلفة). تصوير المناظر الطبيعية لتشغيل الاطفال).


        يحتوي القرص السفلي على مجموعة من أوضاع التصوير مثل "S" (فردي)، و"Cl, Ch" (منخفض مستمر ومرتفع مستمر)، و"Q" (هادئ)، و"Qc" (هادئ مستمر)، ومؤقت وMup (مرآة). اغلق). عادةً ما يتم ضبط خاصيتي على "S" والذي يطلق طلقة واحدة فقط عندما أضغط على زر تحرير الغالق. إذا أردت أن تقوم الكاميرا بإطلاق عدة لقطات عند تصوير الحركة، فإنني أتحول إلى "Ch". نادرًا ما أستخدم إعدادات أخرى، ولكن يمكن أن تكون مفيدة أيضًا، خاصة ميزة المؤقت التي أستخدمها عند تصوير المناظر الطبيعية لتقليل الاهتزازات (المزيد حول هذا أدناه).

        وبصرف النظر عن ما سبق، لا تقلق بشأن أي أزرار أخرى على الكاميرا. الآن دعنا ننتقل إلى قائمة إعدادات الكاميرا.


        Shooting Mode and Camera Mode Dials


        On the top left side of the camera you will find a double dial – the top portion allows switching between different camera modes (often referred to as the “PASM” dial), while the bottom part allows switching between different shooting modes. I have my top dial set to “A” (Aperture Priority Mode) 90% of the time, because the camera does a great job in giving me good exposures. Once you get to know the camera better, I would recommend to explore the “U1” / “U2” settings (more on this below under Setup Menu), because they could save you time when switching between different shooting environments (say when switching between photographing landscapes to running kids).


        The lower dial has a bunch of shooting modes like “S” (Single), “Cl, Ch” (Continuous low and Continuous High), “Q” (Quiet), “Qc” (Quiet Continuous), Timer and Mup (Mirror lock-up). Mine is usually set to “S” which only fires a single shot when I press the shutter release button. If I want the camera to fire multiple shots when shooting action, I switch to “Ch”. I rarely use other settings, but those can be useful as well, particularly the timer feature that I use when shooting landscapes to reduce vibrations (more on this below).

        Aside from the above, don’t worry about any other buttons on the camera. Now let’s move to the camera settings menu.

        تعليق


        • #5
          قائمة التشغيل

          نادرًا ما ألمس أي شيء في قائمة التشغيل، نظرًا لأن ذلك يُستخدم فقط لعرض الصور على شاشة LCD الخلفية. الإعدادان الوحيدان اللذان أعبث بهما هما "خيارات عرض التشغيل" و"التدوير طويلًا". يمكن أن تكون "خيارات عرض التشغيل" مفيدة عند مراجعة الصور. عندما تضغط على زر التشغيل الموجود في الجزء الخلفي من الكاميرا، يمكنك الضغط على الأزرار لأعلى/لأسفل وستتمكن من رؤية أنواع مختلفة من المعلومات. وللحفاظ على الفوضى، قمت بتشغيل ثلاثة أشياء: "نقطة التركيز"، والتي تسمح لي برؤية المكان الذي ركزت عليه، و"الإبرازات" لإظهار التعريض الزائد في اللقطات (المعروف أيضًا باسم "وميض") و"نظرة عامة"، والتي تمنحني رؤية واضحة. ملخص التعرض الخاص بي (سرعة الغالق، فتحة العدسة، ISO، البعد البؤري، إلخ). أقوم دائمًا بإيقاف تشغيل إعداد "التدوير طويلًا"، لأنني لا أريد أن تقوم الكاميرا بتغيير الصور الرأسية إلى الصور الأفقية عندما أقوم بمراجعتها - فمن الأسهل بكثير تدوير الكاميرا لرؤية صورة رأسية، بدلاً من الاضطرار إلى تكبير كل صورة. مرة واحدة. كل شيء آخر هو الافتراضي.


          Playback Menu


          I rarely ever touch anything in the Playback menu, since that’s only used for displaying pictures on the rear LCD. The only two settings that I ever mess with are “Playback display options” and “Rotate tall”. The “Playback display options” can be useful when reviewing images. When you press the playback button on the back of the camera, you can press up/down buttons and you will be able to see different types of information. To keep the clutter out, I have three things turned on: “Focus point”, which allows me to see where I focused, “Highlights” to show overexposure in shots (a.k.a. “blinkies”) and “Overview”, which gives me a summary of my exposure (shutter speed, aperture, ISO, focal length, etc). I always turn the “Rotate tall” setting off, because I do not want my camera to change vertical images to horizontal when I review them – it is much easier to rotate the camera to see a vertical image, rather than having to zoom in every single time. Everything else is default.

          تعليق


          • #6
            قائمة تصوير الصور

            لننتقل الآن إلى قائمة التقاط الصور، وهو المكان الأول الذي أذهب إليه عادةً عند التحقق من إعداداتي. سأقدم قيمي أولاً، ثم أتحدث عن الإعدادات المهمة:

            إعادة ضبط قائمة تصوير الصور: —مجلد التخزين: افتراضي، لا تغير تسمية الملف: DSC (افتراضي)، لا تغير الدور الذي تلعبه البطاقة في الفتحة 2: الفائض جودة الصورة: NEF (RAW) حجم الصورة: رمادي خارج منطقة الصورة اختر منطقة الصورة: FXAuto اقتصاص DX: ضغط ONJPEG: جودة مثالية تسجيل NEF (RAW): النوع: عمق بت NEF (RAW) مضغوط بدون فقدان: 14 بت توازن اللون الأبيض: تلقائي (AUTO1 عادي) ضبط برنامج التحكم بالصورة Picture Control: SD (قياسي)، القيم الافتراضية إدارة برنامج التحكم بالصورة Picture Control: —مساحة اللون : Adobe RGBActive D-Lighting: OFFHDR (نطاق ديناميكي عالي): إيقاف (رمادي) التحكم في نقوش الصورة النصفية: إيقاف التحكم التلقائي في التشوه: إيقاف التعريض الطويل NR: إيقاف High ISO NR: إعدادات حساسية OFFISO حساسية ISO: 100 التحكم التلقائي في حساسية ISO: ONالحساسية القصوى: 6400 الحد الأدنى لسرعة الغالق : تلقائي -> منتصف المقياس، وضع التحكم عن بعد: 2 ثانية، التعريض الضوئي المتعدد: إيقاف التصوير بفاصل زمني: إيقاف


            Photo Shooting Menu


            Let’s now go through the Photo Shooting Menu, which is the first place that I usually go to when checking my settings. I will first provide my values, then talk about the important settings:
            • Reset photo shooting menu: —
            • Storage folder: default, don’t change
            • File naming: DSC (default), don’t change
            • Role played by card in Slot 2: Overflow
            • Image quality: NEF (RAW)
            • Image size: grayed out
            • Image area
              • Choose image area: FX
              • Auto DX crop: ON
            • JPEG compression: Optimal quality
            • NEF (RAW) recording:
              • Type: Lossless compressed
              • NEF (RAW) bit depth: 14-bit
            • White balance: AUTO (AUTO1 Normal)
            • Set Picture Control: SD (Standard), Default values
            • Manage Picture Control: —
            • Color space: Adobe RGB
            • Active D-Lighting: OFF
            • HDR (high dynamic range): OFF (grayed out)
            • Vignette control: OFF
            • Auto distortion control: OFF
            • Long Exposure NR: OFF
            • High ISO NR: OFF
            • ISO sensitivity settings
              • ISO sensitivity: 100
              • Auto ISO sensitivity control: ON
                • Maximum sensitivity: 6400
                • Minimum shutter speed: Auto -> Middle of the scale
            • Remote control mode: 2s
            • Multiple exposure: OFF
            • Interval timer shooting: OFF

            تعليق


            • #7
              على الرغم من وجود الكثير من الإعدادات المختلفة هنا، فلا تقلق – فلن تقوم بتغيير العديد من الإعدادات كثيرًا. دعنا نستعرض بعض الإعدادات المهمة. الأول هو "الدور الذي تلعبه البطاقة في الفتحة 2"، والذي يسمح لك باختيار ما تريد القيام به باستخدام فتحات البطاقة المزدوجة في الكاميرا. إذا قمت بالتصوير باستخدام بطاقات متعددة، يمكنك ضبط الكاميرا لحفظ الصور بثلاث طرق مختلفة. يمكنك ضبطه على "Overflow"، والذي يقوم بشكل أساسي بحفظ الصور على البطاقة الأولى، ثم عندما تنفد المساحة، تبدأ الكاميرا في الحفظ على البطاقة الثانية. عادةً ما أضبط خياري على Overflow، إلا إذا كنت أعمل على شيء مهم حقًا وأحتاج إلى نسخ الصور احتياطيًا. وبالحديث عن النسخ الاحتياطي/التكرار، فهذا هو ما تستخدم الإعداد الثاني "النسخ الاحتياطي" من أجله. بمجرد تحديده، ستقوم الكاميرا بحفظ الصور على بطاقتي الذاكرة في نفس الوقت. يتيح لك الإعداد الأخير حفظ ملفات RAW على بطاقة واحدة وملفات JPEG على بطاقة أخرى. بالنسبة للتصوير اليومي، ما عليك سوى تركه على "Overflow" وإذا كنت تريد حقًا التأكد من عدم فقدان صورك في حالة فشل إحدى البطاقات، فاختر "Backup".

              من الواضح أن "جودة الصورة" مضبوطة على RAW، لأنني أقوم بالتصوير بصيغة RAW فقط. يتم دائمًا ضبط "تسجيل NEF (RAW)" على ضغط 14 بت بدون فقدان البيانات. أريد أفضل جودة صورة يمكن أن توفرها الكاميرا. "توازن اللون الأبيض" هو تلقائي ويتم إيقاف تشغيل كافة الإعدادات الأخرى مثل عناصر التحكم بالصورة Picture Control وActive D-Lighting وHDR وما إلى ذلك، حيث لا يؤثر أي منها (باستثناء "Long Exposure NR") على صور RAW. تذكر أن ملفات RAW تحتوي على بيانات لم يتم التلاعب بها وتتطلب معالجة لاحقة، وبالتالي فإن الإعدادات المذكورة أعلاه تؤثر فقط على شيئين: الصور المعروضة على شاشة LCD الخاصة بالكاميرا (يحتوي كل ملف RAW على صورة JPEG بالحجم الكامل، وهو ما يتم استخدامه للعرض الصور) وإذا كنت تستخدم برنامجًا خاصًا بشركة Nikon مثل Capture NX، فيمكن تطبيق هذه الإعدادات على صور RAW تلقائيًا. وبما أنني أستخدم Lightroom لتخزين ومعالجة صوري، فإن الجزء الثاني لا ينطبق علي. كما أنني لا أهتم كثيرًا بكيفية عرض الصور على شاشة LCD الخاصة بالكاميرا، لذا أترك كل شيء مغلقًا.

              على الرغم من أن مساحة اللون لا تهم ملفات RAW، إلا أنني الآن أستخدم AdobeRGB لأنه يوفر رسمًا بيانيًا أكثر دقة قليلاً لتحديد التعريض الضوئي الصحيح (نظرًا لأن الكاميرا تعرض رسمًا بيانيًا استنادًا إلى صورة JPEG التي تعرضها الكاميرا، حتى إذا كنت تقوم بالتصوير بصيغة RAW حصريًا).

              إعداد القائمة الكبيرة الذي أقوم بتغييره بشكل متكرر هو "إعدادات حساسية ISO". في أغلب الأحيان، أستخدم Auto ISO، لأنها ميزة رائعة توفر لي الكثير من الوقت. بدلاً من تحديد ISO لكل لقطة، قمت فقط بضبطها على تلقائي، مع ضبط ISO الأساسي على 100، وتعيين الحساسية القصوى على 3200 (الحد الشخصي لمستويات الضوضاء "المقبولة") وتعيين الحد الأدنى لسرعة الغالق على "تلقائي". والذي يغير تلقائيًا الحد الأدنى لسرعة الغالق ليتناسب مع البعد البؤري الذي أستخدمه. عند استخدام عدسة VR، قد أخفض الحد الأدنى لسرعة الغالق "تلقائي" إلى "أبطأ" وإذا قمت بالتصوير باستخدام عدسة أساسية وأردت الحصول على سرعات غالق أسرع (على سبيل المثال عند تصوير الحياة البرية)، فإنني أقوم بتحريك شريط التمرير نحو "أسرع" . عند تصوير المناظر الطبيعية أو الهندسة المعمارية باستخدام الكاميرا المثبتة على حامل ثلاثي الأرجل، أقوم بإيقاف تشغيل ISO التلقائي واستخدم ISO 100 لأعلى نطاق ديناميكي وأقل مستويات الضوضاء. بالمناسبة، يمكنك بسهولة تشغيل وإيقاف ISO التلقائي عن طريق الضغط على زر ISO الموجود في الجزء الخلفي من الكاميرا، ثم تدوير القرص الأمامي.


              While there are a lot of different settings here, do not worry – you won’t be changing many settings very often. Let’s go through some of the important settings. The first one is “Role played by card in Slot 2”, which allows you to choose what you want to do with the dual card slots of your camera. If you shoot with multiple cards, you can set the camera to save images in three different ways. You can set it to “Overflow”, which basically saves images to the first card, then when the space runs out, the camera starts saving to the second card. I usually set mine to Overflow, unless I am working on something really important and need to backup images. And speaking of backup/redundancy, that’s what you use the second setting “Backup” for. Once selected, the camera will save photos to both memory cards at the same time. The last setting allows you to save RAW files to one card and JPEG files to another. For your day to day shooting, just leave it on “Overflow” and if you really need to make sure that your photos are not lost if one of the cards fails, then choose “Backup”.

              “Image quality” is obviously set to RAW, since I only shoot RAW. “NEF (RAW) recording” is always set on mine to 14-bit Lossless compressed. I want the best image quality the camera can provide. “White Balance” is Auto and all other settings like Picture Controls, Active D-Lighting, HDR, etc. are turned off, since none of them (with the exception of “Long Exposure NR”) affect RAW images. Remember, RAW files contain non-manipulated data and require post-processing, so the above settings only impact two things: images displayed by your camera’s LCD screen (each RAW file contains a full-size JPEG image, which is what is used to display images) and if you use Nikon’s proprietary software like Capture NX, those settings can be applied to RAW images automatically. Since I use Lightroom to store and process my images, the second part does not apply to me. And I also do not care much about how images are displayed on the camera’s LCD, so I leave everything turned off.

              Although color space does not matter for RAW files, I now use AdobeRGB because it gives a slightly more accurate histogram to determine the correct exposure (since the camera shows histogram based on camera-rendered JPEG image, even if you shoot exclusively in RAW).

              The big menu setting that I frequently change is “ISO sensitivity settings”. Most of the time, I use Auto ISO, because it is a great feature that saves me a lot of time. Instead of specifying ISO for every shot, I just have it set on Auto, with its base ISO set to 100, Maximum sensitivity set to 3200 (my personal limit for “acceptable” noise levels) and Minimum shutter speed set to “Auto”, which automatically changes the minimum shutter speed to match the focal length I am using. When using a VR lens, I might lower the “Auto” minimum shutter speed to “Slower” and if I shoot with a prime lens and want to have faster shutter speeds (say when photographing wildlife), I move the slider towards “Faster”. When photographing landscapes or architecture with the camera mounted on a tripod, I turn Auto ISO off and use ISO 100 for the highest dynamic range and lowest noise levels. By the way, you can easily turn Auto ISO on and off by holding the ISO button on the back of the camera, then rotating the front dial.

              تعليق


              • #8
                قائمة تصوير الفيلم

                مع كاميرا D750، قدمت شركة Nikon "قائمة تصوير الأفلام" الجديدة لنقل جميع الإعدادات والوظائف المتعلقة بالأفلام إلى موقع واحد. تغيير عظيم، لأنه كان في كل مكان من قبل. أنا شخصياً لا أصور فيديو، لذا فإن هذه الإعدادات ليست مهمة بالنسبة لي. إذا كنت تخطط لتصوير فيديو، فستتمكن من العثور على كل شيء بدءًا من إعدادات ISO للفيلم وحتى عناصر التحكم في الصورة. بالإضافة إلى هذه الإعدادات، سيؤدي الضغط على زر Live View ثم الزر "i" إلى تنشيط الإعدادات الإضافية التي يمكنك تغييرها.


                Movie Shooting Menu


                With the D750, Nikon introduced a new “Movie Shooting Menu” to move all movie-related settings and functions to a single location. A great change, because it was all over the place before. I personally do not shoot video, so these settings are not important for me. If you are planning to shoot video, you will be able to find everything from movie ISO settings to picture controls. In addition to these settings, pressing the Live View button then the “i” button will activate additional settings that you can change.

                تعليق


                • #9
                  قائمة الإعدادات المخصصة

                  هذا هو المكان الذي يضيع فيه الكثير من الأشخاص، نظرًا لوجود العديد من الإعدادات المختلفة. فيما يلي الإعدادات التي أستخدمها شخصيًا:

                  تحديد أولوية التركيز البؤري التلقائي AF-C: تحديد أولوية إطلاق AF-S: تتبع التركيز البؤري مع القفل: AF 3 (عادي) إضاءة نقطة التركيز البؤري وضع التركيز اليدوي: ON عرض التركيز البؤري التلقائي للمنطقة الديناميكية: إضاءة التركيز البؤري التلقائي لمنطقة المجموعة: الخيار الأول إضاءة نقطة التركيز البؤري التلقائي: التفاف نقطة التركيز البؤري التلقائي -حول: OFFعدد نقاط التركيز: AF51 تخزين النقاط حسب الاتجاه: ONمصباح مساعدة التركيز البؤري التلقائي المدمج: ON


                  Custom Setting Menu


                  This is where a lot of people get lost, since there are so many different settings. Here are the settings that I personally use:
                  • Autofocus
                    • AF-C priority selection: Release
                    • AF-S priority selection: Focus
                    • Focus tracking with lock-on: AF 3 (Normal)
                    • Focus point illumination
                      • Manual focus mode: ON
                      • Dynamic-area AF display: ON
                      • Group-area AF illumination: First option
                    • AF point illumination: Auto
                    • Focus point wrap-around: OFF
                    • Number of focus points: AF51
                    • Store points by orientation: ON
                    • Built-in AF-assist illuminator: ON

                  تعليق


                  • #10
                    القياس/قيمة خطوة حساسية ISO: خطوات 1/3EV للتعريض الضوئي: 1/3Ex./flash comp. قيمة الخطوة: 1/3 تعويض التعريض السهل: إيقاف معايرة المصفوفة: اكتشاف الوجه في منطقة وزن المركز: 12 مم ضبط التعريض الضوئي الأمثل: —المؤقتات/قفل AE زر تحرير الغالق AE-L: إيقاف مؤقت الاستعداد: 6 ثوانٍ مؤقت ذاتي تأخير المؤقت الذاتي: 5 ثوانٍ عدد اللقطات : 1الفاصل الزمني بين اللقطات: 0.5 ثانيةتأخير إيقاف تشغيل الشاشة: 10ث، 1م، 10ث، 4ث، 10ممدة تشغيل جهاز التحكم عن بعد (ML-L3): 1م
                    • Metering/exposure
                      • ISO sensitivity step value: 1/3
                      • EV steps for exposure cntrl: 1/3
                      • Ex./flash comp. step value: 1/3
                      • Easy exposure compensation: OFF
                      • Matrix metering: Face detection on
                      • Center-weighted area: 12mm
                      • Fine-tune optimal exposure: —
                    • Timers/AE lock
                      • Shutter-release button AE-L: OFF
                      • Standby timer: 6s
                      • Self-timer
                        • Self-timer delay: 5s
                        • Number of shots: 1
                        • Interval between shots: 0.5s
                      • Monitor off delay: 10s, 1m, 10s, 4s, 10m
                      • Remote on duration (ML-L3): 1m

                    تعليق


                    • #11
                      التصوير/العرض حجم الصوت: درجة إيقاف التشغيل: منخفض السرعة المنخفضة المستمرة: 3 إطار في الثانية الحد الأقصى. التحرير المستمر: 100 وضع تأخير التعريض: OFF تحذير الفلاش: OFF تسلسل رقم الملف: ONViewfinder عرض الشبكة: ONEasy ISO: ON عرض المعلومات: AUTOLCD الإضاءة: OFFMB-D16 نوع البطارية: LR6 ترتيب البطارية: MB-D16Bracketing/flash سرعة مزامنة الفلاش: 1/250*مصراع الفلاش السرعة: 1/60Flash cntrl للفلاش المدمج: TTLExposure comp. للفلاش: الإطار بأكمله، فلاش النمذجة: ON، مجموعة تصحيح تلقائي: AE وفلاش، ترتيب الأقواس: تحت > MTR > أكثر
                      • Shooting/display
                        • Beep
                          • Volume: OFF
                          • Pitch: Low
                        • Continuous low-speed: 3 fps
                        • Max. continuous release: 100
                        • Exposure delay mode: OFF
                        • Flash warning: OFF
                        • File number sequence: ON
                        • Viewfinder grid display: ON
                        • Easy ISO: ON
                        • Information display: AUTO
                        • LCD illumination: OFF
                        • MB-D16 battery type: LR6
                        • Battery order: MB-D16
                      • Bracketing/flash
                        • Flash sync speed: 1/250*
                        • Flash shutter speed: 1/60
                        • Flash cntrl for built-in flash: TTL
                        • Exposure comp. for flash: Entire frame
                        • Modeling flash: ON
                        • Auto bracketing set: AE & flash
                        • Bracketing order: Under > MTR > over

                      تعليق


                      • #12

                        عناصر التحكم زر موافق وضع التصوير: إعادة تعيين وضع التشغيل: تشغيل/إيقاف التكبير -> 1:1 (100%) عرض مباشر: زر RESETAssign Fn: الوصول إلى العنصر العلوي في قائمتي زر معاينة التعيين: PreviewAssign AE-L/AF-L زر: AE-L / الضغط على زر AF-L: قفل AE/AF تخصيص أقراص الأوامر: كل زر التحرير الافتراضي لاستخدام القرص: OFF قفل تحرير الفتحة الفارغة: LOCKالمؤشرات العكسية: - 0 + تعيين زر تسجيل الفيلم: حساسية ISO تعيين زر MB-D16 AE-L/AF-L: قفل AE/AF، زر التحكم عن بعد (WR) Fn: OFFMovieAssign زر Fn: OFFزر معاينة Assign: علامة الفهرس، زر AE-L/AF-L: قفل AE/AF، زر مصراع التعيين: التقاط الصور
                        • Controls
                          • OK button
                            • Shooting mode: RESET
                            • Playback mode: Zoom on/off -> 1:1 (100%)
                            • Live view: RESET
                          • Assign Fn button: Access top item in MY MENU
                          • Assign preview button: Preview
                          • Assign AE-L/AF-L button: AE-L / AF-L button press: AE/AF lock
                          • Customize command dials: All default
                          • Release button to use dial: OFF
                          • Slot empty release lock: LOCK
                          • Reverse indicators: – 0 +
                          • Assign movie record button: ISO sensitivity
                          • Assign MB-D16 AE-L/AF-L button: AE/AF lock
                          • Assign remote (WR) Fn button: OFF
                        • Movie
                          • Assign Fn button: OFF
                          • Assign preview button: Index marking
                          • Assign AE-L/AF-L button: AE/AF lock
                          • Assign shutter button: Take photos

                        تعليق


                        • #13
                          هذا كثير من الخيارات! مرة أخرى، لن أخوض في تفاصيل حول كل إعداد، لذا اسمحوا لي أن أتطرق إلى أهم الإعدادات التي يجب أن تعرفها. يعد قسم "التركيز التلقائي" مهمًا جدًا، لأنه يتحكم في طريقة تكوين التركيز التلقائي للكاميرا. يوجد أول إعدادين "اختيار أولوية AF-C" و"اختيار أولوية AF-S" للمساعدة في التصوير في الأوضاع الفردية أو المستمرة. يؤدي إعداد "التركيز البؤري" في تحديد "اختيار أولوية AF-S" إلى إجبار الكاميرا على الحصول على التركيز البؤري قبل التقاط اللقطة. على عكس كاميرات DSLR السابقة مثل Nikon D700، ستظل كاميرا D750 تسمح لك بالتقاط لقطة إذا قمت "بالتركيز وإعادة التركيب" في وضع AF-S.

                          الإعداد التالي هو "تتبع التركيز البؤري مع القفل"، والذي أحتفظ به عادةً على الإعداد الافتراضي "3". يتحكم هذا الإعداد في مدى سرعة إعادة تشغيل التركيز البؤري التلقائي عندما يكتشف أخطاء التركيز. عند تصوير الطيور أثناء طيرانها، أميل إلى تقليل هذا الإعداد إلى تأخيرات قصيرة، لأنني أريد إعادة تشغيل التركيز البؤري التلقائي حتى مع التغييرات الصغيرة. وفي بقية الوقت، أبقي الأمر طبيعيًا ولا أضطر أبدًا إلى الانتظار لفترة طويلة.

                          ستسمح "إضاءة نقطة التركيز البؤري" بتخصيص الطريقة التي يضيء بها عدسة الكاميرا نقاط التركيز في أوضاع مختلفة. تعجبني حقيقة أن عدسة الكاميرا D750 الخاصة بي ستُظهر فعليًا ما إذا كنت أقوم بالتصوير في الوضع الديناميكي المستمر ذو 9 نقاط أو 51 نقطة عن طريق وضع النقاط داخل إطار عدسة الكاميرا.


                          That’s a lot of options! Once again, I won’t go into details about each setting, so let me just go over the most important ones that you should know about. The “Autofocus” section is pretty important, because it controls the way your camera autofocus is configured. The first two settings “AF-C priority selection” and “AF-S priority selection” are there to assist in shooting in Single or Continuous modes. The “Focus” setting in the “AF-S priority selection” selection forces the camera to acquire focus before taking the shot. Unlike earlier DSLRs like Nikon D700, the D750 will still let you take a shot if you “focus and recompose” in AF-S mode.

                          The next setting is “Focus tracking with lock-on”, which I normally keep at the default setting of “3”. This setting controls how quickly your autofocus will re-engage when it detects focus errors. When shooting birds in flight, I tend to reduce that setting to short delays, because I want autofocus to re-engage even with smaller changes. The rest of the time, I keep it in normal and almost never go up to long waits.

                          “Focus point illumination” will allow customizing the way the camera viewfinder illuminates focus points in different modes. I like the fact that my D750 viewfinder will actually show if I am shooting 9-point or 51-point dynamic continuous mode by putting dots inside the viewfinder frame.

                          تعليق


                          • #14

                            ستسمح "إضاءة نقطة التركيز البؤري" بتخصيص الطريقة التي يضيء بها عدسة الكاميرا نقاط التركيز في أوضاع مختلفة. تعجبني حقيقة أن عدسة الكاميرا D750 الخاصة بي ستُظهر فعليًا ما إذا كنت أقوم بالتصوير في الوضع الديناميكي المستمر ذو 9 نقاط أو 51 نقطة عن طريق وضع النقاط داخل إطار عدسة الكاميرا.

                            يتم استخدام "إضاءة نقطة AF" لإضاءة نقطة (نقاط) التركيز البؤري في معين المنظر والشبكات المختلفة باللون الأحمر عندما تضغط نصف ضغطة على زر الغالق. عادةً ما أحتفظ بهذا على الوضع "تلقائي"، والذي لا يضيء في ظروف شديدة السطوع حيث يمكنني رؤية كل شيء بوضوح في عدسة الكاميرا، ولا يفعل ذلك إلا في البيئات المظلمة (مما يساعد في تحديد موقع نقطة التركيز البؤري). لا أحب أن تنتقل نقاط التركيز البؤري إلى الجانب الآخر من الشاشة عندما أكون في الزوايا وأحب التصوير مع تمكين جميع نقاط التركيز البؤري، لذلك يتم إيقاف تشغيل "التفاف نقطة التركيز البؤري" ويتم إيقاف تشغيل عدد تم ضبط نقاط التركيز على 51.


                            Focus point illumination” will allow customizing the way the camera viewfinder illuminates focus points in different modes. I like the fact that my D750 viewfinder will actually show if I am shooting 9-point or 51-point dynamic continuous mode by putting dots inside the viewfinder frame.

                            “AF point illumination” is used to light up the viewfinder focus point(s) and different grids in red color when you half-press the shutter button. I usually keep this on “Auto”, which does not light up in very bright conditions where I can clearly see everything in the viewfinder, and only does it in darker environments (which helps with identifying my focus point location). I do not like when my focus points roll over to the other side of the screen when I am in the corners and I like to shoot with all focus points enabled, so my “Focus point wrap-around” is turned off and the number of focus points is set to 51.

                            تعليق


                            • #15

                              أحد خيارات القائمة الجديدة الرائعة التي ورثتها كاميرا D750 من كاميرا D810 هو "تخزين النقاط حسب الاتجاه" (a8 في قائمة الإعدادات المخصصة)، والذي قمت الآن بتشغيله افتراضيًا. أحب هذه الميزة، لأنها تتذكر مكان نقطة التركيز الخاصة بي لكل من الاتجاه الأفقي والعمودي. على سبيل المثال، إذا قمت بتصوير عروس في اتجاه أفقي وقمت بتعيين نقطة التركيز الخاصة بي، فيمكنني التبديل إلى الاتجاه العمودي، وتحريك نقطة التركيز الخاصة بي، وعندما أتحرك ذهابًا وإيابًا بين الاثنين، سيتم تذكر نقطة التركيز الخاصة بي في كلا الاتجاهين! هذه ميزة رائعة يمكن أن تكون مفيدة جدًا عند التبديل بين اتجاهين مختلفين في بيئة سريعة الخطى. عند تصوير حفل الزفاف في يوم الزفاف، غالبًا ما أقوم بالتبديل بين الاتجاه الأفقي والرأسي، حتى أتمكن من التقاط الجسم بالكامل في الاتجاه الرأسي. باستخدام هذا الإعداد، أحتفظ بنقاط التركيز البؤري في مواقع مختلفة، لذا يكون التبديل ذهابًا وإيابًا أمرًا سهلاً للغاية - كل ما علي فعله هو إعادة التركيز البؤري والتصوير!

                              "مصباح مساعدة التركيز البؤري التلقائي المدمج" هو المصباح الموجود في مقدمة الكاميرا والذي يتم تشغيله عند التصوير في وضع التركيز البؤري AF-S. إذا كان الهدف مظلمًا، فسيتم تشغيل الضوء الأمامي وإلقاء الضوء على الهدف الذي تقوم بتصويره، مما سيساعد نظام التركيز التلقائي على الحصول على التركيز المناسب. أجد الضوء مفيدًا في حالات الإضاءة المنخفضة، لذا أبقي هذا الإعداد قيد التشغيل.


                              A great new menu option that the D750 inherited from the D810 is “Store points by orientation” (a8 in Custom Setting Menu), which I now have turned on by default. I love this feature, because it remembers where my focus point was for both landscape and portrait orientation. For example, if I photograph a bride in horizontal orientation and set my focus point, I can switch to portrait orientation, move my focus point and when I go back and forth between the two, my focus point will be remembered for both orientations! This is a neat feature that can be very helpful when you switch between two different orientations in a fast-paced environment. When photographing the bridal party on a wedding day, I often switch between horizontal and vertical orientation, so that I can capture the whole body in vertical orientation. With this setting, I keep my focus points at different locations, so switching back and forth is super easy – all I have to do is refocus and shoot!

                              The “Built-in AF-assist illuminator” is the lamp on the front of the camera that is engaged when shooting in AF-S focus mode. If the subject is dark, the front light will turn on and illuminate the subject you are photographing, which will help the autofocus system to acquire proper focus. I find the light to be helpful in low-light situations, so I keep that setting turned on.

                              تعليق

                              يعمل...
                              X