طائرات التصوير بدون طيار Best Photography Drones Available Today: Top 5 Tested

تقليص
X
 
  • تصفية - فلترة
  • الوقت
  • عرض
إلغاء تحديد الكل
مشاركات جديدة

  • طائرات التصوير بدون طيار Best Photography Drones Available Today: Top 5 Tested

    أفضل طائرات التصوير بدون طيار المتاحة اليوم: أفضل 5 طائرات تم اختبارها
    Best Photography Drones
    Available Today: Top 5 Tested


    قد يكون اختيار أفضل طائرة بدون طيار للتصوير الفوتوغرافي والفيديو أمرًا صعبًا. سواء كنت تنظر إلى أحدث الموديلات من DJI، أو تفكر في تصنيع طائرات بدون طيار أخرى، فإن كل طراز يتميز بمجموعة مذهلة من المواصفات، وبعضها يحمل بعض المقايضات الكبيرة. لقد كنت محظوظًا باختبار عدد من الخيارات الأكثر شيوعًا، لذلك قمت بإنشاء القائمة التالية لأفضل الطائرات بدون طيار التي ستجدها اليوم.

    هنا في Photography Life، ربما ليس من المفاجئ أنني قمت باختبار هذه الطائرات بدون طيار في المقام الأول لقدراتها على الصور الثابتة. بينما قمت أيضًا بتقييم جودة الفيديو الخاصة بهم، وأوقات الرحلة، وسهولة التعامل، وأوضاع الطيران الآلية، فإن الميزة الأولى بالنسبة لي هي جودة صورهم.

    كان الاتجاه الأخير في الطائرات بدون طيار الشهيرة هو أهمية تحديثات البرامج الثابتة بعد الإطلاق. على سبيل المثال، تلقت الطائرة بدون طيار التي اخترتها، DJI Mavic 3، العديد من تحديثات البرامج الثابتة الرئيسية التي أدت إلى تحسين عدد من الوظائف بشكل كبير، بل وفتحت وظائف جديدة مثل التقاط صور أولية باستخدام عدسة مقربة 7x. حيثما أمكن، سأحكم على هذه الطائرات بدون طيار بناءً على ما هو متاح اليوم في عام 2022، حيث تحسن بعضها بشكل ملحوظ منذ الإطلاق.

    ملاحظة أخيرة: إذا كنت في الولايات المتحدة وترغب في السفر بالطائرة لأي غرض يتجاوز "المتعة أو الاستمتاع الشخصي فقط"، فأنت بحاجة قانونًا إلى العمل بترخيص الجزء 107. بخلاف ذلك، فإن معظم هذه المقالة لن تنطبق عليك، لأنك غير قادر قانونًا على قيادة معظم الطائرات بدون طيار على الإطلاق. بغض النظر عن شعورك تجاه هذه اللوائح، فربما ترغب في الالتحاق بمدرسة إعدادية للاختبار من أجل اجتياز اختبار الجزء 107 مع إدارة الطيران الفيدرالية (FAA)، كما أوضحت في هذه المقالة. تُسمى الخدمة التابعة لنا باسم Pilot Institute، وتبلغ تكلفة الدورة التدريبية 249 دولارًا أمريكيًا، أو 149 دولارًا أمريكيًا من خلال خصم Photoography Life (الموجود هنا). إنها ليست الشركة الوحيدة التي تقوم بإعداد اختبار الجزء 107، لذا قم بالبحث مسبقًا، ولكنها الشركة التي نوصي بها.

    الآن دعنا ننتقل إلى أفضل الطائرات بدون طيار الاستهلاكية في السوق اليوم.


    Choosing the best drone for photography and video can be tricky. Whether you’re looking at the latest models from DJI, or considering another drone manufacturer, each model features a dizzying array of specs, and some carry some big tradeoffs. I’ve been fortunate to test a number of the most popular options, so I’ve created the following list of the best drones you’ll find today.

    Here at Photography Life, it’s probably not a surprise that I’ve tested these drones primarily for their still image capabilities. While I’ve also evaluated their video quality, flight times, ease of handling, and automated flight modes, my number one feature is the quality of their photos.

    A recent trend in popular drones has been the importance of firmware updates post launch. For instance, my drone of choice, the DJI Mavic 3, has received several major firmware updates that have drastically improved a number of functions, and even unlocked new functions like shooting raw photos with the 7x telephoto lens. Where possible, I’ll be judging these drones on what’s available today in 2022, as some have gotten significantly better since launch.

    One last note: If you’re in the US and want to fly for any purpose beyond “purely for fun or personal enjoyment,” you legally need to operate with a Part 107 license. Otherwise, most of this article won’t apply to you, since you aren’t legally able to fly most drones at all. No matter how you feel about these regulations, you’ll probably want to go with a test prep school in order to pass your Part 107 exam with the FAA, as I explained in this article. The service we’re affiliated with is called Pilot Institute, whose course is $249, or $149 through Photography Life’s discount (found here). It’s not the only Part 107 test prep company, so do your research beforehand, but it’s the one we recommend.

    Now let’s get to the best consumer drones on the market today.

  • #2
    سأتحدث في هذا المقال عن الطيارات من دون طيار التالية

    Table of Contents

    تعليق


    • #3
      1. DJI Mavic 3

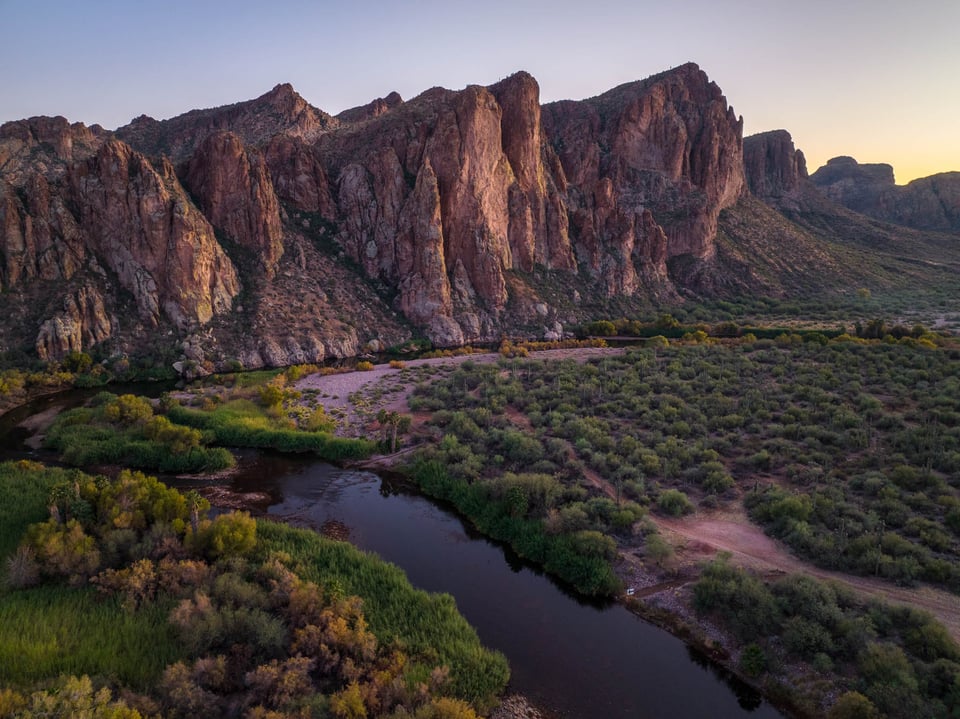
      الطائرة بدون طيار الأولى للتصوير الفوتوغرافي في عام 2022 هي DJI Mavic 3. على الرغم من أنني أملك طائرة Mavic 3 منذ يوم الإطلاق، حيث أذهلتني على الفور بملفات RAW المرنة، والنطاق الديناميكي الرائع، والقدرة على التحمل الفائق للطيران، فقد أصبحت أفضل منذ ذلك الحين، وذلك بفضل تحديثات البرامج الثابتة.

      DJI Mavic 3 + 24 مم f/2.8 @ 12.29 مم، ISO 100، 1/30، f/2.8

      لقد فتحت تحديثات البرامج الثابتة الأخيرة المزيد من الوظائف للكاميرا المقربة، بما في ذلك وظائف RAW وAEB. وهذا يعني أن لديك الآن كاميرتين كاملتي الوظائف في طائرة بدون طيار واحدة، مع طول بؤري مكافئ 24 مم و162 مم. (معظم الطائرات بدون طيار تحتوي فقط على عدسة واسعة الزاوية، عادةً ما تكون بنفس علامة 24 مم).


      1. DJI Mavic 3


      My number one drone for photography in 2022 is the DJI Mavic 3. While I’ve had the Mavic 3 since launch day, where it immediately impressed me with the flexible RAW files, great dynamic range, and extreme flight endurance, it’s only gotten better since then, thanks to firmware updates.
      DJI Mavic 3 + 24mm f/2.8 @ 12.29mm, ISO 100, 1/30, f/2.8
      Recent firmware updates have unlocked much more functionality for the telephoto camera, including RAW and AEB functions. This means that you now have two fully-functional cameras in one drone, offering 24mm and 162mm equivalent focal lengths. (Most drones only have a wide-angle lens, typically around the same 24mm mark.)

      تعليق


      • #4

        على الرغم من أن العدسة المقربة لا تتمتع بنفس المستوى الرائع من التفاصيل الذي توفره العدسة الواسعة، إلا أن المنظور المختلف تمامًا لا يزال ميزة مفيدة للغاية.

        DJI Mavic 3 + 161 مم f/4.4 @ 29.85 مم، ISO 100، 1/25، f/4.4

        وللتوسع بشكل أكبر، تدعم Mavic 3 التقاط الصور البانورامية وإضافة عدسة محول واسعة الزاوية لتوفير خيار مكافئ مقاس 15 مم. بين الاثنين، أفضّل كثيرًا جودة الصورة المحسنة التي توفرها البانوراما، لكن المحول يعد خيارًا مناسبًا لتحريك الأهداف التي لا يمكن التقاطها عبر البانوراما.

        عند التصوير بشكل طبيعي بمقاس 24 مم، توفر طائرة Mavic 3 جودة صورة ممتازة باستمرار. على الرغم من أن المستشعر لا يسجل رقمًا قياسيًا من حيث عدد الميجابكسل، حيث يقدم دقة تبلغ 20 ميجابكسل فقط، إلا أن الملفات نظيفة جدًا بحيث يمكن ترقيتها بسهولة.

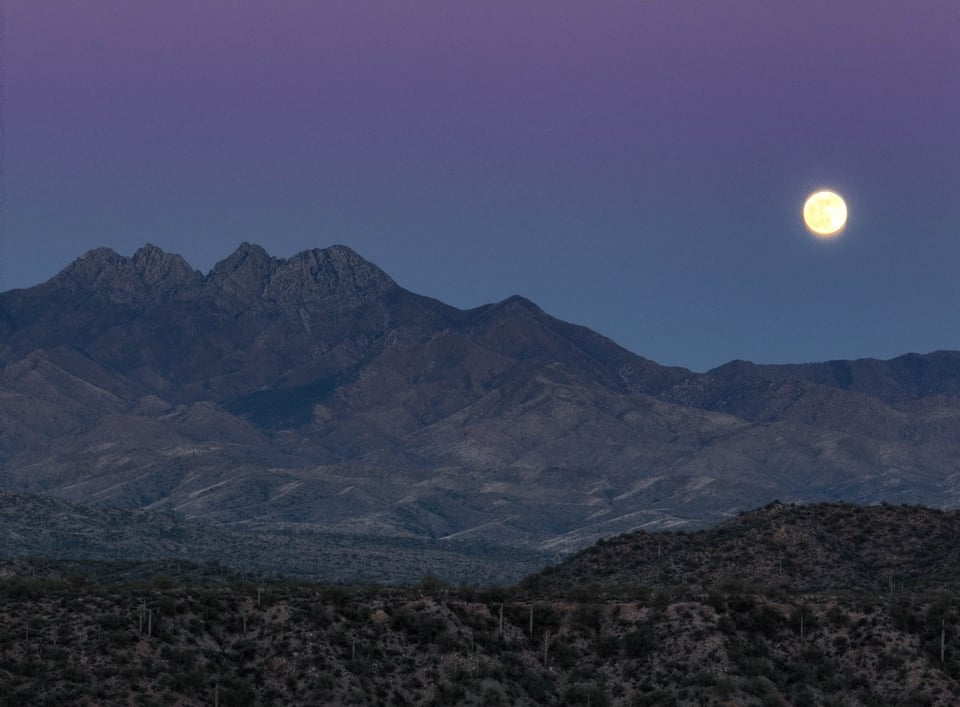
        وذلك لأن المستشعر الموجود في Mavic 3 ضخم بالنسبة لطائرة استهلاكية بدون طيار. الكاميرا العريضة عبارة عن مستشعر CMOS من النوع 4/3، بنفس الحجم الموجود في كاميرا Micro Four Thirds. في حين أن الطائرات بدون طيار لن تتطابق مع التعرض الطويل وقدرة الإضاءة المنخفضة للكاميرا الأرضية، فمن الممكن تمامًا التقاط صور عالية الجودة في وقت الشفق باستخدام Mavic 3 نتيجة لذلك. لقد التقطت بعض الصور الليلية باستخدام هذه الطائرة بدون طيار والتي يتم تنظيفها جيدًا من خلال المعالجة اللاحقة الدقيقة.

        While the tele lens doesn’t have the same great level of detail that the wide lens offers, the drastically different perspective is still a very useful feature.
        DJI Mavic 3 + 161mm f/4.4 @ 29.85mm, ISO 100, 1/25, f/4.4
        To go even wider, the Mavic 3 supports shooting panoramas and adding a wide-angle adapter lens to bring a 15mm equivalent option. Between the two, I greatly prefer the enhanced image quality offered by the panorama, but the adapter is a decent option for moving subjects that can’t be captured via a panorama.

        When just shooting normally at 24mm, the Mavic 3 delivers consistently excellent image quality. While the sensor doesn’t set a record in terms of megapixels, offering just 20MP of resolution, the files are so clean that they can easily be upscaled.

        That’s because the sensor on the Mavic 3 is huge for a consumer drone. The wide camera is a 4/3-type CMOS sensor, same size as in a Micro Four Thirds camera. While drones are not going to match the long exposure and low light capability of a ground-based camera, it’s entirely possible to shoot high-quality images well into twilight with the Mavic 3 as a result. I’ve even taken some nighttime images with this drone that clean up well with careful post-processing.

        تعليق


        • #5


          في الواقع، بفضل النطاق الديناميكي الممتاز من المستشعر 4/3، يعد غروب الشمس أحد الأوقات المفضلة لدي للطيران بطائرة Mavic 3. سواء كنت تقوم بتصوير ملفات RAW فردية أو الاستفادة من مجموعات AEB السريعة والسهلة، فإن Mavic 3 تبرز الألوان الرائعة في السماء، مع الاحتفاظ بالكثير من التفاصيل في عناصر المقدمة المظلمة. كما أن زمن الرحلة الطويل يجعل من السهل التصوير قبل غروب الشمس وأثناءه وبعده، وكل ذلك بشحنة واحدة.

          DJI Mavic 3 + 24 مم f/2.8 @ 12.29 مم، ISO 100، 1/20، f/2.8

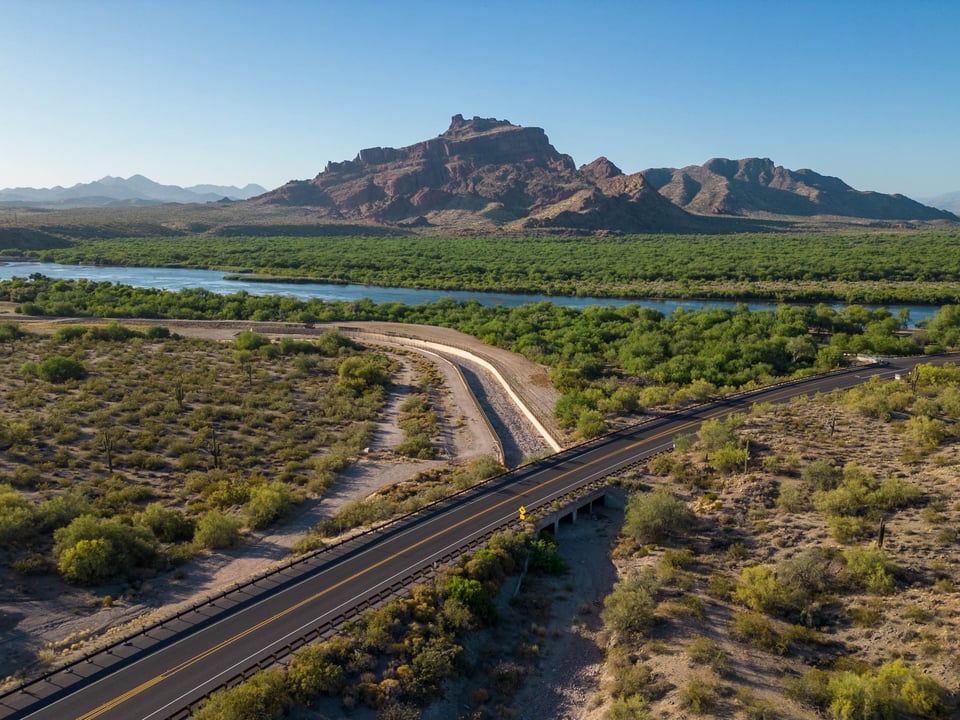
          من حيث قدرات الطيران، تتعامل طائرة Mavic 3 بكفاءة. على الرغم من أنها لن تكون رياضية مثل بعض الطائرات بدون طيار الأكثر ذكاءً في السوق، إلا أنها مستقرة بشكل لا يصدق وسريعة للغاية. وهذا يجعلها منصة رائعة لتخطيط اللقطات، حيث تكون العدسة المقربة مفيدة في اكتشاف التفاصيل البعيدة التي تستحق نظرة فاحصة. كما أنها قادرة جدًا في ظروف الرياح، حيث يتم تصنيفها لرياح تبلغ سرعتها 12 م / ث (27 ميلاً في الساعة).

          ربما تكون الصور البانورامية هي المجال الرئيسي الأخير الذي لا يزال من الممكن أن يحتاج إلى القليل من التحسين. على الرغم من أن الوضع يعمل بشكل جيد، إلا أنه يمكن تعديل بعض الميزات لجعله أفضل للمصورين المحترفين. الأول، والأكثر أهمية، هو أن الأمر يستغرق بعض الوقت الإضافي لتعيين تعريض ضوئي مقفل واحد لكامل البانوراما، في حين أنه ينبغي أن يكون تلقائيًا. لقد حاولت تعيين قفل AE على زر الوظيفة الموجود على جهاز التحكم عن بعد، لكن تجربتي كانت غير متسقة.


          In fact, thanks to the excellent dynamic range from the 4/3 sensor, sunset is one of my favorite times to fly the Mavic 3. Whether shooting single RAW files or making use of the quick and easy AEB sets, the Mavic 3 brings out the great colors in the sky, while still retaining plenty of detail in the dark foreground elements. The long flight time also makes it easy to shoot before, during, and after sunset, all on one charge.
          DJI Mavic 3 + 24mm f/2.8 @ 12.29mm, ISO 100, 1/20, f/2.8
          In terms of flight capabilities, the Mavic 3 handles competently. While it’s not going to be as sporty as some of the more stunt-minded drones on the market, it’s incredibly stable and plenty fast. This makes it a great platform for planning shots, with the telephoto lens coming in handy for spotting distant details that are worth a closer look. It’s also very capable in windy conditions, being rated for 12 m/s (27 MPH) of wind.

          Panoramas are perhaps the last major area that could still use a little improvement. While the mode functions well, some features could be tweaked to make it even better for professional photographers. The first, and most important, is that it takes some extra time to set a single locked exposure for the entirety of the panorama, when it should be automatic. I’ve tried mapping the AE lock to the function button on the remote, but it’s been inconsistent in my experience.

          تعليق


          • #6

            أيضًا، يقوم وضع البانوراما بتصوير نسخة JPEG وتجميعها، وهي خطوة غير ضرورية، حيث أفضل دائمًا دمج ملفات RAW الفردية بنفسي. بينما يمكنك إلغاء عملية التركيب التلقائي عن طريق تحريك الطائرة بدون طيار أثناء العملية، سيكون من الأفضل بكثير تعطيل عملية التركيب تمامًا. أخيرًا، أود أن أرى إضافة وضع البانوراما الآلي إلى الكاميرا المقربة - الآن بعد أن أصبحت تدعم RAW، سيكون خيارًا رائعًا لالتقاط صور بانورامية قصيرة وعالية الدقة.

            وأخيرًا، لا يتم دعم Mavic 3 حاليًا بواسطة SDK. يتيح دعم SDK الخاص بـ DJI لموفري برامج الطرف الثالث مثل Litchi إنشاء أدوات لأتمتة الرحلات الجوية، من بين ميزات أخرى. على الرغم من أن هذا لن يكون أولوية بالنسبة للكثيرين، إلا أن المستخدمين الذين يرغبون في إنشاء خرائط واستخدامات تقنية أخرى للطائرات بدون طيار سيجدون أن هذا يشكل قيدًا كبيرًا.

            لا تعد طائرة Mavic 3 أرخص طائرة بدون طيار حيث يبلغ سعرها حوالي 2050 دولارًا أمريكيًا، ولكنها ذات قيمة رائعة بالنسبة لمستشعر من النوع 4/3. ومع ذلك، فإن بقية الطائرات بدون طيار في هذا التصنيف أقل تكلفة.


            Also, the panorama mode shoots and stitches a JPEG version, an unnecessary step, as I’ll always prefer to just stitch the individual RAW files myself. While you can cancel the automatic stitching operation by moving the drone during the process, it would be much nicer to just disable stitching altogether. Lastly, I’d love to see the automated panorama mode added to the telephoto camera – now that it supports RAW, it would be a great option to shoot high resolution, short telephoto panoramas.

            Lastly, the Mavic 3 currently isn’t supported by the SDK. DJI’s SDK support enables third party software providers like Litchi to create tools for automating flights, among other features. While this isn’t going to be a priority for many, users who want to create maps and other technical drone uses will find this to be a major limitation.

            The Mavic 3 is not the cheapest drone at about $2050, but it’s a great value for a 4/3-type sensor. The rest of the drones in this ranking are less expensive, however.

            تعليق


            • #7

              2. DJI Mini 3 Pro
              في حين أن طائرة Mavic 3 تمثل علامة المياه العالية الحالية في مجال الطائرات بدون طيار للمستهلكين، فقد فاجأتني طائرة Mini 3 Pro تمامًا عندما حلقت بها في وقت سابق من هذا العام. إنها أصغر بكثير، والأفضل من ذلك، فهي تزن أقل من 250 جرامًا مع حزمة البطارية الأصغر، مما يجعل الطيران بشكل قانوني أسهل بكثير مع Mini 3 Pro.

              DJI Mini 3 Pro + 6.7 مم f/1.7 @ 6.72 مم، ISO 150، 1/3200، f/1.7

              يمكن للطائرات بدون طيار الصغيرة التي يقل وزنها عن 250 جرامًا تجنب بعض متطلبات التسجيل والتنظيم المفروضة على الطائرات الأكبر حجمًا. في حين أن هذه القواعد تختلف وقابلة للتغيير، فإن امتلاك طائرة بدون طيار تزن 250 جرامًا يمكن أن يكون مفيدًا جدًا لمصوري السفر ومصوري المناظر الطبيعية وغيرهم ممن قد يعملون في مجموعة من البيئات التنظيمية.


              2. DJI Mini 3 Pro


              While the Mavic 3 represents the current high-water mark in the prosumer drone space, the Mini 3 Pro completely surprised me when I flew it earlier this year. It’s significantly smaller, and even better, it weighs under 250 grams with the smaller battery pack, making is substantially easier to fly legally with the Mini 3 Pro.
              DJI Mini 3 Pro + 6.7mm f/1.7 @ 6.72mm, ISO 150, 1/3200, f/1.7
              Small drones under 250 g can avoid some registration and regulation requirements that are imposed on larger drones. While these rules vary and are subject to change, having a 250 g drone can be a great benefit for travel photographers, landscape photographers, and others who may operate in a range of regulatory environments.

              تعليق


              • #8
                نظرًا لأن جهاز Mini 3 Pro بأكمله يزن أقل من بطارية واحدة لطائرة Mavic 3، فقد تعتقد أنك تضحي بالكثير من جودة الصورة، ولكن الواقع مثير للدهشة. في حين أن جهاز Mini 3 Pro لا يتمتع بنفس قدرات التصوير المقربة أو معدل الذكاء النقي، فإن الملفات من مستشعر من النوع 1/1.3 بوصة (أكبر قليلاً من الهاتف الذكي النموذجي) جيدة بشكل مدهش لمثل هذه الحزمة الصغيرة. في ظروف النهار وحتى عند شروق الشمس وغروبها، ينتج جهاز Mini 3 Pro صورًا رائعة.

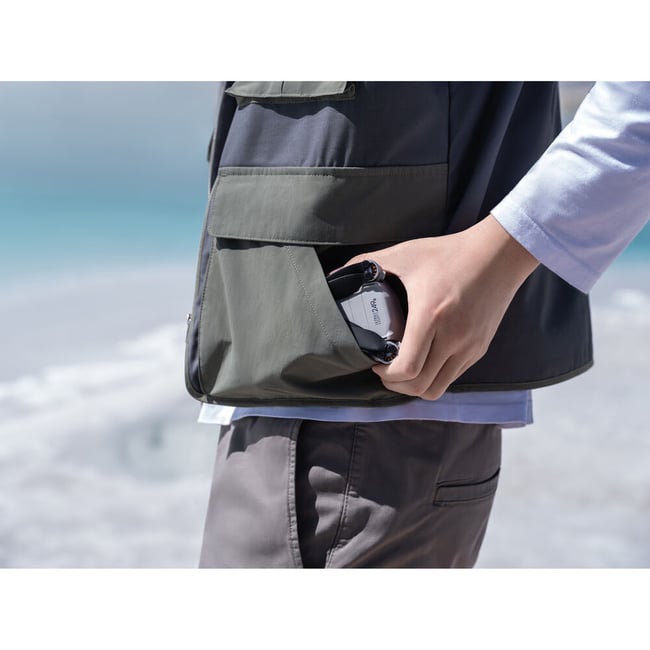
                بالطبع، تتمتع طائرة Mavic 3 الأكبر حجمًا بميزة كبيرة في الإضاءة المنخفضة، أو عندما تحتاج إلى القيام بالكثير من عمليات استعادة الظل. ومع ذلك، فإن Mini 3 Pro أكثر قابلية للاستخدام. يعد إحضار Mavic 3 معك خيارًا متعمدًا، حيث إنها تشغل مساحة تعادل مساحة عدسة تكبير مقاس 70-200 مم f/2.8، وتتطلب وحدة التحكم مكانًا آخر للعدسة الكاملة في الحقيبة. وعلى النقيض من ذلك، يمكن وضع جهاز Mini 3 بسهولة في مكان عدسة صغير الحجم، أو حتى يمكن وضعه في جيب سترة كبير.


                As the entire Mini 3 Pro weighs less than a single battery for the Mavic 3, you might think you’re sacrificing a ton of image quality, but the reality is surprising. While the Mini 3 Pro doesn’t have the same telephoto or pure IQ capabilities, the files from its 1/1.3″-type sensor (a bit bigger than a typical smartphone) are surprisingly good for such a small package. In daylight conditions and even right at sunrise and sunset, the Mini 3 Pro produces impressive images.

                Of course, the larger Mavic 3 has a big advantage in low light, or when you need to do a lot of shadow recovery. The Mini 3 Pro, however, is far more usable. Bringing the Mavic 3 along is a deliberate choice, as it takes up about as much space as a 70-200mm f/2.8 zoom lens, with the controller requiring another full lens spot in a bag. The Mini 3, by contrast, easily fits into a compact lens spot, or could even be stuck into a large jacket pocket.


                تعليق


                • #9
                  تُترجم ميزة الحجم أيضًا إلى طائرة بدون طيار أكثر هدوءًا وأقل اقتحامًا للاستخدام. بينما يجب عليك دائمًا تشغيل طائرة بدون طيار بما يتوافق مع اللوائح المحلية، فإن طائرة Mavic 3 الأكبر حجمًا تجذب المزيد من الاهتمام ويكون صوتها أعلى بكثير في السماء، مما قد يزعج الأشخاص أو الحيوانات القريبة.

                  يتمتع جهاز Mini 3 Pro، مثل Mavic 3، بعمر بطارية ممتاز. مع بطارية أقل من 250 جرام، تكون الطائرة بدون طيار جيدة لمدة 34 دقيقة، بينما تدفع حزمة البطارية الأكبر ذلك إلى 47 دقيقة. وفي كلتا الحالتين، يعد هذا وقتًا أكثر من كافٍ لاكتشاف التركيبات والتقاط الصور الثابتة والصور البانورامية ومقاطع الفيديو، ولا يزال لديك ما يكفي من الوقت للعودة والهبوط.

                  تعجبني أيضًا إحدى الحيل التي يمتلكها Mini 3 Pro. على وجه التحديد، فإن المحور المحوري قادر على الدوران بمقدار 90 درجة، مما يتيح لك التقاط صور ومقاطع فيديو رأسية أصلية. وهذا يلغي الحاجة إلى اقتصاص الصور أو مقاطع الفيديو إلى تنسيق رأسي، الأمر الذي قد يؤدي إلى استهلاك قدر كبير من الدقة. تمامًا مثل المنظور الفريد الذي توفره العدسة المقربة في طائرة Mavic، يمكن أن يساعدك الخيار الرأسي لـ Mini في تقديم مظهر فريد في بحر صور الطائرات بدون طيار.

                  DJI Mini 3 Pro + 6.7 مم f/1.7 @ 6.72 مم، ISO 120، 1/2000، f/1.7


                  The size advantage also translates into a quieter and less obtrusive drone to use. While you should always operate a drone in compliance with local regulations, the bigger Mavic 3 simply draws more attention and is much louder in the sky, which may annoy people or animals nearby.

                  The Mini 3 Pro, like the Mavic 3, has excellent battery life. With the sub-250g battery, the drone is good for 34 minutes, while the larger battery pack pushes that to 47 minutes. Either way, that’s more than enough time to figure out compositions, shoot stills, panoramas, and videos, and still have enough time to fly back and land.

                  I also like one of the tricks that the Mini 3 Pro has up its sleeve. Namely, the gimbal is able to rotate 90 degrees, letting you shoot native vertical photos and videos. This eliminates the need to crop photos or videos to a vertical format, which would take away a lot of resolution. Just like the unique perspective offered by the telephoto lens on the Mavic, the Mini’s vertical option can help you deliver a unique look in the sea of drone photos.
                  DJI Mini 3 Pro + 6.7mm f/1.7 @ 6.72mm, ISO 120, 1/2000, f/1.7

                  تعليق


                  • #10

                    3. DJI Air 2S

                    يقع DJI Air 2S في مكان مثير للاهتمام الآن. جودة الصورة جيدة بفضل المستشعر من النوع 1 بوصة، ولكنها ليست أفضل بشكل كبير من Mini 3 Pro. كما يزن Air 2S أكثر من 250 جرامًا. ما يميز Air 2S عن Mini 3 Pro هو أن Air 2S يدعم SDK الخاص بـ DJI. يتيح DJI MSDK للمطورين إنشاء تطبيقات يمكنها التفاعل مع الطائرات بدون طيار بطريقة مباشرة وفعالة. من الناحية العملية، هذا يعني أن تطبيقات مثل Litchi وMaven يمكنها دعم Air 2S، مما يوفر ميزات مهمة مثل التخطيط الآلي للطيران لهذه الطائرة بدون طيار.

                    يعد مستشعر Air 2S مقاس 1 بوصة خطوة واحدة أعلى من مستشعر Mini 3 Pro. (على وجه التحديد، يبلغ قطر المستشعر 15.9 ملم مقابل 12.0 ملم في Mini 3 Pro، وهو ما يمثل الفرق بين micro four Thirds وaps-c.) ومع ذلك، يتمتع Air 2S بفتحة قصوى أضيق من Mini 3 Pro، عند f/2.8 بدلاً من f/1.7. وهذا ينفي تمامًا الميزة في ظروف الإضاءة المنخفضة، على الرغم من أن Air 2S لا يزال يتمتع بنطاق ديناميكي أفضل إذا كان من الممكن استخدام كلتا الكاميرتين عند ISO الأساسي.

                    تشمل المزايا الأخرى لـ Air 2S اكتشافًا أفضل للعوائق ومحركات أقوى، مما يسمح للطائرة بدون طيار بالتحليق بشكل أسرع من Mini 3 Pro. يمكن لـ Air 2S أيضًا التعامل مع سرعات الرياح الأكبر. وأخيرًا، يدعم Air 2S أيضًا ADS-B، والذي يعمل بشكل أساسي كتحذير محتمل بوجود طائرة مأهولة في مجالك الجوي. معظم هذه المزايا ممكنة فقط بسبب عامل الشكل الأكبر لجهاز Air 2S.

                    علاوة على ذلك، يضيف Air 2S أيضًا عددًا من ميزات الفيديو عبر Mini 3 Pro، مثل دعم دقة 5.4K. في حين أن Air 2S كان يتمتع أيضًا في الأصل بميزة دعم الألوان 10 بت، فإن تحديث Mini 3 Pro جلب هذه الميزة إلى الطائرة الأصغر حجمًا.

                    عند الاختيار بين Air 2S، يتعلق الأمر حقًا بمسألة الحجم مقابل مزايا البرنامج والجسم. تقدم Mini 3 Pro تنازلات قليلة بشكل مدهش لكونها طائرة صغيرة بدون طيار، لكن Air 2S تحتفظ بهذه الميزات القليلة التي تجعلها متقدمة على خط Mini بالنسبة لبعض المستخدمين. هناك أيضًا فرق في السعر، حيث يبلغ سعر Air 2S حوالي 1000 دولار مقارنة بـ Mini 3 Pro بحوالي 670 دولارًا.


                    3. DJI Air 2S


                    The DJI Air 2S is in an interesting spot right now. The image quality is good, thanks to a 1-inch type sensor, but not drastically better than the Mini 3 Pro. Also, the Air 2S weighs more than 250 grams. What sets the Air 2S apart from the Mini 3 Pro is that the Air 2S has support for DJI’s SDK. The DJI MSDK lets developers create apps that can interface with drones in a direct, efficient way. In practical terms, this means that apps like Litchi and Maven can support the Air 2S, bringing important features like automated flight planning to this drone.

                    The Air 2S’s 1-inch type sensor is one step up from the Mini 3 Pro’s sensor. (Specifically, the sensor diagonal is 15.9mm versus 12.0mm on the Mini 3 Pro, which is about the difference between micro four thirds and aps-c.) However, the Air 2S has a narrower maximum aperture than the Mini 3 Pro, at f/2.8 rather than f/1.7. This fully negates the advantage in low light conditions, although the Air 2S still has better dynamic range if both cameras can be used at base ISO.

                    Other advantages of the Air 2S include better obstacle detection and beefier motors, allowing the drone to fly faster than the Mini 3 Pro. The Air 2S can also handle greater wind speeds. Lastly, the Air 2S also supports ADS-B, which essentially acts as a potential warning that manned aircraft are in your airspace. Most of these advantages are only possible because of the Air 2S’s larger form factor.

                    Beyond that, the Air 2S also adds a number of video features over the Mini 3 Pro, like support for 5.4K resolution. While the Air 2S also originally had an advantage in support for 10 bit color, an update to the Mini 3 Pro brought that feature down to the smaller drone.

                    When choosing between the Air 2S, it really comes down to a question of size versus software and body advantages. The Mini 3 Pro makes surprisingly few concessions for being such a small drone, but the Air 2S does retain those few features that keep it ahead of the Mini line for some users. There’s also the difference in price, with the Air 2S at about $1000 compared to the Mini 3 Pro at about $670.

                    تعليق


                    • #11

                      4. DJI Mavic Air 2


                      لا تزال طائرة Mavic Air 2 تحتل مكانًا في القائمة، وهو ما يعد مفاجأة بعض الشيء في صناعة تتحرك بسرعة كبيرة، بالإضافة إلى شهادة على مدى نجاح DJI عندما تم إصدارها لأول مرة. في حين أن Air 2S يقدم بعض التحسينات على Air 2 الموقر، بما في ذلك مستشعر أفضل وعدسة أوسع قليلاً، فإن الاختلافات قد لا تكون كافية لتبرير فرق السعر بالنسبة لك. إذا كنت تبحث عن قيمة قوية لطائرة بدون طيار للتصوير الفوتوغرافي، فإن طائرة Mavic Air 2 المستعملة ستكون صفقة رائعة.

                      DJI Air 2 + 24 مم f/2.8 @ 4.5 مم، ISO 100، 1/1000، f/2.8

                      يحتوي جهاز Air 2 على مستشعر من النوع 1/2 بوصة، قادر على إنتاج صور بدقة 12 ميجابكسل أو صور بدقة 48 ميجابكسل عبر وضع التصوير الخاص (وهو أمر لا يستحق ذلك للأسف). على الرغم من أن هذه الصور لن تتمتع بالضوضاء أو النطاق الديناميكي المتميز الموجود في الطائرات بدون طيار الأحدث، إلا أنها لا تزال لقطات ذات جودة ممتازة في ظروف ضوء النهار.

                      الأهم من ذلك، على عكس خيارات الطائرات بدون طيار الأخرى ذات الميزانية المحدودة، لا تزال طائرة Mavic Air 2 تدعم جميع ميزات DJI الرائعة، مثل اللقطات السريعة والصور البانورامية والتقطيع الزائد وتجنب العوائق. دعم Ocusync 2.0 يعني أن الطائرة بدون طيار ستتمتع بتغذية فيديو قوية وثابتة حتى في النطاق أو ظروف التردد اللاسلكي الضعيفة، مما يجعل من السهل الطيران بثقة.

                      DJI Air 2 + 24 مم f/2.8 @ 4.5 مم، ISO 100، 1/800، f/2.8

                      بشكل عام، يتمتع Air 2 بمكانة قوية حقًا كخيار للميزانية، إذا كنت مرتاحًا لشراء جهاز مستعمل. ومع ذلك، سأتأكد من العثور على صفقة في السوق المستعملة تجعل هذه الطائرة بدون طيار أرخص على الأقل من Mini 3 Pro. تعد Mini 3 Pro طائرة بدون طيار أفضل بشكل عام، لكن الاثنين قريبان جدًا إذا لم تكن بحاجة إلى خيار أقل من 250 جرامًا.


                      4. DJI Mavic Air 2


                      The Mavic Air 2 is still holding a spot on the list, which is both a bit of a surprise in an industry that moves so quickly, as well as a testament to just how much DJI got right when it was first released. While the Air 2S offers a few improvements over the venerable Air 2, including a better sensor and slightly wider lens, the differences may not be enough to justify the price difference to you. If you’re looking for a solid value for a photography drone, a used Mavic Air 2 is going to be a great deal.
                      DJI Air 2 + 24mm f/2.8 @ 4.5mm, ISO 100, 1/1000, f/2.8
                      The Air 2 has a 1/2-inch type sensor, capable of producing 12MP images or 48MP images via special shooting mode (which really aren’t worth it, unfortunately). While these images won’t have the noise or dynamic range excellence present in newer drones, they’re still excellent quality shots in daylight conditions.

                      Importantly, unlike other more budget minded drone options, the Mavic Air 2 still supports all the great DJI features, like Quickshots, panoramas, hyperlapses, and obstacle avoidance. Support for Ocusync 2.0 means that the drone will have a solid, steady video feed even at range or poor RF conditions, making it easy to fly with confidence.
                      DJI Air 2 + 24mm f/2.8 @ 4.5mm, ISO 100, 1/800, f/2.8
                      Overall, the Air 2 has a really solid spot as a budget option, if you’re comfortable buying used. However, I’d make sure you find a deal on the used market that puts this drone at least cheaper than the Mini 3 Pro. The Mini 3 Pro is a better drone overall, but the two are pretty close if you don’t need a sub-250 gram option.

                      تعليق


                      • #12
                        5. Autel Evo Lite+

                        في حين أن هذه القائمة سيطرت عليها طائرات بدون طيار رائعة من DJI، إلا أنها ليست الشركة الوحيدة في السوق، حتى لو كان الأمر كذلك في بعض الأحيان. أصدرت شركة Autel، وهي شركة أخرى لتصنيع الطائرات بدون طيار، عددًا من النماذج التي تهدف إلى التنافس مع عروض DJI. يُقارن Autel Evo Lite+ بشكل وثيق مع Air 2S، وهو مصمم ليتفوق عليه في بعض المواصفات، وإن كان ذلك بسعر أعلى.

                        يأتي التحسين الرئيسي المتعلق بالتصوير الفوتوغرافي في Evo Lite+ بعد غروب الشمس، حيث تكون الكاميرا قادرة على التصوير عند قيم ISO أعلى، مع نتائج أنظف. في حين أن كلا الطائرتين تشتركان في مستشعر CMOS مقاس 1 بوصة بدقة 20 ميجابكسل، يمكن لـ Autel دفع مستشعرهما إلى أبعد من ذلك، مما يوفر ISO يصل إلى 48000، مقارنة بـ Air 2S's 6400. يتم تعزيز هذه البراعة في الإضاءة المنخفضة بشكل أكبر من خلال خوارزمية "Moonlight" من Autel، والتي تهدف إلى تقديم لقطات أنظف مع ألوان أفضل.


                        يحتوي Evo Lite+ أيضًا على بطارية أكبر من Air 2S، مما يمنحه 40 دقيقة من وقت الطيران مقابل 30 دقيقة لـ Air 2S. على الرغم من أن هذا الاختلاف قد يبدو صغيرًا، إلا أنك تريد أن تترك بعض الراحة لرحلة العودة، مما يحد من أوقات الرحلة العملية إلى 35 و25 دقيقة على التوالي. إن الحصول على المزيد من الوقت باستخدام بطارية واحدة يجعل الأمور أسهل من منظور إدارة الطيران والتصوير الفوتوغرافي.

                        لسوء الحظ، يفتقد Evo Lite+ بعض الميزات التي أعتقد أنها مفيدة للطيارين. الأول: دعم ADS-B. في حين أن تنبيهات ADS-B ليست بديلاً عن اليقظة والضمير خلف العصي، إلا أنها يمكن أن تساعد في توفير الوعي في المجال الجوي الأكثر ازدحامًا.

                        أما السبب الثاني فقد يكون مفيدًا أو سلبيًا لبعض الطيارين، وهو عدم وجود سياج جغرافي على طائرة Autel بدون طيار. السياج الجغرافي عبارة عن قيود تضعها الشركة المصنعة على المكان الذي يمكنك الطيران فيه، وهو مصمم لمنع التشغيل في المناطق المحظورة. بينما تتيح لك DJI طلب الإعفاء، إلا أن العملية قد تكون مرهقة بعض الشيء. Autel، من ناحية أخرى، لا يقيد العمليات، للأفضل أو للأسوأ. مع Eco Lite+، ستحتاج بالتأكيد إلى إيلاء المزيد من الاهتمام لتطبيقات مثل B4UFly، أو الموارد الأخرى مثل المخططات المقطعية والقواعد المحلية.

                        بشكل عام، لست متأكدًا من أن Evo Lite+ يستحق سعرًا أعلى من Air 2S (حوالي 500 دولار أكثر تكلفة). إذا كنت تبحث عن أفضل جودة للإضاءة المنخفضة دون الحاجة إلى الانتقال إلى Mavic 3، فهذا خيار جيد. ومع ذلك، بالنسبة للمستخدمين الآخرين، فإن الحصول على Air 2S يترك الميزانية لشراء المزيد من البطاريات، وترخيص 107، وغيرها من أساسيات الطائرات بدون طيار، كل ذلك دون التضحية بالكثير من الجودة أو القدرة على الطيران.

                        آمل أن يكون هذا المقال قد أعطاك فكرة جيدة عن الفئات المختلفة للطائرات بدون طيار، وأي منها يجب أن تشتريه لاستخدام الصور والفيديو.


                        5. Autel Evo Lite+


                        While this list has been dominated by great drones from DJI, they aren’t the only company in the market, even if it feels that way sometimes. Autel, another drone maker, has released a number of models intended to compete with DJI’s offerings. The Autel Evo Lite+ compares most closely to the Air 2S, designed to beat it in a few specs, albeit at a higher list price.

                        The major, photography-relevant improvement on the Evo Lite+ comes after sunset, where the camera is capable of shooting at higher ISOs, with cleaner results. While both drones share a 1” 20MP CMOS sensor, Autel can push theirs further, offering ISOs up to 48000, compared to the Air 2S’s 6400. This low-light prowess is further bolstered by Autel’s “Moonlight” algorithm, which is meant to offer cleaner shots with better color.


                        The Evo Lite+ also sports a larger battery than the Air 2S, giving it 40 minutes of flight time to the Air 2S’s 30 minutes. While that difference might seem small, you want to leave some cushion for your return trip, limiting practical flight times to 35 and 25 minutes respectively. Having more time on a single battery makes things easier from both a flight management and photography perspective.

                        Unfortunately, the Evo Lite+ is missing a few features that I think are helpful to pilots. The first: ADS-B support. While ADS-B alerts are not a substitute for being alert and conscientious behind the sticks, it can help provide awareness in busier airspace.

                        The second might be a benefit or a negative to some pilots, and that’s the lack of geo-fencing on the Autel drone. Geofencing is manufacturer-created restrictions on where you can fly, designed to prevent operation in prohibited areas. While DJI lets you request an exemption, the process can be a bit cumbersome. Autel, on the other hand, doesn’t restrict the operations, for better or worse. With the Eco Lite+, you’ll definitely need to pay more attention to apps like B4UFly, or other resources like sectional charts and local rules.

                        Overall, I’m not sure the Evo Lite+ is worth the price premium over the Air 2S (about $500 more expensive). If you’re looking for the best low light quality without having to step up to the Mavic 3, it’s a good option. For other users, however, getting the Air 2S instead leaves budget for more batteries, 107 licensing, and other drone essentials, all without sacrificing much quality or flight capability.

                        I hope this article gave you a good idea of the different classes of drones, and which one you should buy for photo and video usage.

                        تعليق

                        يعمل...
                        X