إعدادات نيكون D500 الموصى بها Recommended Nikon D500 Settings

تقليص
X
 
  • تصفية - فلترة
  • الوقت
  • عرض
إلغاء تحديد الكل
مشاركات جديدة

  • إعدادات نيكون D500 الموصى بها Recommended Nikon D500 Settings

    إعدادات نيكون D500 الموصى بها
    Recommended Nikon D500 Settings

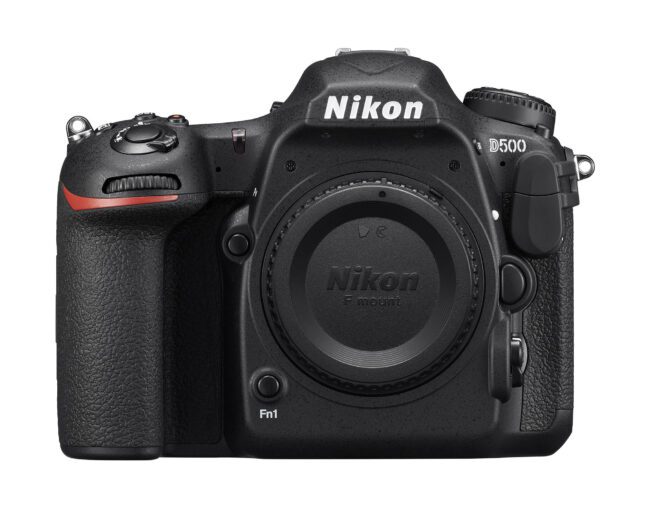
    تعد كاميرا D500 DSLR الاحترافية من نيكون واحدة من أفضل الخيارات بين العديد من مصوري الرياضة والحياة البرية. بفضل جودة تصنيعها الرائعة، وبيئة العمل التي أثبتت كفاءتها، ونظام التركيز البؤري التلقائي السريع للغاية والمخزن المؤقت الضخم، اكتسبت كاميرا Nikon D500 مكانتها كأفضل كاميرا DSLR من Nikon في التصوير الفوتوغرافي للحركة. ومع ذلك، وعلى الرغم من نقاط قوتها، فإنها تظل أداة معقدة تحتوي على العديد من خيارات القائمة التي يمكن أن تكون مربكة لبعض المصورين. في هذه المقالة، سأقدم معلومات حول الإعدادات التي أستخدمها شخصيًا وأشرح بإيجاز ما تفعله بعض أزرار الكاميرا وعناصر التحكم.

    يرجى أن تضع في اعتبارك أنه على الرغم من أن الإعدادات أدناه تناسبني، إلا أن هذا لا يعني أنها ستعمل مع الجميع. يتم توفير المعلومات الواردة في هذه المقالة كدليل لأولئك الذين يعانون من الكاميرا ويريدون فقط البدء بفهم الكاميرا وميزاتها العديدة. أخيرًا، من المهم ملاحظة أن هذا الدليل مكتوب مع التركيز على التصوير الفوتوغرافي للحركة.


    قبل أن نتعمق في قائمة الكاميرا، سنتعرف أولاً على عناصر التحكم الخارجية. على غرار كاميرات Nikon DSLR المتطورة الأخرى، تحتوي كاميرا D500 على الكثير من خيارات القائمة، ولكن هناك بعض الأشياء التي لا يمكنك التحكم فيها إلا من خلال أزرار وعناصر تحكم محددة.

    جدول المحتويات

    أوضاع التركيز البؤري التلقائي والأقواس وضع التصوير وأقراص وضع الكاميرا قائمة التشغيل قائمة تصوير الصور قائمة تصوير الأفلام قائمة الإعدادات المخصصة قائمة الإعداد


    Nikon’s professional-grade D500 DSLR is one of the top choices among many sports and wildlife photographers. Thanks to its superb build quality, proven ergonomics, insanely fast autofocus system and a huge buffer, the Nikon D500 earned its spot as a top Nikon DSLR for action photography. Still, despite its strengths, it remains as a complex tool with numerous menu options that can be confusing for some photographers. In this article, I will provide information on what settings I personally use and shortly explain what some of the camera buttons and controls do.

    Please keep in mind that while the below settings work for me, it does not mean that they will work for everyone else. The information in this article is provided as a guide for those who struggle with the camera and just want to get started with an understanding of the camera and its many features. Lastly, it is important to note that this guide is written with emphasis on action photography.


    Before we delve into the camera menu, we will first go over the exterior controls. Similar to other high-end Nikon DSLRs, the D500 has a lot of menu options, but there are some things that you can only control via specific buttons and controls.

    Table of Contents

  • #2

    أوضاع التركيز البؤري التلقائي والأقواس

    في الجزء الأمامي الأيسر من الكاميرا، ستجد رافعة تنتقل من AF إلى M، مع وجود زر في المنتصف (دائرة حمراء كبيرة في الصورة أدناه). تأكد من إبقاء هذا الرافعة على وضع "AF"، وإلا فلن تقوم العدسة بالتركيز التلقائي. إذا توقفت عدستك عن التركيز لسبب ما، فهذا هو ما تحتاج إلى التحقق منه أولاً. يتيح لك الضغط على الزر الموجود في منتصف الذراع الاختيار بين أوضاع التركيز المختلفة.


    لتنشيط هذا التغيير، تحتاج إلى الضغط مع الاستمرار على الزر، ثم تدوير القرص الخلفي بإبهامك. أثناء قيامك بذلك، انظر إلى شاشة LCD العلوية وستقوم الكاميرا بالتبديل بين AF-S وAF-C. لن أخوض في الكثير من التفاصيل حول كل وضع تركيز، حيث أنه تم شرحه بالتفصيل في هذه المقالة. هنا خلاصة سريعة:

    AF-S - يُسمى هذا الوضع "Single-servo AF" ويستخدم فقط للأهداف الثابتة التي لا تتحرك. عندما تضغط نصف زر على زر الغالق، يتم تثبيت التركيز البؤري التلقائي على الهدف وإذا تحرك الهدف، فلن يتغير التركيز، مما يؤدي إلى صورة ضبابية. استخدم هذا الوضع فقط لتصوير الأهداف الثابتة (المناظر الطبيعية، والهندسة المعمارية، وما إلى ذلك) وعند التصوير في مواقف الإضاءة المنخفضة للغاية. AF-C - المعروف باسم "التركيز البؤري التلقائي المستمر" في لغة نيكون، يُستخدم هذا الإعداد لتصوير الأهداف المتحركة. عندما تضغط نصف زر على زر الغالق ويتحرك هدفك، ستعيد الكاميرا التركيز. إذا كان هدفك مع كاميرا D500 هو التقاط الحركة المتحركة في الغالب، فاحتفظ بالكاميرا في وضع التركيز البؤري التلقائي AF-C وقم بالتبديل إلى AF-S فقط عند الحاجة.

    الآن إذا قمت بتدوير القرص الأمامي بإصبع السبابة أثناء الضغط على نفس الزر، فستحصل على العديد من الخيارات المختلفة مثل "S"، "D 25"، "D 72"، "D 153"، "3D"، "GrP" و"السيارة". توجد هذه الإعدادات للتحكم في نقاط التركيز التي تراها داخل عدسة الكاميرا. مرة أخرى، تم بالفعل شرح معظم هذه الأمور بالتفصيل في المقالة الموضحة حول أوضاع التركيز التلقائي، لذلك لن أخوض في الكثير من التفاصيل هنا. عند تصوير الحياة البرية، عادةً ما أقوم بضبط وضع التركيز البؤري التلقائي على المنطقة الديناميكية AF (72 نقطة) (D 72)، ولكن أبقي زر التحكم الأوسط على المنطقة الديناميكية AF (25 نقطة). بهذه الطريقة، يمكنني استخدام كلا وضعي التركيز البؤري التلقائي بالضغط على زرين مختلفين. يتم شرح طريقة الإعداد أدناه ضمن قائمة الإعدادات المخصصة -> عناصر التحكم. دعنا ننتقل إلى الضوابط الخارجية الأخرى.

    مباشرة فوق ذراع AF / M، ستجد زر BKT (Bracketing) لإعداد الأقواس على الكاميرا. تأكد من إيقاف تشغيل الأقواس بالضغط على الزر والتحقق من شاشة LCD العلوية للكاميرا. يجب أن يظهر "0F" على الجانب الأيسر، مما يعني أن القوسين غير نشط (يجب أن تختفي أحرف "BKT" أيضًا). سيسمح استخدام القرص الأمامي بتغيير خطوات التصحيح وسيغير القرص الخلفي عدد الإطارات التي تم التقاطها في تسلسل بين قوسين. تسمح كاميرا Nikon D500 بوضع ما يصل إلى 9 إطارات ومسافة تصل إلى 3 توقفات (EV). ومع ذلك، من أجل إجراء تصحيح 3 EV، يمكنك فقط تمكين 5 إطارات من التصحيح أو أقل.


    Autofocus Modes and Bracketing


    On the front left of the camera, you will find a lever that goes from AF to M, with a button in the middle (big red circle in the image below). Make sure to keep that lever on “AF”, or your lens will not autofocus. If for some reason your lens stops focusing, this is what you need to check first. Pressing the button in the middle of the lever allows to choose between different focus modes.


    To activate this change, you need to press and hold the button, then rotate the rear dial with your thumb. As you do this, look at the top LCD and the camera will switch between AF-S and AF-C. I won’t go into too much detail about each focus mode, since it is all explained in detail in this article. Here is a quick recap:
    1. AF-S – this mode is called “Single-servo AF” and it is used only for stationary subjects that do not move. When you half-press the shutter button, autofocus lock on the subject and if the subject moves, the focus will not change, resulting in a blurry picture. Only use this mode for photographing stationary subjects (landscapes, architecture, etc) and when shooting in extremely low-light situations.
    2. AF-C – known as “Continuous-servo AF” in Nikon’s lingo, this setting is used for photographing moving subjects. When you half-press the shutter button and your subject moves, the camera will re-acquire focus. If your goal with the D500 is to mostly capture moving action, then keep the camera in AF-C autofocus mode and only switch to AF-S when needed.

    Now if you rotate the front dial with your index finger while holding the same button, you will get many different options like “S”, “D 25”, “D 72”, “D 153”, “3D”, “GrP” and “Auto”. These settings are there for controlling the focus points that you see inside the viewfinder. Once again, most of these are already explained in detail in my autofocus modes explained article, so I won’t go into too much detail here. When shooting wildlife, I typically set my AF mode to Dynamic Area AF (72 points) (D 72), but keep my joystick center button to Dynamic Area AF (25 points). This way, I can use both AF modes by pressing two different buttons. The way this is set up is explained below under the Custom Settings Menu -> Controls. Let’s move on to other external controls.

    Right above the AF / M lever, you will find the BKT (Bracketing) button to set up bracketing on the camera. Make sure that bracketing is turned off by holding the button and checking the top camera LCD. It should show “0F” on the left side, which means that bracketing is inactive (the “BKT” letters should also disappear). Using the front dial will allow changing bracketing steps and the rear dial will change the number of frames shot in a bracketing sequence. The Nikon D500 allows bracketing up to 9 frames and up to 3 stops (EV) apart. However, in order to do 3 EV bracketing, you can only enable 5 frames of bracketing or fewer.

    تعليق


    • #3

      وضع التصوير وأقراص وضع الكاميرا

      في الجانب العلوي الأيسر من الكاميرا ستجد قرصًا كبيرًا به أزرار في الأعلى. تتمثل الوظيفة الأساسية لهذا القرص الدوار في ضبط وضع التصوير الخاص بك والأزرار الموجودة في الأعلى موجودة لإجراء تعديلات سريعة على تنسيق/جودة الصورة والقياس ووضع الكاميرا وتوازن اللون الأبيض:


      يحتوي القرص على مجموعة من أوضاع التصوير مثل "S" (فردي)، و"Cl، Ch" (منخفض مستمر ومرتفع مستمر)، و"Q" (هادئ)، و"Qc" (هادئ مستمر)، وTimer وMup (مرآة لأعلى) ). بافتراض أنك ستستخدم الكاميرا في المقام الأول لتصوير الألعاب الرياضية والحياة البرية، يجب عليك ضبط الكاميرا إما على الوضع "منخفض مستمر" أو "مرتفع مستمر"، اعتمادًا على عدد الإطارات في الثانية التي تريد تصويرها. يمكن تغيير إعداد "السرعة المنخفضة المستمرة" من خلال قائمة الكاميرا. إذا كنت ترغب في الحصول على أقصى سرعة للتصوير المستمر وهي 10 إطارات في الثانية، فيجب عليك ضبط الكاميرا على Ch.


      Shooting Mode and Camera Mode Dials


      On the top left side of the camera you will find a large dial with buttons on the top. The primary function of this rotary dial is to set your shooting mode and the buttons that sit on the top are there for making quick adjustments to image format/quality, metering, camera mode and white balance:


      The dial has a bunch of shooting modes like “S” (Single), “Cl, Ch” (Continuous low and Continuous high), “Q” (Quiet), “Qc” (Quiet continuous), Timer and Mup (Mirror Up). Assuming that you are going to be using the camera primarily for sports and wildlife photography, you should set your camera to either “Continuous low” or “Continuous high” mode, depending on how many frames per second you want to shoot. The speed of “Continuous low” setting can be changed through the camera menu. If you want to get the maximum continuous shooting speed of 10 fps, you should set the camera to Ch.

      تعليق


      • #4

        تعتبر الأزرار العلوية رائعة لتغيير الإعدادات المهمة بسرعة مثل وضع الكاميرا والقياس وتوازن اللون الأبيض. قامت شركة Nikon بنقل زر "MODE" من الجانب الأيمن أعلى الكاميرا إلى هذه المنطقة، لذلك يتعين عليك الآن استخدام اليدين لتغيير وضع الكاميرا (ضع في اعتبارك أنه على عكس الكاميرات الأخرى التي تتميز عادةً بوضع تقليدي قرص "PASM"، لا تحتوي كاميرا Nikon D500 على مثل هذا القرص وتتطلب استخدام زر الوضع هذا بدلاً من ذلك).

        لذلك، إذا كنت بحاجة إلى التبديل بين أوضاع الكاميرا المختلفة، فأنت بحاجة إلى الضغط على زر MODE بيدك اليسرى، ثم قم بتدوير القرص الخلفي. سيؤدي القيام بذلك إلى الكشف عن 4 أوضاع مختلفة: "P" (برنامج تلقائي)، و"S" (أولوية الغالق)، و"A" (أولوية فتحة العدسة)، و"M" (يدوي).

        بالنسبة لتصوير الحياة البرية، أعتمد في الغالب على وضعي أولوية فتحة العدسة والوضع اليدوي عند التصوير باستخدام كاميرا Nikon D500. يعد الوضع اليدوي مع Auto ISO خيارًا رائعًا بشكل خاص لتصوير الأحداث، حيث يمكنك ضبط فتحة العدسة وسرعة الغالق المطلوبة، والسماح للكاميرا بضبط ISO تلقائيًا.


        The top buttons are great for quickly changing important settings like Camera Mode, Metering and White Balance. Nikon has moved the “MODE” button from the right side of the top of the camera to this area, so you now have to use two hands in order to change the camera mode (keep in mind that unlike other cameras that typically feature a traditional “PASM” dial, the Nikon D500 does not have such dial and requires using this MODE button instead).

        So if you need to switch between different camera modes, you need to hold the MODE button with your left hand, then rotate the rear dial. Doing so will reveal 4 different modes: “P” (Program Auto), “S” (Shutter Priority), “A” (Aperture Priority) and “M” (Manual).

        For wildlife photography, I mostly rely on Aperture Priority and Manual modes when shooting with the Nikon D500. The Manual mode in combination with Auto ISO is a particularly great choice for photographing action, since you can set your desired Aperture and Shutter Speed, and let the camera adjust ISO automatically.

        تعليق


        • #5
          The exposure compensation button nicely complements the Aperture Priority mode, however, keep in mind that the D500 no longer has a dedicated AE-L / AF-L button, so if you need to lock exposure, you will need to assign another button such as the joystick to do that (instructions on how to do that are provided below).

          The “WB” button is there for setting/changing white balance. The rear dial allows you to change white balance, while the front dial allows fine-tuning it. The Nikon D500 comes with three Auto white balance modes: Auto0, Auto1 and Auto2. Auto0 reduces warm colors, Auto2 keeps warm colors, whereas Auto1 sets it to normal. I personally keep mine at Auto1, but depending on how cool or warm you want your images to be, you might want to look into Auto0 and Auto2 as well.

          I am not a fan of the “QUAL” button and its location, since I have accidentally switched my image quality format a few times in the past, so be careful with this one.


          يكمل زر تعويض التعريض الضوئي وضع أولوية فتحة العدسة بشكل جيد، ومع ذلك، ضع في اعتبارك أن كاميرا D500 لم تعد تحتوي على زر AE-L / AF-L مخصص، لذلك إذا كنت بحاجة إلى قفل التعريض الضوئي، فستحتاج إلى تعيين زر آخر مثل عصا التحكم للقيام بذلك (ترد أدناه تعليمات حول كيفية القيام بذلك).

          يوجد زر "WB" لضبط/تغيير توازن اللون الأبيض. يتيح لك القرص الخلفي تغيير توازن اللون الأبيض، بينما يسمح لك القرص الأمامي بضبطه بشكل دقيق. تأتي كاميرا Nikon D500 بثلاثة أوضاع توازن اللون الأبيض التلقائي: Auto0 وAuto1 وAuto2. يقوم Auto0 بتقليل الألوان الدافئة، بينما يحافظ Auto2 على الألوان الدافئة، بينما يقوم Auto1 بضبطها على الوضع الطبيعي. أنا شخصياً أحتفظ بصورتي في Auto1، ولكن اعتمادًا على مدى روعة أو دفء صورك التي تريدها، قد ترغب في النظر إلى Auto0 وAuto2 أيضًا.

          أنا لست من محبي الزر "QUAL" وموقعه، حيث قمت عن طريق الخطأ بتبديل تنسيق جودة الصورة الخاص بي عدة مرات في الماضي، لذا كن حذرًا مع هذا التنسيق.

          تعليق


          • #6

            أخيرًا، لتغيير وضع القياس، اضغط مع الاستمرار على زر القياس (أربعة مربعات بنقطة في المنتصف)، ثم قم بتدوير القرص الخلفي. ما لم يكن الوضع يستدعي ذلك، فإنني أحتفظ بجهاز Matrix Metering افتراضيًا. ومع ذلك، إذا كنت أقوم بتصوير هدف واحد، مثل طائر جاثم، أقوم أحيانًا بالتبديل إلى قياس البقعة لتعريض الهدف بشكل صحيح بدلاً من البيئة المحيطة به.

            على يمين قرص وضع التصوير، ستجد ثلاثة أزرار: "ISO" لتغيير ISO للكاميرا، وزر تسجيل الفيديو (بنقطة حمراء) وزر تعويض التعريض. نادرًا ما أقوم بتسجيل مقاطع الفيديو، لذا فإن الزرين الأكثر استخدامًا هنا هما ISO وتعويض التعريض. يسمح زر ISO بتغيير سريع لـ ISO إذا كنت تستخدم القرص الخلفي، ويتيح القرص الأمامي تشغيل وإيقاف تشغيل ISO التلقائي.

            على الرغم من أنني أحب القدرة على تشغيل وإيقاف ISO التلقائي بسرعة، عادةً ما ينتهي بي الأمر بتعيين زر Fn (الوظيفة) الموجود في الجزء الأمامي من الكاميرا إلى إعدادات ISO التلقائي، حتى أتمكن من إجراء تغييرات على أقصى قدر من الحساسية والحد الأدنى من سرعة الغالق ( راجع ملاحظاتي أدناه ضمن قائمة الإعدادات المخصصة). يعمل تعويض التعريض بطريقة مشابهة لـ ISO، باستثناء أن القرص الأمامي تم إلغاء تنشيطه والقرص الخلفي هو ما تستخدمه لتعديل التعريض الضوئي.


            Lastly, to change your metering mode, press and hold the metering button (four squares with a dot in the middle), then rotate the rear dial. Unless situation calls for it, I keep mine in Matrix Metering by default. However, if I am photographing a single subject, like a perched bird, I occasionally switch to Spot Metering to properly expose the subject rather than the environment surrounding it.

            To the right of the shooting mode dial, you will find three buttons: “ISO” for changing camera ISO, a video recording button (with a red dot) and Exposure Compensation button. I practically rarely ever record videos, so the two most used buttons here are ISO and Exposure Compensation. The ISO button allows quick change of ISO if you use the rear dial, and the front dial allows switching Auto ISO on and off.

            While I like the ability to quickly turn Auto ISO on and off, I typically end up mapping the Fn (Function) button on the front of the camera to Auto ISO settings, so that I can make changes to maximum sensitivity and minimum shutter speed (see my notes below under Custom Setting Menu). Exposure Compensation works in a similar way as ISO, except the front dial is deactivated and the rear dial is what you use to tweak your exposure.

            تعليق


            • #7
              قائمة التشغيل

              نادرًا ما ألمس أي شيء في قائمة التشغيل، نظرًا لأن ذلك يُستخدم فقط لعرض الصور على شاشة LCD الخلفية. الإعدادان الوحيدان اللذان أعبث بهما هما "خيارات عرض التشغيل" و"التدوير طويلًا". يمكن أن تكون "خيارات عرض التشغيل" مفيدة عند مراجعة الصور.

              عندما تضغط على زر التشغيل الموجود في الجزء الخلفي من الكاميرا، يمكنك الضغط على الأزرار لأعلى/لأسفل وستتمكن من رؤية أنواع مختلفة من المعلومات. وللحفاظ على الفوضى، قمت بتشغيل ثلاثة أشياء: "نقطة التركيز"، والتي تسمح لي برؤية المكان الذي ركزت عليه، و"الإبرازات" لإظهار التعريض الزائد في اللقطات (المعروف أيضًا باسم "وميض") و"نظرة عامة"، والتي تمنحني رؤية واضحة. ملخص التعرض الخاص بي (سرعة الغالق، فتحة العدسة، ISO، البعد البؤري، إلخ).

              أقوم دائمًا بإيقاف تشغيل إعداد "التدوير طويلًا"، لأنني لا أريد أن تقوم الكاميرا بتدوير الصور الرأسية إلى الوضع الأفقي عندما أقوم بمراجعتها - فمن الأسهل بكثير تدوير الكاميرا لرؤية صورة رأسية، بدلاً من الاضطرار إلى تكبير كل صورة. مرة واحدة. كل شيء آخر هو الافتراضي.


              Playback Menu


              I rarely ever touch anything in the Playback menu, since that’s only used for displaying pictures on the rear LCD. The only two settings that I ever mess with are “Playback display options” and “Rotate tall”. The “Playback display options” can be useful when reviewing images.

              When you press the playback button on the back of the camera, you can press up/down buttons and you will be able to see different types of information. To keep the clutter out, I have three things turned on: “Focus point”, which allows me to see where I focused, “Highlights” to show overexposure in shots (a.k.a. “blinkies”) and “Overview”, which gives me a summary of my exposure (shutter speed, aperture, ISO, focal length, etc).

              I always turn the “Rotate tall” setting off, because I do not want my camera to rotate vertical images to horizontal when I review them – it is much easier to rotate the camera to see a vertical image, rather than having to zoom in every single time. Everything else is default.

              تعليق


              • #8


                قائمة تصوير الصور

                لننتقل الآن إلى قائمة التصوير، وهي المكان الأول الذي أذهب إليه عادةً عند التحقق من إعداداتي. سأقدم قيمي أولاً، ثم أتحدث عن أهم الإعدادات:

                بنك قائمة التصوير: A (افتراضي) بنوك القائمة الموسعة: OFF مجلد التخزين: افتراضي، لا تتغير تسمية الملف: DSC (افتراضي)، لا تتغير اختيار الفتحة الأساسية: XQD (إلا إذا قمت بالتصوير SD فقط) وظيفة الفتحة الثانوية: Overflow Flash التحكم: —اختر منطقة الصورة: DX (24×16) جودة الصورة: NEF (RAW) حجم الصورة JPEG/TIFF: LargeNEF (RAW): تسجيل RAW LNEF (RAW) ضغط NEF (RAW): عمق بت NEF (RAW) المضغوط بدون فقدان: 14 بت ISO إعدادات الحساسية حساسية ISO: 100 التحكم التلقائي في حساسية ISO: تشغيل (انظر القسم التالي أدناه) أقصى حساسية: 3200 أقصى حساسية مع الفلاش: 3200 الحد الأدنى لسرعة الغالق: تلقائي


                Photo Shooting Menu


                Let’s now go through the Shooting Menu, which is the first place that I usually go to when checking my settings. I will first provide my values, then talk about the most important settings:
                • Shooting menu bank: A (default)
                • Extended menu banks: OFF
                • Storage folder: default, don’t change
                • File naming: DSC (default), don’t change
                • Primary slot selection: XQD (unless you only shoot SD)
                • Secondary slot function: Overflow
                • Flash control: —
                • Choose image area: DX (24×16)
                • Image quality: NEF (RAW)
                • Image size
                  • JPEG/TIFF: Large
                  • NEF (RAW): RAW L
                • NEF (RAW) recording
                  • NEF (RAW) compression: Lossless compressed
                  • NEF (RAW) bit depth: 14-bit
                • ISO sensitivity settings
                  • ISO sensitivity: 100
                  • Auto ISO sensitivity control: ON (see the next section below)
                    • Maximum sensitivity: 3200
                    • Maximum sensitivity with flash: 3200
                    • Minimum shutter speed: Auto

                تعليق


                • #9
                  توازن اللون الأبيض: AUTO (AUTO1 عادي) ضبط برنامج التحكم بالصورة Picture Control: SD (قياسي)، القيم الافتراضية مساحة اللون: Adobe RGBActive D-Lighting: OFF تعريض ضوئي طويل NR: OFF High ISO NR: OFF التحكم في التظليل: OFF التحكم التلقائي في التشوه: OFF تقليل الوميض إعداد تقليل الوميض: إيقاف مؤشر تقليل الوميض: تشغيل مجموعة التصحيح التلقائي: تصحيح AE التعريض الضوئي المتعدد: OFFHDR (النطاق الديناميكي العالي): إيقاف (رمادي) التصوير بفاصل زمني: إيقاف
                  ​​​​​​​
                  • White balance: AUTO (AUTO1 Normal)
                  • Set Picture Control: SD (Standard), Default values
                  • Color space: Adobe RGB
                  • Active D-Lighting: OFF
                  • Long Exposure NR: OFF
                  • High ISO NR: OFF
                  • Vignette control: OFF
                  • Auto distortion control: OFF
                  • Flicker reduction
                    • Flicker reduction setting: OFF
                    • Flicker reduction indicator: ON
                  • Auto bracketing set: AE bracketing
                  • Multiple exposure: OFF
                  • HDR (high dynamic range): OFF (grayed out)
                  • Interval timer shooting: OFF

                  تعليق


                  • #10
                    على الرغم من وجود الكثير من الإعدادات المختلفة هنا، فلا تقلق - فلن تقوم بتغيير العديد من الإعدادات كثيرًا. دعنا نستعرض بعض الإعدادات المهمة. الأول هو "بنك قائمة التصوير"، والذي يسمح لك بتخزين ما يصل إلى 4 إعدادات مختلفة لقائمة التصوير. والخبر السار هو أنه يمكنك تسمية كل بنك باسم مخصص مثل "Landscape" و"Portrait" وما إلى ذلك. الخبر السيئ هو أن بنوك الرماية هذه عديمة الفائدة عمليا! لقد شعر العديد من رماة نيكون، بما فيهم أنا، بالحيرة من تطبيق نيكون لبنوك القائمة، والتي لم يتم تغييرها لسنوات عديدة حتى الآن. هناك ثلاثة عيوب أساسية في بنوك الإعدادات المخصصة:

                    تكون بنوك القوائم منفصلة بالنسبة لأقسام "قائمة التصوير" و"قائمة الإعدادات المخصصة"، مما يعني أنه يتعين على المرء تخزين الإعدادات في مكانين، وعندما تكون هناك حاجة إلى تغيير، يجب عليه أيضًا أن يتذكر التغيير في مكانين. لا يوجد مكان واحد لتخزين جميع إعدادات الكاميرا، ولا يوجد زر على الكاميرا لتتمكن من تحديد بنك على الفور. أسرع طريقة هي الضغط على الزر "i" الموجود في الخلف، ثم اختيار بنك مختلف لـ "بنك قائمة تصوير الصور" أو "بنك الإعدادات المخصصة". تعد كاميرات Nikon DSLR ذات النهاية المنخفضة، مثل D610/D750، أفضل بكثير في هذا الصدد، لأنها تحتوي على خيارات U1 وU2 مباشرة على قرص PASM. ولا توجد طريقة لحفظ بنوك القائمة. نعم، من المفترض أن تكون بنوك القائمة عبارة عن بنوك "ذاكرة" تسمح للمرء بتخزين إعدادات معينة. إذا اخترت بنكًا معينًا ثم انتهى بك الأمر إلى تغيير أي من الإعدادات، فسيتم الحفاظ على هذه الإعدادات، مما يتعارض تمامًا مع غرض بنوك الذاكرة


                    While there are a lot of different settings here, do not worry – you won’t be changing many settings very often. Let’s go through some of the important settings. The first one is “Shooting menu bank”, which allows you to store up to 4 different shooting menu settings. The good news is, you can name each bank with a custom name like “Landscape”, “Portrait”, etc. The bad news is, these shooting banks are practically useless! Many Nikon shooters, including myself, have been puzzled by Nikon’s implementation of the menu banks, which have not been changed for many years now. There are three fundamental flaws with the custom settings banks:
                    1. Menu banks are separate for “Shooting Menu” and for “Custom Setting Menu” sections, which means that one would have to store settings in two places and when a change is needed, also have to remember to change in two places. There is no single place to store all camera settings.
                    2. There is no button on the camera to be able to instantly select a bank. The quickest way is to press the “i” button on the back, then choose a different bank for “Photo shooting menu bank” or “Custom settings bank”. Lower-end Nikon DSLRs like D610/D750 are much better in this regard, because they have U1 and U2 options right on the PASM dial.
                    3. There is no way to save menu banks. Yup, menu banks are supposed to be “memory” banks that allow one to store specific settings. If you pick a specific bank and then end up changing any of the settings, those settings will be preserved, which completely defeats the purpose of memory banks

                    تعليق


                    • #11

                      لقد حاولت في الماضي أن أكون منظمًا باستخدام كاميرات Nikon الاحترافية الخاصة بي وفشلت، فالقيود المذكورة أعلاه تجعل بنوك الذاكرة عديمة الفائدة بالنسبة لي. الأمر هو أنه ليس من الصعب إصلاح هذا الأمر، لأنه مجرد تغيير في البرنامج الثابت. كل ما يتعين على شركة Nikon فعله هو إضافة بعض الخيارات مثل U1 وU2 إلى زر MODE بالكاميرا، ثم السماح بحفظ جميع إعدادات الكاميرا في بنوك الذاكرة هذه (بما في ذلك إعدادات التركيز البؤري التلقائي) ويتم حل المشكلة! لا أعرف لماذا تستمر شركة Nikon في دفع نفس البنوك عديمة الفائدة مرارًا وتكرارًا إلى كاميرات DSLR الاحترافية.

                      كفى من الصخب، فلننتقل إلى إعدادات قائمة التصوير الأخرى. الإعداد المهم التالي هو "وظيفة الفتحة الثانوية"، والذي يسمح لك باختيار دور لفتحة البطاقة الثانية عند التصوير باستخدام بطاقات متعددة. يمكنك ضبط الكاميرا لحفظ الصور بثلاث طرق مختلفة. يمكنك ضبطه على "Overflow"، والذي يقوم بشكل أساسي بحفظ الصور على البطاقة الأولى، ثم عندما تنفد المساحة، تبدأ الكاميرا في الحفظ على البطاقة الثانية. عادةً ما أضبط خياري على Overflow، إلا إذا كنت أعمل على شيء مهم حقًا وأحتاج إلى نسخ الصور احتياطيًا.


                      I have tried to be organized with my pro-grade Nikon cameras in the past and failed – the above limitations just make memory banks useless for me. The thing is, it is not that hard to get this fixed, as it is just a firmware change. All Nikon needs to do is add a few options like U1 and U2 to the camera MODE button, then allow saving all camera settings into these memory banks (including autofocus settings) and the problem is solved! I don’t know why Nikon keeps pushing the same useless banks over and over again to the pro-grade DSLRs.

                      Enough of ranting, let’s move on to other shooting menu settings. The next important setting is “Secondary slot function”, which allows you to choose a role for the second card slot when shooting with multiple cards. You can set the camera to save images in three different ways. You can set it to “Overflow”, which basically saves images to the first card, then when the space runs out, the camera starts saving to the second card. I usually set mine to Overflow, unless I am working on something really important and need to backup images.

                      تعليق


                      • #12

                        وبالحديث عن النسخ الاحتياطي/التكرار، فهذا هو ما تستخدم الإعداد الثاني "النسخ الاحتياطي" من أجله. بمجرد تحديده، ستقوم الكاميرا بحفظ الصور على بطاقتي الذاكرة في نفس الوقت. يتيح لك الإعداد الأخير حفظ ملفات RAW على بطاقة واحدة وملفات JPEG على بطاقة أخرى. بالنسبة للتصوير اليومي، ما عليك سوى ترك الأمر على "Overflow" وإذا كنت تريد حقًا التأكد من عدم فقدان صورك في حالة فشل إحدى البطاقات، فاختر "Backup".

                        من الواضح أن "جودة الصورة" مضبوطة على RAW، حيث يجب عليك دائمًا التصوير بصيغة RAW. يتم دائمًا ضبط "تسجيل NEF (RAW)" على 14 بت مضغوط بدون فقدان البيانات. اخترت 14 بت للحصول على أفضل جودة صورة يمكن للكاميرا تقديمها وينتج عن الضغط "بدون فقدان" ملفات أصغر بكثير من "غير مضغوط".

                        "توازن اللون الأبيض" هو تلقائي وجميع الإعدادات الأخرى مثل عناصر التحكم بالصورة Picture Control وActive D-Lighting وHDR وما إلى ذلك. تم إيقاف تشغيلها، حيث لا يؤثر أي منها (باستثناء "NR التعريض الطويل") على صور RAW. تذكر أن ملفات RAW تحتوي على بيانات لم يتم التلاعب بها وتتطلب معالجة لاحقة، وبالتالي فإن الإعدادات المذكورة أعلاه تؤثر فقط على الصور التي تعرضها شاشة LCD الخاصة بالكاميرا (يحتوي كل ملف RAW على صورة JPEG كاملة الحجم، وهي ما يتم استخدامه لعرض الصور على الشاشة). LCD) وإذا كنت تستخدم برنامجًا خاصًا بشركة Nikon مثل Capture NX-D، فيمكن تطبيق هذه الإعدادات على صور RAW تلقائيًا. وبما أنني أستخدم برامج أخرى تابعة لجهة خارجية لتخزين ومعالجة الصور الخاصة بي، فإن الجزء الثاني لا ينطبق علي. تم إيقاف كل شيء آخر.


                        And speaking of backup/redundancy, that’s what you use the second setting “Backup” for. Once selected, the camera will save photos to both memory cards at the same time. The last setting allows you to save RAW files to one card and JPEG files to another. For your day to day shooting, just leave it on “Overflow” and if you really need to make sure that your photos are not lost if one of the cards fails, then choose “Backup”.

                        “Image quality” is obviously set to RAW, since you should always be shooting in RAW. “NEF (RAW) recording” is always set on mine to 14-bit Lossless Compressed. I choose 14-bit to get the best image quality the camera can deliver and “Lossless” compression results in much smaller files than “Uncompressed”.

                        “White Balance” is Auto and all other settings like Picture Controls, Active D-Lighting, HDR, etc. are turned off, since none of them (with the exception of “Long Exposure NR”) affect RAW images. Remember, RAW files contain non-manipulated data and require post-processing, so the above settings only impact images displayed by your camera’s LCD screen (each RAW file contains a full-size JPEG image, which is what is used to display images on the LCD) and if you use Nikon’s proprietary software like Capture NX-D, those settings can be applied to RAW images automatically. Since I use other third party software to store and process my images, the second part does not apply to me. Everything else is turned off.

                        تعليق


                        • #13


                          على الرغم من أن مساحة اللون لا تهم ملفات RAW، إلا أنني أستخدم AdobeRGB لأنه يوفر رسمًا بيانيًا أكثر دقة قليلاً (نظرًا لأن الكاميرا تعرض رسومًا بيانية بناءً على صور JPEG التي تعرضها الكاميرا، حتى إذا كنت تقوم بالتصوير بصيغة RAW حصريًا).

                          إعداد القائمة الكبيرة الذي أقوم بتغييره بشكل متكرر هو "إعدادات حساسية ISO". عند التصوير وأنا محمول باليد، أستخدم في الغالب Auto ISO، لأنها ميزة رائعة توفر لي الكثير من الوقت. بدلاً من تحديد ISO لكل لقطة، قمت فقط بضبطها على تلقائي، مع ضبط ISO الأساسي على 100، وتعيين الحساسية القصوى على 3200 (الحد الشخصي لمستويات الضوضاء "المقبولة") وضبط الحد الأدنى لسرعة الغالق على "تلقائي".

                          يعد إعداد الحد الأدنى لسرعة الغالق "تلقائي" أمرًا رائعًا، لأنه يقرأ البعد البؤري للعدسة المرفقة ويقوم تلقائيًا بضبط الحد الأدنى لسرعة الغالق على البعد البؤري للعدسة. إذا كانت يداك مرتعشتين، فيمكنك تغيير الحد الأدنى لسرعة الغالق التلقائي لتكون خطوة واحدة أقرب إلى "أسرع"، والذي يستخدم بشكل أساسي الحد الأدنى لسرعة الغالق أسرع مرتين.

                          على سبيل المثال، إذا كان لدي عدسة مقاس 500 مم مثبتة على الكاميرا، فإن الحد الأدنى لسرعة الغالق سيتراوح من 1/500 إلى 1/1000 من الثانية مع خطوة واحدة للأعلى. إذا قمت بتحريكه حتى النهاية (أسرع)، فسوف يؤدي ذلك إلى تسريع سرعة الغالق مرة أخرى إلى 1/2000 من الثانية.


                          Although color space does not matter for RAW files, I use AdobeRGB because it gives a slightly more accurate histogram (since the camera shows histograms based on camera-rendered JPEG images, even if you shoot exclusively in RAW).

                          The big menu setting that I frequently change is “ISO sensitivity settings”. When shooting hand-held, I mostly use Auto ISO, because it is a great feature that saves me a lot of time. Instead of specifying ISO for every shot, I just have it set on Auto, with its base ISO set to 100, Maximum sensitivity set to 3200 (my personal limit for “acceptable” noise levels) and Minimum shutter speed set to “Auto”.

                          The “Auto” minimum shutter speed setting is great, because it reads the focal length of the attached lens and automatically adjusts the minimum shutter speed to the focal length of the lens. If you have shaky hands, you can change the Minimum shutter speed Auto to be one step closer to “Faster”, which basically uses a twice faster minimum shutter speed.

                          For example, if I have a 500mm lens mounted on the camera, my minimum shutter speed will go from 1/500 to 1/1000 of a second with one step up. If I move it all the way to the end (Faster), it will speed up the shutter speed again to 1/2000 of a second.

                          تعليق


                          • #14


                            قائمة تصوير الفيلم

                            إعادة تعيين قائمة تصوير الأفلام: —تسمية الملف: DSCDالوجهة: XQDاختيار منطقة الصورة: DXFrame حجم / معدل الإطار: 2160 p24 (3840×2160)؛ 24p جودة الفيلم: إعدادات حساسية HIGHISO حساسية ISO (الوضع M): 64 التحكم التلقائي في ISO (الوضع M): تشغيل الحد الأقصى للحساسية: 12800 توازن اللون الأبيض: تلقائي 1 (نفس إعدادات الصورة) ضبط برنامج التحكم بالصورة Picture Control: نفس إعدادات الصورة الإضاءة D النشطة: إيقاف ISO NR العالي: وميض عادي التخفيض: حساسية الميكروفون التلقائي: يدوي 10 استجابة التردد: WIDEتقليل ضوضاء الرياح: OFFفيلم بفاصل زمني: OFFElectronic VR: OFF

                            لن أتطرق إلى ميزات تسجيل الأفلام، لأنها تعتمد بشكل كبير على ما تحاول القيام به. لن تعمل بعض الميزات اعتمادًا على ما إذا كنت تقوم بالتصوير بدقة 4K أو 1080 بكسل، لذلك إذا رأيت أي شيء باللون الرمادي أو لا يعمل، فقد تحتاج إلى التبديل إلى التقاط فيديو بدقة 1080 بكسل لتمكينها.


                            Movie Shooting Menu
                            • Reset movie shooting menu: —
                            • File naming: DSC
                            • Destination: XQD
                            • Choose image area: DX
                            • Frame size / frame rate: 2160 p24 (3840×2160); 24p
                            • Movie quality: HIGH
                            • ISO sensitivity settings
                              • ISO sensitivity (mode M): 64
                              • Auto ISO control (mode M): ON
                              • Maximum sensitivity: 12800
                            • White Balance: Auto1 (Same as photo settings)
                            • Set Picture Control: Same as photo settings
                            • Active D-Lighting: OFF
                            • High ISO NR: Normal
                            • Flicker reduction: Auto
                            • Microphone sensitivity: Manual 10
                            • Frequency response: WIDE
                            • Wind noise reduction: OFF
                            • Time-lapse movie: OFF
                            • Electronic VR: OFF

                            I am not going to go through the movie recording features, because it highly depends on what you are trying to do. Some of the features won’t work depending on whether you shoot in 4K or 1080p, so if you see anything grayed out or not working, you might need to switch to 1080p video capture in order to enable them.

                            تعليق


                            • #15
                              قائمة الإعدادات المخصصة

                              هذا هو المكان الذي يضيع فيه الكثير من الأشخاص، نظرًا لوجود العديد من الإعدادات المختلفة. فيما يلي الإعدادات التي أستخدمها شخصيًا:

                              اختيار أولوية التركيز البؤري التلقائي AF-C: تحديد أولوية إطلاق AF-S: تتبع التركيز البؤري مع القفل: استجابة التركيز البؤري التلقائي لللقطة المحظورة: 3، حركة الموضوع: تتبع متوسط ​​ثلاثي الأبعاد، اكتشاف الوجه: إيقاف تشغيل منطقة مراقبة التتبع ثلاثي الأبعاد: عدد واسع من نقاط التركيز البؤري: AF55، تخزين حسب الاتجاه : تنشيط نقطة التركيز البؤري التلقائي: إيقاف - يرجى القراءة أدناه حول هذا الإعداد قيود وضع التركيز البؤري التلقائي: لا توجد قيود التفاف نقطة التركيز البؤري: إيقاف خيارات نقطة التركيز البؤري وضع التركيز اليدوي: تشغيل مساعدة التركيز البؤري التلقائي للمنطقة الديناميكية: تشغيل عرض التركيز البؤري التلقائي لمنطقة المجموعة: أسهم كبيرة إضاءة نقطة التركيز البؤري: تلقائي حلقة التركيز البؤري اليدوية في وضع التركيز البؤري التلقائي: تمكين


                              Custom Setting Menu


                              This is where a lot of people get lost, since there are so many different settings. Here are the settings that I personally use:
                              • Autofocus
                                • AF-C priority selection: Release
                                • AF-S priority selection: Focus
                                • Focus tracking with lock-on: Blocked shot AF response: 3, Subject motion: middle
                                • 3D-tracking face-detection: Off
                                • 3D-tracking watch area: Wide
                                • Number of focus points: AF55
                                • Store by orientation: Focus point
                                • AF activation: OFF – please read below on this setting
                                • Autofocus mode restrictions: No restrictions
                                • Focus point wrap-around: OFF
                                • Focus point options
                                  • Manual focus mode: ON
                                  • Dynamic-area AF assist: ON
                                  • Group-area AF display: Large arrows
                                  • Focus point illumination: AUTO
                                • Manual focus ring in AF mode: Enable

                              تعليق

                              يعمل...
                              X