9 نصائح للتصوير الماكرو للمبتدئين 9 Macro Photography Tips for Beginners

تقليص
X
 
  • تصفية - فلترة
  • الوقت
  • عرض
إلغاء تحديد الكل
مشاركات جديدة

  • 9 نصائح للتصوير الماكرو للمبتدئين 9 Macro Photography Tips for Beginners

    9 نصائح للتصوير الماكرو للمبتدئين
    9 Macro Photography Tips for Beginners


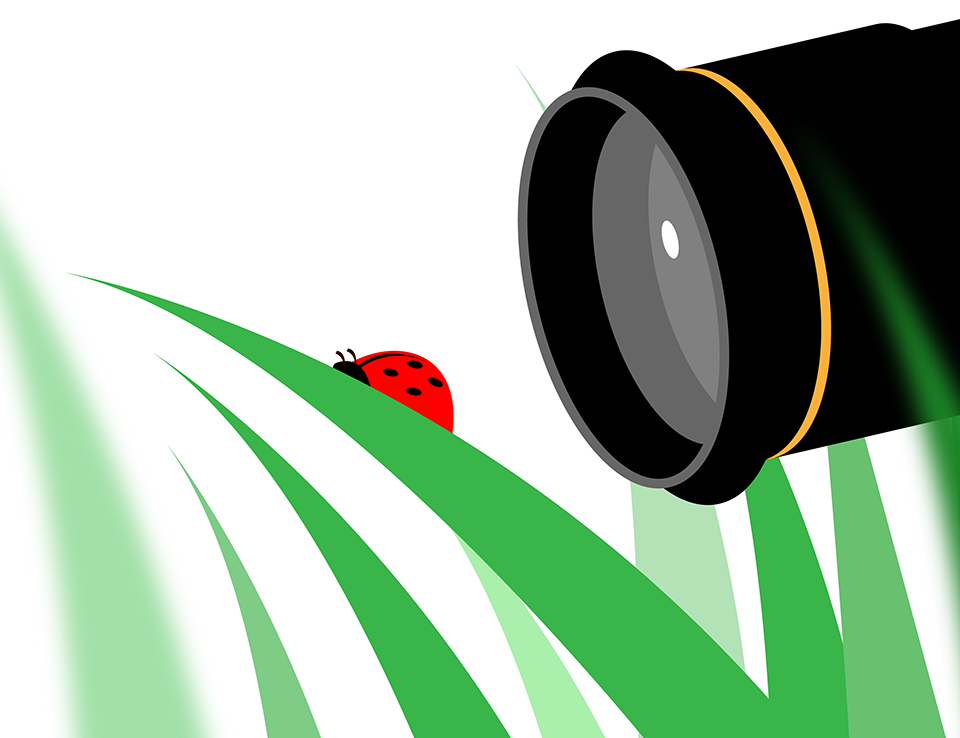
    With spring arriving in the Northern Hemisphere, it’s time again for many of us to go outside in humid, buggy areas in search of creepy-crawlies. Macro photography is… peculiar, I admit that. But anyone who’s tried this genre also knows its allure. Navigate some technical hurdles and heed the mosquitos, and you’ll find whole universes of photographs to capture in your backyard. If you’re just beginning macro photography, the following tips will show you where to start.

    Table of Contents

    مع حلول الربيع في نصف الكرة الشمالي، حان الوقت مرة أخرى للكثير منا للخروج في مناطق رطبة وعربات التي تجرها الدواب بحثًا عن الحشرات الزاحفة. تصوير الماكرو... غريب، أعترف بذلك. لكن أي شخص جرب هذا النوع يعرف أيضًا جاذبيته. تجاوز بعض العقبات التقنية وقم بإخفاء البعوض، وستجد عوالم كاملة من الصور الفوتوغرافية التي يمكنك التقاطها في الفناء الخلفي لمنزلك. إذا كنت قد بدأت للتو في تصوير الماكرو، فستوضح لك النصائح التالية من أين تبدأ.

    جدول المحتويات

    تعلم سلوك الأخطاء ابدأ عند شروق الشمس أخبر قصة استخدم الفلاش قم بتوزيع نغمة مصدر الضوء لأسفل اضبط الفلاش تلقائيًا (TTL) قم بالتركيز بشكل صحيح يدويًا (أحيانًا) تخلص من بقع الغبار

  • #2

    1. Learn Bug Behavior


    You should understand your subject if you want to photograph it as well as possible. What, for example, is the easiest way to approach a dragonfly without scaring it off? By knowing the answer, you dramatically improve your chances of getting the photo you want.

    Some bugs fly away when you get near, or when your camera’s flash goes off. Others need a few minutes to get used to your presence, but they’ll ignore you in time. Still others don’t have the slightest care about people. In that way, macro photography is like the broader genre of wildlife photography. You need to work with your subject’s natural behavior in order to photograph it successfully.

    The best way to learn bug behavior is simply to take a lot of macro photos. The more you photograph one particular insect, the easier it will be for you to predict what it’s about to do. This tip extends to other animals like lizards and spiders, of course.

    Now, to answer the question I posed a moment ago:

    The best way to approach a dragonfly, in my experience, is to do so gradually. Approach slower and slower as you get nearer and nearer. Pause for a few seconds every so often. Lastly, never make sudden movements. These steps work almost flawlessly for me. Once, I accidentally touched the dragonfly with my lens hood and didn’t scare it away.
    NIKON D800E + 105mm f/2.8 @ 105mm, ISO 100, 1/250, f/8.0

    1. تعلم سلوك الأخطاء

    يجب أن تفهم موضوعك إذا كنت تريد تصويره قدر الإمكان. على سبيل المثال، ما هي أسهل طريقة للاقتراب من اليعسوب دون إخافته؟ من خلال معرفة الإجابة، يمكنك تحسين فرص حصولك على الصورة التي تريدها بشكل كبير.

    تطير بعض الأخطاء بعيدًا عندما تقترب، أو عندما ينطفئ فلاش الكاميرا. يحتاج الآخرون إلى بضع دقائق ليعتادوا على وجودك، لكنهم سيتجاهلونك في الوقت المناسب. لا يزال البعض الآخر ليس لديهم أدنى اهتمام بالناس. وبهذه الطريقة، يشبه التصوير الفوتوغرافي الماكرو النوع الأوسع من تصوير الحياة البرية. تحتاج إلى التعامل مع السلوك الطبيعي لموضوعك حتى تتمكن من تصويره بنجاح.

    أفضل طريقة لتعلم سلوك الأخطاء هي ببساطة التقاط الكثير من الصور الكلية. كلما قمت بتصوير حشرة معينة، أصبح من الأسهل عليك التنبؤ بما ستفعله. وتمتد هذه النصيحة إلى حيوانات أخرى مثل السحالي والعناكب بالطبع.

    والآن، للإجابة على السؤال الذي طرحته منذ قليل:

    أفضل طريقة للتعامل مع اليعسوب، حسب تجربتي، هي أن تفعل ذلك تدريجيًا. اقترب بشكل أبطأ وأبطأ كلما اقتربت أكثر فأكثر. توقف لبضع ثوان بين الحين والآخر. وأخيرا، لا تقم أبدا بحركات مفاجئة. هذه الخطوات تعمل بشكل لا تشوبه شائبة تقريبًا بالنسبة لي. ذات مرة، لمست اليعسوب بغطاء العدسة عن طريق الخطأ ولم أخيفه.

    نيكون D800E + 105 مم f/2.8 @ 105 مم، ISO 100، 1/250، f/8.0

    تعليق


    • #3

      2. Start at Sunrise


      A number of photographers have asked me when I prefer taking macro photos. My answer is always the same: sunrise, ideally on a warm, humid, windless, sunny day.
      • Sunrise, because bugs are likely to be more sluggish from the night before.
      • Warm, because you are more likely to find a lot of bugs out in the first place.
      • Humid, because dew droplets look beautiful in photos. Water also slows down many creatures (making them sit still and dry off).
      • Windless, because it is very difficult to focus on a macro subject when plants are moving in the wind, and more bugs are usually out on calm days as well.
      • Sunny, because it makes for good light and attracts more creatures.

      The common denominator here is sunrise; the light is great, bugs are slow, and water droplets are more likely to decorate the world.

      Of course, sunrise isn’t the only time of day that works for macro photography. If you use a flash, your lighting will be similar regardless of when you take pictures. So, it’s all about finding an interesting subject, no matter the time it happens.

      However, if you’re starting from scratch and you want the best chances, sunrise is my recommendation.
      NIKON D800E + 105mm f/2.8 @ 105mm, ISO 100, 1/640, f/3.2
      2. ابدأ عند شروق الشمس

      لقد سألني عدد من المصورين متى أفضّل التقاط صور الماكرو. إجابتي هي نفسها دائمًا: شروق الشمس، من الأفضل أن يكون في يوم دافئ، رطب، عديم الرياح، ومشمس.

      شروق الشمس، لأن الحشرات من المرجح أن تكون أبطأ من الليلة السابقة. دافئة، لأنك أكثر عرضة للعثور على الكثير من الحشرات في المقام الأول. رطبة، لأن قطرات الندى تبدو جميلة في الصور. يبطئ الماء أيضًا حركة العديد من المخلوقات (مما يجعلها تجلس ساكنة وتجف)، بدون ريح، لأنه من الصعب جدًا التركيز على موضوع كبير عندما تتحرك النباتات في مهب الريح، وعادةً ما يكون هناك المزيد من الحشرات في الأيام الهادئة أيضًا. لأنه يجعل الضوء جيدًا ويجذب المزيد من المخلوقات.

      القاسم المشترك هنا هو شروق الشمس؛ الضوء رائع، والحشرات بطيئة، ومن المرجح أن تزين قطرات الماء العالم.

      وبطبيعة الحال، شروق الشمس ليس هو الوقت الوحيد من اليوم الذي يصلح لتصوير الماكرو. إذا كنت تستخدم الفلاش، فستكون الإضاءة لديك متشابهة بغض النظر عن وقت التقاط الصور. لذلك، الأمر كله يتعلق بالعثور على موضوع مثير للاهتمام، بغض النظر عن وقت حدوثه.

      ومع ذلك، إذا كنت تبدأ من الصفر وتريد أفضل الفرص، فإن شروق الشمس هو توصيتي.

      نيكون D800E + 105 ملم f/2.8 @ 105 ملم، ISO 100، 1/640، f/3.2

      تعليق


      • #4

        3. Tell a Story


        The best photos work well because they resonate with our emotions. In the field of macro photography – or any genre of photography – one of the best ways to convey emotion is to tell a story.

        Most of my favorite macro photos do not just show a subject. Instead, they show a subject doing something. A bug is reaching for a nearby leaf, or waiting for something. It’s playing with the light and background. Rather than looking at a photo of a bug, you are watching a story unfold.

        Macro photography is at an advantage when it comes to telling a story. Because your subject is so far outside what people ordinarily see, you can get away with a more “plain” and literal style while still retaining a sense of wonder in your work. For example, you might capture an ordinary bug like a housefly, magnifying it through a microscope to show remarkable detail in its eyes.

        Unfortunately, the importance of telling a story is also the reason why some macro photographers stage photos without telling their audience. To convey a whimsical mood, they find an interesting bug, put it in the freezer, and then manipulate it manually in a studio into unnatural positions. This sort of photo is easy to identify in many cases because it looks completely unrealistic, like a praying mantis on top of a mushroom with a perfect background and studio lighting.
        Nikon D800e + 105mm f/2.8 @ 105mm, ISO 100, 1/3200, f/4.0

        3. احكي قصة

        أفضل الصور تعمل بشكل جيد لأنها لها صدى مع مشاعرنا. في مجال تصوير الماكرو - أو أي نوع من أنواع التصوير الفوتوغرافي - فإن إحدى أفضل الطرق لنقل المشاعر هي رواية قصة.

        معظم صور الماكرو المفضلة لدي لا تظهر موضوعًا فقط. بدلا من ذلك، فإنها تظهر موضوعا يفعل شيئا ما. يصل الخلل إلى ورقة قريبة، أو ينتظر شيئًا ما. إنها تلعب بالضوء والخلفية. بدلاً من النظر إلى صورة حشرة ما، فإنك تشاهد قصة تتكشف.

        يعد التصوير الفوتوغرافي الماكرو ميزة عندما يتعلق الأمر بسرد القصة. نظرًا لأن موضوعك بعيد جدًا عما يراه الناس عادةً، يمكنك الابتعاد بأسلوب أكثر "وضوحًا" وحرفيًا مع الحفاظ على حس الدهشة في عملك. على سبيل المثال، يمكنك التقاط حشرة عادية مثل الذبابة المنزلية، وتكبيرها من خلال المجهر لإظهار تفاصيل رائعة في عينيها.

        لسوء الحظ، فإن أهمية سرد القصة هي أيضًا السبب وراء قيام بعض مصوري الماكرو بالتقاط صور دون إخبار جمهورهم. لنقل مزاج غريب الأطوار، وجدوا خطأً مثيرًا للاهتمام، ووضعوه في الثلاجة، ثم قاموا بالتلاعب به يدويًا في الاستوديو في أوضاع غير طبيعية. من السهل التعرف على هذا النوع من الصور في كثير من الحالات لأنه يبدو غير واقعي تمامًا، مثل فرس النبي فوق الفطر مع خلفية مثالية وإضاءة الاستوديو.

        نيكون D800e + 105 مم f/2.8 @ 105 مم، ISO 100، 1/3200، f/4.0

        تعليق


        • #5

          4. Use a Flash


          One of the primary challenges in macro photography is capturing enough light. There are three reasons:

          First, you’re focused at extreme magnifications, which reduces your depth of field down to just a hair’s width. Unless you’re shooting a stationary subject and using a tripod (at which point focus stacking is an option), it will be a huge challenge getting enough of your subject sharp. Your best option is to use a small aperture like f/16 or f/22 (full frame), and that makes your photo extremely dark.

          Second, the close focus not only magnifies your subject, but also motion blur (and blur from camera shake). The old “1/focal length” rule is not nearly enough to capture sharp macro photos handheld. Vibration reduction helps – as does standing a bit farther from your subject to magnify it less – but you’re still dealing with heavy blur even in the best of cases.

          Third, the closer you get to your subject, the more natural light you will block. Even on a bright day, the wrong angle can cover everything with your shadow, cutting down the light by several stops. Not only does this make it even harder to get a bright enough photo, but it means that the quality of light itself may be quite poor – with your subject dark and the surroundings bright.

          The easy solution – use a flash. It fills in all the light you could want, and the duration of a flash is so quick that it will freeze any motion in your scene instantly. Some photographers use constant lights for macro photography, such as ring lights, but I don’t recommend these because they only add a couple stops of light to your images. Flashes, when placed so close to your subject, actually outshine sunlight.
          NIKON D7000 + 105mm f/2.8 @ 105mm, ISO 800, 1/250, f/8.0

          4. استخدم الفلاش

          أحد التحديات الأساسية في التصوير الفوتوغرافي الكلي هو التقاط ما يكفي من الضوء. هناك ثلاثة أسباب:

          أولاً، أنت تركز على التكبير الشديد، مما يقلل من عمق مجالك إلى عرض الشعرة فقط. ما لم تكن تقوم بتصوير هدف ثابت واستخدام حامل ثلاثي الأرجل (عند هذه النقطة يكون تجميع التركيز البؤري خيارًا)، سيكون تحديًا كبيرًا الحصول على ما يكفي من وضوح هدفك. أفضل خيار لديك هو استخدام فتحة صغيرة مثل f/16 أو f/22 (إطار كامل)، وهذا يجعل صورتك مظلمة للغاية.

          ثانيًا، لا يعمل التركيز البؤري القريب على تكبير الهدف فحسب، بل يعمل أيضًا على تكبير ضبابية الحركة (والضبابية الناتجة عن اهتزاز الكاميرا). قاعدة "1/البعد البؤري" القديمة ليست كافية تقريبًا لالتقاط صور ماكرو حادة محمولة باليد. يساعد تقليل الاهتزاز - كما هو الحال مع الوقوف بعيدًا قليلاً عن موضوعك لتكبيره بشكل أقل - ولكنك لا تزال تتعامل مع ضبابية شديدة حتى في أفضل الحالات.

          ثالثًا، كلما اقتربت من هدفك، كلما زاد حجب الضوء الطبيعي. حتى في يوم مشرق، يمكن للزاوية الخاطئة أن تغطي كل شيء بظلك، مما يؤدي إلى تقليل الضوء بعدة توقفات. لا يؤدي هذا إلى زيادة صعوبة الحصول على صورة ساطعة بدرجة كافية فحسب، بل يعني أيضًا أن جودة الضوء نفسها قد تكون سيئة للغاية - حيث يكون هدفك مظلمًا والمناطق المحيطة به ساطعة.

          الحل السهل - استخدم الفلاش. فهو يملأ كل الضوء الذي قد ترغب فيه، وتكون مدة الفلاش سريعة جدًا بحيث ستجمد أي حركة في مشهدك على الفور. يستخدم بعض المصورين أضواء ثابتة للتصوير الفوتوغرافي الماكرو، مثل الأضواء الحلقية، لكنني لا أوصي بها لأنها تضيف فقط بضع توقفات من الضوء إلى صورك. الومضات، عند وضعها بالقرب من هدفك، تتفوق في الواقع على ضوء الشمس.

          نيكون D7000 + 105 مم f/2.8 @ 105 مم، ISO 800، 1/250، f/8.0

          تعليق


          • #6

            5. Diffuse Your Light Source


            As valuable as a flash is for macro photography, they do come with some considerations. On one hand, they aren’t always necessary. For lower-magnification macro photography, like photographing butterflies, flowers, and dragonflies, you can get away with wider apertures and more normal shutter speeds, so you have plenty of natural light to work with.

            More importantly, when you do use a flash, it is very easy to end up with harsh light and bright specular reflections that make your subject look ugly. Macro photography lighting is so complicated and important that we have a full article on the subject. The takeaway is simple, though: diffuse your flash.

            Use a simple diffuser to spread out the area of your flash and make the light much softer. Done properly, you shouldn’t even be able to tell that you used a flash. One option is the $7.50 Vello Mini Softbox, or you can experiment with making your own. But this is a critical step that you shouldn’t skip if you’re just starting macro photography. If you’ve ever taken a photo of an amazing moment and beautiful subject, but the lighting is horrible and harsh, you’ll know how frustrating it can be.


            5. انتشر مصدر الضوء الخاص بك

            على الرغم من أهمية الفلاش في التصوير الفوتوغرافي الماكرو، إلا أنه يأتي مع بعض الاعتبارات. من ناحية، فهي ليست ضرورية دائمًا. بالنسبة للتصوير الفوتوغرافي الماكرو منخفض التكبير، مثل تصوير الفراشات والزهور واليعسوب، يمكنك الابتعاد عن فتحات أوسع وسرعات غالق أكثر طبيعية، بحيث يكون لديك الكثير من الضوء الطبيعي للعمل معه.

            والأهم من ذلك، عندما تستخدم الفلاش، فمن السهل جدًا أن ينتهي بك الأمر بضوء قاس وانعكاسات مرآوية ساطعة تجعل هدفك يبدو قبيحًا. تعتبر إضاءة التصوير الفوتوغرافي الكلي معقدة ومهمة للغاية لدرجة أن لدينا مقالة كاملة حول هذا الموضوع. الوجبات الجاهزة بسيطة، على الرغم من ذلك: قم بتوزيع الفلاش الخاص بك.

            استخدم ناشرًا بسيطًا لتوزيع مساحة الفلاش وجعل الضوء أكثر نعومة. إذا قمت بذلك بشكل صحيح، فلن تتمكن حتى من معرفة أنك استخدمت الفلاش. أحد الخيارات هو Vello Mini Softbox بسعر 7.50 دولار، أو يمكنك تجربة صنع جهاز خاص بك. لكن هذه خطوة حاسمة لا ينبغي عليك تخطيها إذا كنت قد بدأت للتو في تصوير الماكرو. إذا سبق لك أن التقطت صورة للحظة مذهلة وهدفًا جميلاً، ولكن الإضاءة فظيعة وقاسية، فستعرف مدى الإحباط الذي يمكن أن يكون عليه الأمر.


            تعليق


            • #7
              6. Tone Down Your Flash


              When I say to tone down your flash, a lot of photographers might expect that my reasoning is similar: make the light less harsh. But that’s not the case at all. The brightness of your flash doesn’t really affect its harshness – that’s more to do with how well it is diffused. Instead, my reason for recommending a lower flash power is simple: It will recycle more quickly.

              At full power, even higher quality flashes can take a few seconds to recycle after each shot. This means, at a minimum, that you won’t be able to take bursts of macro photos in a row. And in the worst case, you might miss the prime moment of action simply because your flash doesn’t fire, or fires too weakly to matter.

              Instead, I recommend shooting most of your macro photos with the flash at 1/4 to 1/3 power. This is a good balance between a bright output (so you don’t need to raise your ISO too high) and fast recycle times. Of course, “1/4 power” isn’t the same on all flashes, but these recommendations will get you in the right ballpark.
              NIKON D7000 + 105mm f/2.8 @ 105mm, ISO 1250, 1/250, f/22.0

              6. قم بتخفيف حدة الفلاش الخاص بك

              عندما أطلب تخفيف حدة الفلاش، قد يتوقع الكثير من المصورين أن تفكيري مشابه: اجعل الضوء أقل حدة. ولكن هذا ليس هو الحال على الإطلاق. لا يؤثر سطوع الفلاش لديك حقًا على حدته - بل يتعلق الأمر بمدى انتشاره. وبدلاً من ذلك، السبب الذي يجعلني أوصي باستخدام طاقة فلاش أقل بسيط: سيتم إعادة تدويرها بسرعة أكبر.

              بكامل طاقتها، يمكن أن تستغرق وحدات الفلاش ذات الجودة الأعلى بضع ثوانٍ لإعادة تدويرها بعد كل لقطة. وهذا يعني، على الأقل، أنك لن تتمكن من التقاط صور متسلسلة من صور الماكرو على التوالي. وفي أسوأ الحالات، قد تفوتك اللحظة الرئيسية للحدث ببساطة لأن الفلاش الخاص بك لا ينطلق، أو ينطلق بشكل ضعيف جدًا بحيث لا يهم.

              بدلاً من ذلك، أوصي بتصوير معظم صور الماكرو باستخدام الفلاش بقوة 1/4 إلى 1/3. يعد هذا توازنًا جيدًا بين الإخراج الساطع (لذلك لا تحتاج إلى رفع ISO الخاص بك إلى مستوى عالٍ جدًا) وأوقات إعادة التدوير السريعة. بالطبع، "1/4 الطاقة" ليست هي نفسها في جميع الفلاشات، ولكن هذه التوصيات ستضعك في الملعب الصحيح.

              نيكون D7000 + 105 مم f/2.8 @ 105 مم، ISO 1250، 1/250، f/22.0

              تعليق


              • #8

                7. Set Auto (TTL) Flash Correctly


                For flash-lit macro photography, my recommendation is to set aperture, shutter speed, and ISO manually, in combination with an automatic/TTL flash. You want your flash to hover around 1/4 power, increasing or decreasing slightly based on the reflectiveness of your subject. How can you make this happen?

                It’s fairly easy. First, set your aperture to get enough depth of field. The ideal value depends on how far away your subject is. For high-magnification macro photography, I recommend sticking to f/16 or f/22 (full frame equivalent). You can use much wider apertures if your subject is farther away. I use f/4 and even f/2.8 for close-up photos all the time.

                Then, set your shutter speed to its sync speed. For a lot of cameras, this is 1/200 or 1/250 second – the fastest shutter speed that still works with a speedlight. Since you’re lighting the image artificially with flash, you’ll want to cut down on natural light (and the motion blur that comes with it). Setting the sync speed is the way to do that.

                Next up is your flash. For now, just manually set 1/4 flash power. Even though you will eventually make this automatic, the goal at the moment is to find the combination of other settings that allows good flash exposure around 1/4 power.

                Lastly is ISO. Now that you’ve set everything else, gradually increase your ISO from its base value and take sample photos of a normal leaf up close. Stop increasing ISO when your photos look the proper brightness. From here on out, keep aperture, shutter speed, and ISO to the manual values you’ve set. Turn the flash to Auto/TTL. Now, even though it’s an automatic flash, it will always be around 1/4 power.
                Nikon D800e + 105mm f/2.8 @ 105mm, ISO 800, 1/250, f/16.

                7. اضبط الفلاش التلقائي (TTL) بشكل صحيح

                بالنسبة للتصوير الفوتوغرافي الماكرو بإضاءة الفلاش، فإن توصيتي هي ضبط فتحة العدسة وسرعة الغالق وISO يدويًا، جنبًا إلى جنب مع فلاش تلقائي/TTL. تريد أن يحوم فلاشك حول 1/4 من الطاقة، مما يزيد أو ينقص قليلاً بناءً على انعكاس موضوعك. كيف يمكنك تحقيق ذلك؟

                إنه سهل إلى حد ما. أولاً، قم بضبط فتحة العدسة للحصول على عمق مجال كافٍ. تعتمد القيمة المثالية على مدى بعد موضوعك. بالنسبة للتصوير الفوتوغرافي الماكرو عالي التكبير، أوصي بالالتزام بفتحة f/16 أو f/22 (مكافئ الإطار الكامل). يمكنك استخدام فتحات أوسع بكثير إذا كان هدفك بعيدًا. أستخدم f/4 وحتى f/2.8 للصور القريبة طوال الوقت.

                ثم اضبط سرعة الغالق على سرعة المزامنة. بالنسبة للعديد من الكاميرات، تبلغ هذه السرعة 1/200 أو 1/250 ثانية - وهي أسرع سرعة غالق لا تزال تعمل مع ضوء السرعة. نظرًا لأنك تقوم بإضاءة الصورة بشكل مصطنع باستخدام الفلاش، فستحتاج إلى تقليل الضوء الطبيعي (وضبابية الحركة التي تأتي معه). إن ضبط سرعة المزامنة هو الطريقة للقيام بذلك.

                التالي هو الفلاش الخاص بك. في الوقت الحالي، ما عليك سوى ضبط طاقة الفلاش بمقدار 1/4 يدويًا. على الرغم من أنك ستجعل هذا الأمر تلقائيًا في النهاية، إلا أن الهدف في الوقت الحالي هو العثور على مجموعة من الإعدادات الأخرى التي تسمح بتعريض جيد للفلاش بحوالي 1/4 طاقة.

                وأخيرا ISO. الآن بعد أن قمت بتعيين كل شيء آخر، قم بزيادة ISO الخاص بك تدريجيًا من قيمته الأساسية والتقط عينة من الصور لورقة عادية عن قرب. توقف عن زيادة ISO عندما تبدو صورك بالسطوع المناسب. من الآن فصاعدًا، احتفظ بفتحة العدسة وسرعة الغالق وISO للقيم اليدوية التي قمت بتعيينها. قم بتحويل الفلاش إلى تلقائي/TTL. الآن، على الرغم من أنه فلاش تلقائي، إلا أنه سيكون دائمًا حوالي 1/4 من الطاقة.

                نيكون D800e + 105 مم f/2.8 @ 105 مم، ISO 800، 1/250، f/16.0

                تعليق


                • #9

                  8. Focus Manually (Sometimes)


                  I’m a big proponent of autofocus even in genres like landscape photography where some photographers recommend manual. However, in macro photography, you might not have a better choice.

                  For extreme close-ups, autofocus simply isn’t fast enough to track all the movement going on. My recommendation is to set manual focus instead. Then, very slowly rock forward and backward until your subject looks as sharp as possible in the viewfinder or rear LCD. When it does, immediately take the picture.

                  This is not a perfect technique, but I have yet to find one that works better. For handheld images at full 1:1 magnification with a macro lens, and a stationary subject, this method will get anywhere from 25% to 50% of your photos perfectly sharp, depending on your technique.

                  You can improve your keeper rate significantly by avoiding maximum magnification on your lens and photographing larger subjects. In that case, autofocus becomes perfectly feasible, and it’s what I recommend.

                  Maybe the takeaway from this whole article is that macro photography is hard, but you can make it easier by photographing larger subjects! “Close-up” photography is simply easier than extreme macro photography. Both are worth doing, but anyone who is just starting out in macro photography will have more success and get less frustrated with less extreme magnifications.
                  NIKON D7000 + 105mm f/2.8 @ 105mm, ISO 400, 1/320, f/13.0

                  8. التركيز يدويًا (أحيانًا)

                  أنا من أشد المؤيدين للتركيز البؤري التلقائي حتى في أنواع مثل تصوير المناظر الطبيعية حيث يوصي بعض المصورين يدويًا. ومع ذلك، في التصوير الفوتوغرافي الماكرو، قد لا يكون لديك خيار أفضل.

                  بالنسبة إلى اللقطات القريبة للغاية، فإن التركيز البؤري التلقائي ليس بالسرعة الكافية لتتبع كل الحركة الجارية. توصيتي هي ضبط التركيز اليدوي بدلاً من ذلك. بعد ذلك، قم بالتأرجح ببطء شديد للأمام والخلف حتى يبدو هدفك حادًا قدر الإمكان في عدسة الكاميرا أو شاشة LCD الخلفية. وعندما يحدث ذلك، التقط الصورة على الفور.

                  هذه ليست تقنية مثالية، ولكن لم أجد بعد تقنية تعمل بشكل أفضل. بالنسبة للصور المحمولة بتكبير كامل 1:1 باستخدام عدسة ماكرو وهدف ثابت، ستجعل هذه الطريقة ما بين 25% إلى 50% من صورك واضحة تمامًا، اعتمادًا على أسلوبك.

                  يمكنك تحسين معدل الحفظ الخاص بك بشكل كبير عن طريق تجنب الحد الأقصى للتكبير على عدستك وتصوير أهداف أكبر. في هذه الحالة، يصبح التركيز التلقائي ممكنًا تمامًا، وهذا ما أوصي به.

                  ربما يكون الدرس المستفاد من هذه المقالة بأكملها هو أن التصوير الفوتوغرافي الماكرو أمر صعب، ولكن يمكنك جعله أسهل من خلال تصوير أهداف أكبر! يعد التصوير الفوتوغرافي "المقرب" أسهل من التصوير الفوتوغرافي المقرب. كلاهما يستحق القيام به، ولكن أي شخص بدأ للتو في التصوير الفوتوغرافي الماكرو سيحقق نجاحًا أكبر وسيشعر بإحباط أقل مع التكبير الأقل تطرفًا.

                  نيكون D7000 + 105 ملم f/2.8 @ 105 ملم، ISO 400، 1/320، f/13.0

                  تعليق


                  • #10

                    9. Get Rid of Dust Spots


                    Lastly, it’s important to edit your macro photo well, and part of that includes removing dust spots in your images. The smaller your aperture, the more dust spots you’ll see, and the darker they will be. This will be immediately distracting to a lot of photographers who look at your images – and it still amazes me how often I see dust spots in published macro photos, whether online or in print.

                    Dust spots are easy to remove in most post-processing software. You can also use an “envision dust spots” tool in software like Lightroom and Capture One to notice dust that is a bit more subtle at first glance. There’s no excuse not to do this; it only takes a minute, and it elevates photos to their full potential rather than distracting a seasoned viewer.
                    Dust specks on my camera sensor. I circled some of the most visible spots in red.

                    9. التخلص من بقع الغبار

                    أخيرًا، من المهم تعديل صورتك الكلية جيدًا، وجزء من ذلك يتضمن إزالة بقع الغبار من صورك. كلما كانت فتحة العدسة أصغر، زادت بقع الغبار التي ستراها، وأصبحت أكثر قتامة. سيؤدي هذا إلى تشتيت انتباه الكثير من المصورين الذين ينظرون إلى صورك على الفور - وما زال يذهلني عدد المرات التي أرى فيها بقع غبار في صور الماكرو المنشورة، سواء عبر الإنترنت أو المطبوعة.

                    من السهل إزالة بقع الغبار في معظم برامج ما بعد المعالجة. يمكنك أيضًا استخدام أداة "تصور بقع الغبار" في برامج مثل Lightroom وCapture One لملاحظة الغبار الذي يبدو أكثر دقة للوهلة الأولى. ليس هناك عذر لعدم القيام بذلك؛ يستغرق الأمر دقيقة واحدة فقط، ويرفع الصور إلى أقصى إمكاناتها بدلاً من تشتيت انتباه المشاهد المتمرس.

                    بقع غبار على مستشعر الكاميرا. لقد قمت بوضع دائرة حول بعض النقاط الأكثر وضوحًا باللون الأحمر.

                    تعليق

                    يعمل...
                    X