٢٣ نصيحة تصوير للمبتدئين 23 Photography Tips for Beginners in 2023

تقليص
X
 
  • تصفية - فلترة
  • الوقت
  • عرض
إلغاء تحديد الكل
مشاركات جديدة

  • ٢٣ نصيحة تصوير للمبتدئين 23 Photography Tips for Beginners in 2023

    ٢٣ نصيحة تصوير للمبتدئين
    23 Photography Tips for Beginners in 2023


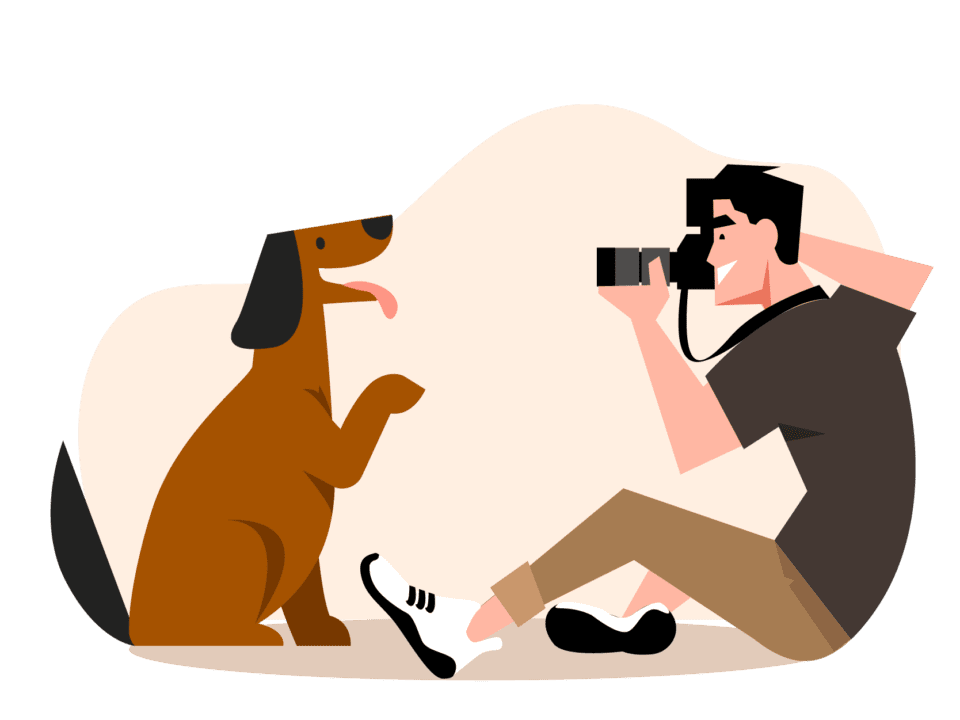
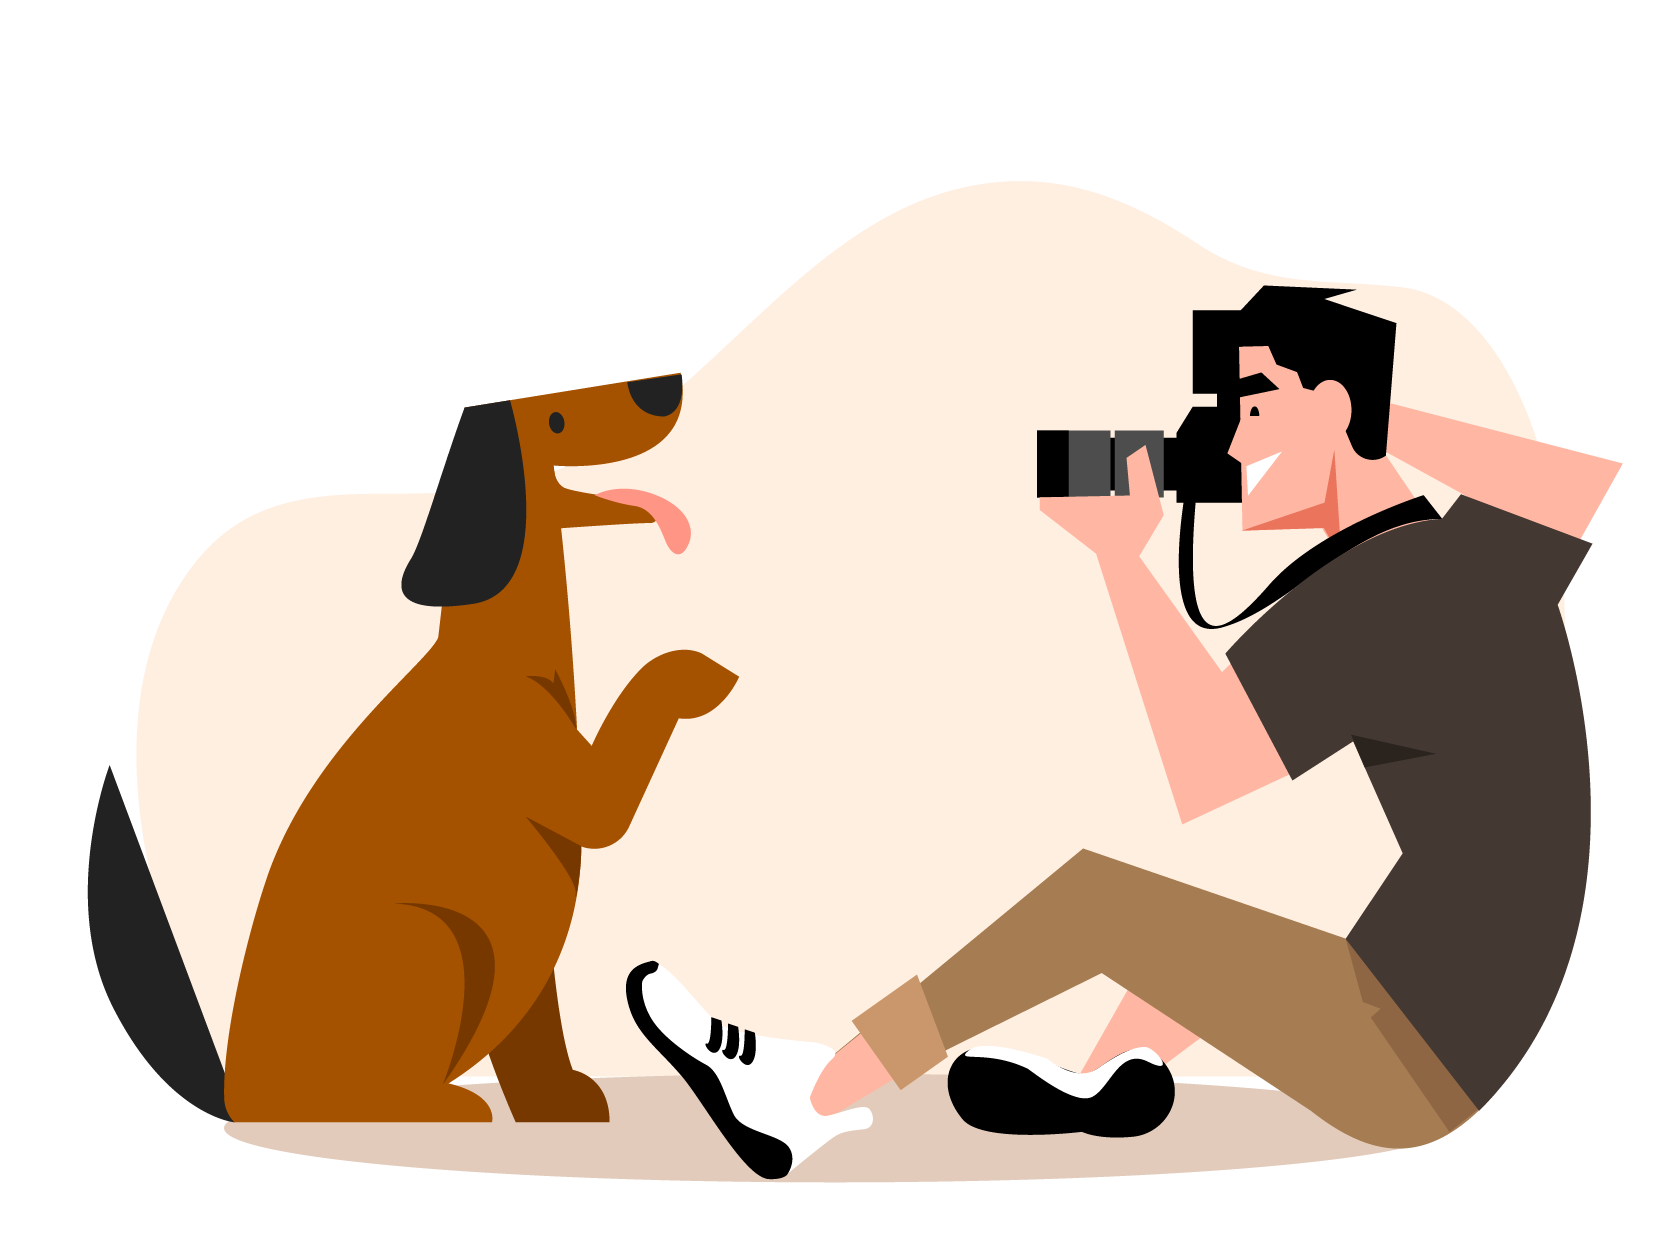
    Whenever I think of a useful photography tip, I always write it down for later. Most of them are forgettable, but some are so helpful that I try to tell them to as many photographers as possible. This article contains 21 of the best. These bite-sized photography tips are easy to understand, covering everything from beginner camera technique to creativity and composition. If you’re learning photography, these should be especially helpful for you along the way.


    عندما أفكر في نصيحة مفيدة للتصوير الفوتوغرافي، أكتبها دائمًا لوقت لاحق. معظمها قابل للنسيان، لكن بعضها مفيد للغاية لدرجة أنني أحاول إخبارها لأكبر عدد ممكن من المصورين. تحتوي هذه المقالة على 21 من الأفضل. من السهل فهم نصائح التصوير الفوتوغرافي الصغيرة هذه، حيث تغطي كل شيء بدءًا من تقنية الكاميرا للمبتدئين وحتى الإبداع والتكوين. إذا كنت تتعلم التصوير الفوتوغرافي، فيجب أن تكون هذه مفيدة لك بشكل خاص على طول الطريق.


  • #2
    1. Work with Your Composition


    To take engaging photos, you need to be engaged with what you’re doing. Don’t just fly by on autopilot. Instead, put thought into your composition and try to make your photos as good as possible.

    That starts with knowing the basics of how to compose good photos. Don’t cut off important parts of your subject with the edge of your frame. Keep your horizons level, and try to eliminate any distractions in your photo by adjusting your composition. See if your photo has a sense of balance and simplicity.

    If the photo doesn’t look good on your first try, keep experimenting until you get it right. It is so easy to depress the shutter when something looks good and then stop, but if you consider a few alternative compositions, chances are one of them will be better than the first.
    NIKON D800E + 24-70mm f/2.8 @ 24mm, ISO 400, 1/100, f/5.6. Photo by Nasim Mansurov.

    1. العمل مع التكوين الخاص بك

    لالتقاط صور جذابة، يجب أن تكون منخرطًا في ما تفعله. لا تطير فقط على الطيار الآلي. بدلاً من ذلك، فكر في تكوينك وحاول أن تجعل صورك جيدة قدر الإمكان.

    يبدأ ذلك بمعرفة أساسيات كيفية إنشاء صور جيدة. لا تقطع أجزاء مهمة من موضوعك بحافة إطارك. حافظ على مستوى آفاقك، وحاول التخلص من أي عوامل تشتيت في صورتك عن طريق ضبط تركيبتك. معرفة ما إذا كانت صورتك تتمتع بحس التوازن والبساطة.

    إذا لم تبدو الصورة جيدة في محاولتك الأولى، فاستمر في التجربة حتى تحصل عليها بشكل صحيح. من السهل جدًا الضغط على الغالق عندما يبدو شيء ما جيدًا ثم التوقف، ولكن إذا فكرت في بعض التركيبات البديلة، فمن المحتمل أن يكون أحدها أفضل من الأول.

    NIKON D800E + 24-70 مم f/2.8 @ 24 مم، ISO 400، 1/100، f/5.6. تصوير نسيم منصوروف.

    تعليق


    • #3

      2. Use the Camera You Already Have


      Camera gear is not all that important.

      There are countless cameras, lenses, and other accessories on the market today. We spend a lot of time reviewing them at Photography Life, and it’s true that some are better than others (or better suited for a given job). But once you’ve tested enough of them, the real takeaway is that pretty much everything today is excellent. The differences are almost always minor, especially at a given price.

      So, use the camera you already have, and don’t look back. In almost every way, today’s entry-level mirrorless cameras are better than the top-of-the-line film SLRs or even the DSLRs of ten years ago. Yet, somehow those film photographers managed to capture beautiful, iconic photos that still look great today.

      Much more important are your creative skills and knowledge of camera settings. Focus your effort on those, not on collecting camera equipment.
      Taken with the Nikon Z50, an entry-level mirrorless camera

      2. استخدم الكاميرا الموجودة لديك بالفعل

      معدات الكاميرا ليست بهذه الأهمية.

      هناك عدد لا يحصى من الكاميرات والعدسات وغيرها من الملحقات في السوق اليوم. نقضي الكثير من الوقت في مراجعتها في Photography Life، وصحيح أن بعضها أفضل من البعض الآخر (أو أكثر ملاءمة لوظيفة معينة). ولكن بمجرد اختبار ما يكفي منها، فإن النتيجة الحقيقية هي أن كل شيء تقريبًا اليوم ممتاز. تكون الاختلافات دائمًا بسيطة، خاصة عند سعر معين.

      لذا، استخدم الكاميرا التي لديك بالفعل، ولا تنظر إلى الوراء. في جميع النواحي تقريبًا، تعد الكاميرات غير المزودة بمرآة للمبتدئين اليوم أفضل من كاميرات SLR للأفلام الأفضل أو حتى كاميرات DSLR التي كانت موجودة قبل عشر سنوات. ومع ذلك، تمكن مصورو الأفلام بطريقة ما من التقاط صور جميلة ومبدعة لا تزال تبدو رائعة حتى اليوم.

      والأهم من ذلك هو مهاراتك الإبداعية ومعرفتك بإعدادات الكاميرا. ركز جهدك على هؤلاء، وليس على جمع معدات الكاميرا.

      تم التقاطها باستخدام كاميرا Nikon Z50، وهي كاميرا عديمة المرآة للمبتدئين

      تعليق


      • #4

        3. Learn Which Settings Matter


        There are a lot of camera settings, and it takes some practice to get them right, especially as a beginner. Even advanced photographers won’t always do everything perfectly. But it’s worth learning how to set your camera properly, and which camera settings matter the most, so you have the best chance to take the photos you want.

        First, try practicing with camera modes other than full Auto. You won’t learn anything if your camera is making all the decisions for you. It might be confusing at first, but hopefully our articles on aperture, shutter speed, and ISO will give you a good head start. Those are the three most important settings in all of photography.

        Aside from aperture, shutter speed, and ISO, learn how to focus properly by practicing with the different autofocus modes. You’ll probably prefer single-servo autofocus (also known as One-Shot AF) for stationary subjects, and continuous-servo autofocus (also known as AI Servo) for moving subjects. Don’t use manual focus unless it’s so dark that autofocus isn’t working.

        Lastly, shoot in Raw if you want to edit your photos, or think there’s any chance you’ll edit them in the future. JPEGs look good out of camera, but the files have much less latitude for post-processing. (If you aren’t sure, shoot RAW+JPEG, and keep the RAWs for later just in case.) See RAW vs JPEG for more.
        To capture photos like this, it helps to have an intimate understanding of camera settings. Two-exposure blend.

        3. تعرف على الإعدادات المهمة

        هناك الكثير من إعدادات الكاميرا، ويتطلب الأمر بعض التدريب حتى تتمكن من ضبطها بشكل صحيح، خاصة إذا كنت مبتدئًا. حتى المصورين المتقدمين لن يقوموا دائمًا بكل شيء على أكمل وجه. ولكن من المفيد أن تتعلم كيفية ضبط الكاميرا بشكل صحيح، وإعدادات الكاميرا الأكثر أهمية، بحيث يكون لديك أفضل فرصة لالتقاط الصور التي تريدها.

        أولاً، حاول التدرب على أوضاع الكاميرا بخلاف الوضع التلقائي الكامل. لن تتعلم أي شيء إذا كانت الكاميرا الخاصة بك هي التي تتخذ جميع القرارات نيابةً عنك. قد يكون الأمر مربكًا في البداية، ولكن نأمل أن تمنحك مقالاتنا حول فتحة العدسة وسرعة الغالق وISO بداية جيدة. هذه هي الإعدادات الثلاثة الأكثر أهمية في التصوير الفوتوغرافي.

        بصرف النظر عن فتحة العدسة وسرعة الغالق وISO، تعلم كيفية التركيز بشكل صحيح من خلال التدرب على أوضاع التركيز البؤري التلقائي المختلفة. من المحتمل أنك ستفضل التركيز البؤري التلقائي المؤازر الفردي (المعروف أيضًا باسم One-Shot AF) للأهداف الثابتة، والتركيز البؤري التلقائي المستمر (المعروف أيضًا باسم AI Servo) للأهداف المتحركة. لا تستخدم التركيز اليدوي إلا إذا كان الظلام شديدًا بحيث لا يعمل التركيز التلقائي.

        أخيرًا، قم بالتصوير بتنسيق Raw إذا كنت تريد تعديل صورك، أو تعتقد أن هناك أي فرصة لتحريرها في المستقبل. تبدو ملفات JPEG جيدة خارج الكاميرا، لكن الملفات تتمتع بمساحة أقل بكثير للمعالجة اللاحقة. (إذا لم تكن متأكدًا، فالتقط صور RAW+JPEG، واحتفظ بصور RAW لوقت لاحق تحسبًا لذلك.) راجع RAW مقابل JPEG لمزيد من المعلومات.

         لالتقاط صور كهذه، من المفيد أن يكون لديك فهم عميق لإعدادات الكاميرا. مزيج التعرض اثنين.

        تعليق


        • #5

          4. Don’t Overexpose Highlights


          When you are picking your camera settings, it is critical to avoid overexposing highlights in a photo. The reason? It’s simply impossible to recover any detail from white areas of a photo. Personally, I prefer the sky in my photos to have nice texture and color, rather than being just a big, featureless blob, and I bet you do too.

          It’s pretty easy to keep your highlights intact. But this is where shutter speed, aperture, and ISO are so important. These are the only camera settings that directly affect the brightness of a photo (ignoring flash settings, of course). Even exposure compensation – an important setting itself – just tells your camera to change one or more of these three variables.

          When you’re taking photos, watch the camera screen to see if there is any overexposure. If there is, the first thing you should do is lower your ISO to its base value (usually ISO 100). If it’s already there, use a faster shutter speed. That will take care of the issue. As for aperture, make sure it isn’t set to a crazy value (f/32, f/45, etc.) and you’ll be good.

          If your camera is mirrorless and has a histogram or zebras, enable them. These tools allow you to check your exposure and more easily get a properly-exposed photograph.
          NIKON D800E + 24mm f/1.4 @ 24mm, ISO 100, 6/10, f/16.0


          4. لا تفرط في تعريض النقاط البارزة

          عند اختيار إعدادات الكاميرا، من المهم تجنب الإفراط في تعريض الضوء للضوء في الصورة. السبب؟ من المستحيل ببساطة استعادة أي تفاصيل من المناطق البيضاء في الصورة. شخصيًا، أفضل أن تكون السماء في صوري ذات ملمس ولون جميلين، بدلاً من أن تكون مجرد نقطة كبيرة بلا ملامح، وأراهن أنك تفعل ذلك أيضًا.

          من السهل جدًا الحفاظ على النقاط البارزة الخاصة بك سليمة. ولكن هذا هو المكان الذي تكون فيه سرعة الغالق وفتحة العدسة وISO في غاية الأهمية. هذه هي إعدادات الكاميرا الوحيدة التي تؤثر بشكل مباشر على سطوع الصورة (مع تجاهل إعدادات الفلاش بالطبع). حتى تعويض التعريض الضوئي - وهو إعداد مهم في حد ذاته - يخبر الكاميرا بتغيير واحد أو أكثر من هذه المتغيرات الثلاثة.

          عند التقاط الصور، شاهد شاشة الكاميرا لمعرفة ما إذا كان هناك أي تعريض زائد. إذا كان الأمر كذلك، فإن أول شيء يجب عليك فعله هو خفض ISO الخاص بك إلى قيمته الأساسية (عادةً ISO 100). إذا كان موجودًا بالفعل، فاستخدم سرعة غالق أسرع. وهذا سوف يعتني بهذه القضية. أما بالنسبة للفتحة، فتأكد من عدم ضبطها على قيمة مجنونة (f/32، f/45، وما إلى ذلك) وستكون جيدًا.

          إذا كانت الكاميرا الخاصة بك بدون مرآة وتحتوي على رسم بياني أو حمار وحشي، فقم بتمكينها. تتيح لك هذه الأدوات التحقق من تعرضك للضوء والحصول بسهولة أكبر على صورة تم تعريضها للضوء بشكل صحيح.

          NIKON D800E + 24 ملم f/1.4 @ 24 ملم، ISO 100، 6/10، f/16.0

          تعليق


          • #6

            5. Pay Attention to the Light


            Probably the single most important part of photography is light. If you take a photo with good light, you’ve taken a huge step toward getting a good picture. But what counts as good light? It’s not all about sunsets.

            Often, the goal here is to balance the light’s intensity between your subject and background. Even if you’re photographing an amazing sunset, the photo could be ruined by a completely dark and silhouetted foreground.

            The easiest way to solve this is to pay attention to the direction and softness of the light. If the light is too harsh, you could get bad shadows going across your subject, which is especially a problem for portrait photography. If the light is coming from an unflattering angle, see what you can do to move the light source (in a studio) or move the subject (outdoors) – or wait until the light is better (landscape photography).

            Also, if you’re taking handheld pictures, make sure there is enough light. If not, use a flash or move where it’s brighter. The easiest way to get bland, discolored photos is to shoot in environments without enough light.
            NIKON D7000 + 105mm f/2.8 @ 105mm, ISO 800, 1/320, f/3.2


            5. انتبه للضوء

            ربما يكون الجزء الأكثر أهمية في التصوير الفوتوغرافي هو الضوء. إذا التقطت صورة بإضاءة جيدة، فقد خطوت خطوة كبيرة نحو الحصول على صورة جيدة. ولكن ما الذي يعتبر ضوء جيد؟ الأمر لا يتعلق بغروب الشمس.

            غالبًا ما يكون الهدف هنا هو موازنة شدة الضوء بين الهدف والخلفية. حتى لو كنت تقوم بتصوير غروب الشمس المذهل، فقد يتم تدمير الصورة بمقدمة مظلمة تمامًا ومظللة.

            أسهل طريقة لحل هذه المشكلة هي الانتباه إلى اتجاه الضوء ونعومته. إذا كان الضوء قاسيًا جدًا، فقد تحصل على ظلال سيئة تمر عبر هدفك، وهو ما يمثل مشكلة خاصة للتصوير الفوتوغرافي للصور الشخصية. إذا كان الضوء يأتي من زاوية غير جذابة، فانظر ما يمكنك فعله لتحريك مصدر الضوء (في الاستوديو) أو تحريك الموضوع (في الهواء الطلق) - أو الانتظار حتى يتحسن الضوء (تصوير المناظر الطبيعية).

            وأيضًا، إذا كنت تلتقط صورًا محمولة باليد، فتأكد من وجود إضاءة كافية. إذا لم يكن الأمر كذلك، فاستخدم الفلاش أو تحرك إلى مكان أكثر سطوعًا. أسهل طريقة للحصول على صور باهتة ومتغيرة الألوان هي التصوير في بيئات لا تحتوي على إضاءة كافية.

            NIKON D7000 + 105 مم f/2.8 @ 105 مم، ISO 800، 1/320، f/3.2

            تعليق


            • #7

              6. Take Your Time


              It’s easy to make mistakes in photography if you aren’t careful. The best way around this is to slow down and take your time whenever possible, particularly when you are first beginning to learn photography.

              First, double-check your camera settings. If you’re shooting outdoor portraits on a sunny day, but you’re using last night’s settings for photographing the Milky Way, something is terribly wrong. Slow down and take the time to get it right.

              Then, keep the same mindset for every other important decision. Is your composition as good as possible? Did you autofocus in the right place? Have you done everything possible to improve the lighting conditions?

              And don’t listen to people who tell you to avoid reviewing photos in the field. Sure, it’s a bad idea to review photos when something amazing is happening in front of you, but you’ll almost always have some downtime between shots. Figure out the problems with an image in the field – not back at your computer.
              NIKON D7000 + 17-55mm f/2.8 @ 17mm, ISO 100, 0.6 seconds, f/8.0

              6. خذ وقتك

              من السهل ارتكاب الأخطاء في التصوير الفوتوغرافي إذا لم تكن حذرًا. أفضل طريقة للتغلب على ذلك هي التباطؤ وأخذ وقتك كلما أمكن ذلك، خاصة عندما تبدأ في تعلم التصوير الفوتوغرافي.

              أولاً، تحقق جيدًا من إعدادات الكاميرا. إذا كنت تلتقط صورًا شخصية في الهواء الطلق في يوم مشمس، ولكنك تستخدم إعدادات الليلة الماضية لتصوير مجرة ​​درب التبانة، فهناك خطأ فادح. تمهل وخذ الوقت الكافي لتصحيح الأمر.

              ثم، احتفظ بنفس العقلية لكل قرار مهم آخر. هل تكوينك جيد قدر الإمكان؟ هل قمت بالتركيز التلقائي في المكان الصحيح؟ هل فعلت كل ما هو ممكن لتحسين ظروف الإضاءة؟

              ولا تستمع إلى الأشخاص الذين يطلبون منك تجنب مراجعة الصور في الميدان. بالتأكيد، إنها فكرة سيئة أن تقوم بمراجعة الصور عندما يحدث شيء مذهل أمامك، ولكن سيكون لديك دائمًا بعض الوقت الضائع بين اللقطات. اكتشف المشاكل المتعلقة بالصورة في الميدان، وليس في جهاز الكمبيوتر الخاص بك.

              NIKON D7000 + 17-55 مم f/2.8 @ 17 مم، ISO 100، 0.6 ثانية، f/8.0

              تعليق


              • #8

                7. Move Your Feet


                It’s easy to get stuck in one place while you’re taking pictures. Don’t fall into that trap. Instead, move your feet (or your tripod) as much as possible. Climb on top of things, change the height of your camera, walk forward and backward, do whatever you need to do – but keep moving.

                If you take a dozen photos from the same height, facing the same direction, without moving your feet or tripod at all, guess what? They won’t be very different. If your entire portfolio is taken from the same height and without any experimentation, you’re missing out on some great photos.

                7. حرك قدميك

                من السهل أن تتعثر في مكان واحد أثناء التقاط الصور. لا تقع في هذا الفخ. بدلًا من ذلك، حرك قدميك (أو الحامل ثلاثي القوائم) قدر الإمكان. تسلق فوق الأشياء، وقم بتغيير ارتفاع الكاميرا، والمشي للأمام والخلف، وافعل كل ما تريد القيام به - ولكن استمر في التحرك.

                إذا التقطت عشرات الصور من نفس الارتفاع، في نفس الاتجاه، دون تحريك قدميك أو حامل ثلاثي الأرجل على الإطلاق، خمن ماذا؟ لن يكونوا مختلفين كثيرًا. إذا تم التقاط محفظتك بأكملها من نفس الارتفاع وبدون أي تجربة، فستفقد بعض الصور الرائعة.

                تعليق


                • #9
                  Moving around is the only way to change the relative sizes and positions of the objects in your photo. Don’t like that your subject is too big and the landscape in the background is too small? Stand back and zoom in. Want to fix a rock that looks distracting? Move around until it’s out of your composition, or too small to be a nuisance.

                  For wildlife photography, pay very close attention to the angle and height of your shot. Animals usually look better when you are at eye level with them, and it also tends to give backgrounds that are farther away, giving more subject isolation.
                  NIKON Z 7 + NIKKOR Z 24-70mm f/4 S @ 24mm, ISO 64, 1/125, f/10.0
                  يعد التنقل هو الطريقة الوحيدة لتغيير الأحجام والمواضع النسبية للكائنات في صورتك. ألا يعجبك أن موضوعك كبير جدًا والمناظر الطبيعية في الخلفية صغيرة جدًا؟ قف للخلف وقم بالتكبير. هل تريد إصلاح صخرة تبدو مشتتة للانتباه؟ تحرك حتى يخرج من تركيبتك، أو يصبح صغيرًا جدًا بحيث لا يسبب إزعاجًا.

                  بالنسبة لتصوير الحياة البرية، انتبه جيدًا لزاوية اللقطة وارتفاعها. عادةً ما تبدو الحيوانات أفضل عندما تكون على مستوى العين معها، كما أنها تميل أيضًا إلى إعطاء خلفيات أبعد، مما يوفر مزيدًا من العزلة للموضوع.

                  NIKON Z 7 + NIKKOR Z مقاس 24-70 مم f/4 S @ 24 مم، ISO 64، 1/125، f/10.0

                  تعليق


                  • #10

                    8. Know When to Use a Tripod


                    Tripods are one of the greatest inventions in photography. They all but eliminate one of the trickiest problems there is – a lack of light. With tripods, you can shoot multi-minute exposures and capture details so dark that they are invisible to the human eye. Even in a brighter scene, tripods improve the stability of your composition and help you take sharper photos.

                    So, when should you use a tripod? If your subject is stationary, almost always. That means landscape photographers, architectural photographers, and still life photographers better have a good excuse if they aren’t using a tripod.

                    Macro photography is another case where tripods are essential. At high magnifications, even the excellent in-body image stabilization (IBIS) of today’s cameras cannot compensate for the very low light and long shutter speeds required for truly excellent macro work. Even if you are using flash, it is very difficult to get the plane of focus right. The only solution is a tripod.
                    8. اعرف متى تستخدم الحامل ثلاثي الأرجل

                    تعد الحوامل الثلاثية أحد أعظم الاختراعات في مجال التصوير الفوتوغرافي. إنهم جميعًا يزيلون واحدة من أصعب المشاكل الموجودة – وهي قلة الضوء. باستخدام الحوامل ثلاثية القوائم، يمكنك التقاط تعريضات ضوئية لعدة دقائق والتقاط تفاصيل مظلمة جدًا بحيث تكون غير مرئية للعين البشرية. حتى في المشهد الأكثر سطوعًا، تعمل الحوامل الثلاثية على تحسين ثبات التركيب وتساعدك على التقاط صور أكثر وضوحًا.

                    إذن متى يجب عليك استخدام الحامل ثلاثي الأرجل؟ إذا كان موضوعك ثابتًا، دائمًا تقريبًا. وهذا يعني أن مصوري المناظر الطبيعية والمصورين المعماريين ومصوري الحياة الساكنة من الأفضل أن يكون لديهم عذر جيد إذا كانوا لا يستخدمون حاملًا ثلاثي الأرجل.

                    يعد التصوير الفوتوغرافي الماكرو حالة أخرى تكون فيها الحوامل الثلاثية ضرورية. عند التكبير العالي، حتى نظام تثبيت الصورة الداخلي (IBIS) الممتاز الموجود في كاميرات اليوم لا يمكنه التعويض عن الإضاءة المنخفضة للغاية وسرعات الغالق الطويلة المطلوبة للحصول على عمل ماكرو ممتاز حقًا. حتى إذا كنت تستخدم الفلاش، فمن الصعب جدًا الحصول على مستوى التركيز البؤري الصحيح. الحل الوحيد هو الحامل الثلاثي .

                    تعليق


                    • #11
                      Event photography and action are a bit different because it’s true that a tripod can slow you down. The same is true of travel photography; as much as you may want to bring along a tripod, it might not be worth the hassle.

                      That’s fair, but know that you’re missing out whenever you leave your tripod at home. If you offered me the choice between an entry-level DSLR and a tripod versus the best camera/lens combo on the market without one, I’d pick the tripod kit every time.
                      NIKON D810 + TAMRON 15-30mm F2.8 VC USD @ 22mm, ISO 64, 1/5, f/11.0

                      يختلف التصوير الفوتوغرافي للحدث والحركة قليلاً لأنه من الصحيح أن الحامل ثلاثي الأرجل يمكن أن يبطئك. وينطبق الشيء نفسه على التصوير الفوتوغرافي للسفر. بقدر ما قد ترغب في إحضار حامل ثلاثي الأرجل معك، فقد لا يكون الأمر يستحق العناء.

                      هذا أمر عادل، ولكن اعلم أنك ستفوت الفرصة عندما تترك الحامل ثلاثي القوائم في المنزل. إذا عرضت عليّ الاختيار بين كاميرا DSLR للمبتدئين وحامل ثلاثي القوائم مقابل أفضل مجموعة كاميرا/عدسة في السوق بدون واحدة، فسأختار مجموعة الحامل ثلاثي القوائم في كل مرة.

                      NIKON D810 + TAMRON مقاس 15-30 مم F2.8 VC USD @ 22 مم، ISO 64، 1/5، f/11.0

                      تعليق


                      • #12

                        9. Pay Attention to the Edges of Your Composition


                        When you’re composing a photo, it helps to pay careful attention to the edges of the frame. Simply put, the edges have an exaggerated impact on the “feel” of your photo!

                        For starters, make sure that your subject has enough breathing room so that it’s not bunching up against the edge of a photo. And certainly don’t cut off an important element, like the top of a mountain, unless you have a very good reason.

                        Along the same lines, any distractions in your photo will draw more attention if they’re close to the edge, because they’re dragging a viewer’s attention further from the main subject of the photo. If you only think about the main subject and don’t pay attention to the rest of the frame, you might end up with a sloppy composition.
                        NIKON D7000 + 24mm f/1.4 @ 24mm, ISO 100, 1 second, f/11.0
                        9. انتبه إلى حواف تكوينك

                        عندما تقوم بتكوين صورة، من المفيد أن تولي اهتمامًا دقيقًا لحواف الإطار. ببساطة، الحواف لها تأثير مبالغ فيه على "ملمس" صورتك!

                        بالنسبة للمبتدئين، تأكد من أن الشخص الذي تصوره لديه مساحة كافية للتنفس حتى لا يتجمع على حافة الصورة. وبالتأكيد لا تقطع عنصرًا مهمًا، مثل قمة الجبل، إلا إذا كان لديك سبب وجيه جدًا.

                        وعلى نفس المنوال، فإن أي عوامل تشتيت في صورتك ستجذب المزيد من الاهتمام إذا كانت قريبة من الحافة، لأنها تجذب انتباه المشاهد بعيدًا عن الموضوع الرئيسي للصورة. إذا كنت تفكر فقط في الموضوع الرئيسي ولم تنتبه لبقية الإطار، فقد ينتهي بك الأمر إلى تركيبة غير متقنة.

                        كاميرا نيكون D7000 + 24 مم f/1.4 @ 24 مم، ISO 100، ثانية واحدة، f/11.0

                        تعليق


                        • #13
                          10. Know When to Use a Flash


                          Flashes aren’t just meant for dark environments.

                          Don’t get me wrong – they’re great if you need some extra light. Get an external flash, tilt it at the ceiling, and use a relatively long lens (50mm or longer). Everyone you know will be amazed at the quality of your event photos. It’s the easiest way to get good results without actually knowing what you’re doing.

                          But flashes are useful outdoors, too, even in the middle of the day. If you’ve ever heard of “fill flash,” this is why it’s so important. You can fill in ugly shadows on your subject just by using a gentle flash – and most people looking at the photo won’t even be able to tell.

                          It’s silly, but I like to tell people that their camera’s built-in flash is more useful on a bright, sunny day than in the dark. That advice holds just as true here.
                          Taken with flash, image by Lola Mansurov


                          10. اعرف متى تستخدم الفلاش

                          لا يقتصر استخدام الومضات على البيئات المظلمة فقط.

                          لا تفهموني خطأ - فهي رائعة إذا كنت بحاجة إلى بعض الضوء الإضافي. احصل على فلاش خارجي، وقم بإمالته نحو السقف، واستخدم عدسة طويلة نسبيًا (50 مم أو أكثر). سوف يندهش كل شخص تعرفه من جودة صور الحدث الخاصة بك. إنها أسهل طريقة للحصول على نتائج جيدة دون معرفة ما تفعله فعليًا.

                          لكن الومضات مفيدة في الهواء الطلق أيضًا، حتى في منتصف النهار. إذا كنت قد سمعت من قبل عن "فلاش التعبئة"، فهذا هو سبب أهميته. يمكنك ملء الظلال القبيحة على موضوعك فقط باستخدام فلاش لطيف - ولن يتمكن معظم الأشخاص الذين ينظرون إلى الصورة من معرفة ذلك.

                          إنه أمر سخيف، لكني أحب أن أخبر الناس أن الفلاش المدمج في الكاميرا يكون أكثر فائدة في يوم مشمس ومشرق منه في الظلام. هذه النصيحة تنطبق تمامًا هنا.

                          ملتقطة بالفلاش، الصورة لولا منصوروف

                          تعليق


                          • #14
                            11. Clean Your Camera Lens


                            I’ve seen too many people walking around with the front element of their camera lens dirty, dusty, and smudged. That’s the easiest way to get blurry photos 100% of the time.

                            Of course, a little bit of dust won’t do any harm; it won’t even be visible in an image. There are small particles of dust inside every lens, which are impossible to clean without taking apart the lens – and they have no impact on a photo whatsoever.

                            Instead, I’m talking about lenses that have never been cleaned, with grime and fingerprints that haven’t been removed in ages. Do yourself a favor and get a microfiber cloth and lens cleaning solution. Bring them along on trips and use them at least once a week. Check out How to Clean SLR Camera Lenses for more information.


                            11. قم بتنظيف عدسة الكاميرا

                            لقد رأيت الكثير من الأشخاص يتجولون والعنصر الأمامي لعدسة الكاميرا الخاصة بهم متسخ ومغبر وملطخ. هذه هي الطريقة الأسهل للحصول على صور ضبابية بنسبة 100% من الوقت.

                            وبطبيعة الحال، فإن القليل من الغبار لن يسبب أي ضرر؛ ولن يكون مرئيًا حتى في الصورة. توجد جزيئات صغيرة من الغبار داخل كل عدسة، ومن المستحيل تنظيفها دون تفكيك العدسة - وليس لها أي تأثير على الصورة على الإطلاق.

                            بدلًا من ذلك، أنا أتحدث عن العدسات التي لم يتم تنظيفها مطلقًا، مع الأوساخ وبصمات الأصابع التي لم تتم إزالتها منذ زمن طويل. افعل لنفسك معروفًا واحصل على قطعة قماش من الألياف الدقيقة ومحلول لتنظيف العدسات. اصطحبها معك في الرحلات واستخدمها مرة واحدة على الأقل في الأسبوع. اطلع على كيفية تنظيف عدسات كاميرا SLR لمزيد من المعلومات.

                            تعليق


                            • #15
                              12. Don’t Use a Cheap Filter


                              The second easiest way to get blurry photos 100% of the time is to use a cheap filter on the front of your lens.

                              Personally, when I just started out in photography, my grandfather gave me an old, clear filter from his film camera. It fit my lens perfectly; I was so surprised that I kept it on my lens all the time, never worrying if the glass was up to today’s standards or not. Turns out that it wasn’t. The corners of all my photos were blurry, and any mild bright area in the photo (like the sky or a lamp at night) turned into wicked flare. Here’s a photo I took with this filter, followed by a crop:
                              NIKON D5100 + 18-55mm f/3.5-5.6 @ 26mm, ISO 400, 1/30, f/5.0

                              12. لا تستخدم مرشحًا رخيصًا

                              الطريقة الثانية الأسهل للحصول على صور ضبابية بنسبة 100% هي استخدام مرشح رخيص الثمن في الجزء الأمامي من عدستك.

                              شخصياً، عندما بدأت للتو في التصوير الفوتوغرافي، أعطاني جدي مرشحاً قديماً وواضحاً من كاميرا الفيلم الخاصة به. أنها تناسب عدستي تماما. لقد كنت مندهشًا جدًا لأنني أبقيته على عدستي طوال الوقت، ولم أقلق أبدًا إذا كان الزجاج يتوافق مع معايير اليوم أم لا. تبين أنه لم يكن كذلك. كانت زوايا جميع صوري ضبابية، وتحولت أي منطقة مشرقة معتدلة في الصورة (مثل السماء أو المصباح في الليل) إلى توهج شرير. إليكم الصورة التي التقطتها باستخدام هذا الفلتر، متبوعة بالاقتصاص:

                              NIKON D5100 + 18-55 مم f/3.5-5.6 @ 26 مم، ISO 400، 1/30، f/5.0

                              تعليق

                              يعمل...
                              X