Recommended Canon EOS R5 Settings الإعدادات الموصى بها لكاميرة كانون اي او اس

تقليص
X
 
  • تصفية - فلترة
  • الوقت
  • عرض
إلغاء تحديد الكل
مشاركات جديدة

  • Recommended Canon EOS R5 Settings الإعدادات الموصى بها لكاميرة كانون اي او اس

    Recommended Canon EOS R5 Settings
    الإعدادات الموصى بها لكاميرة كانون اي او اس

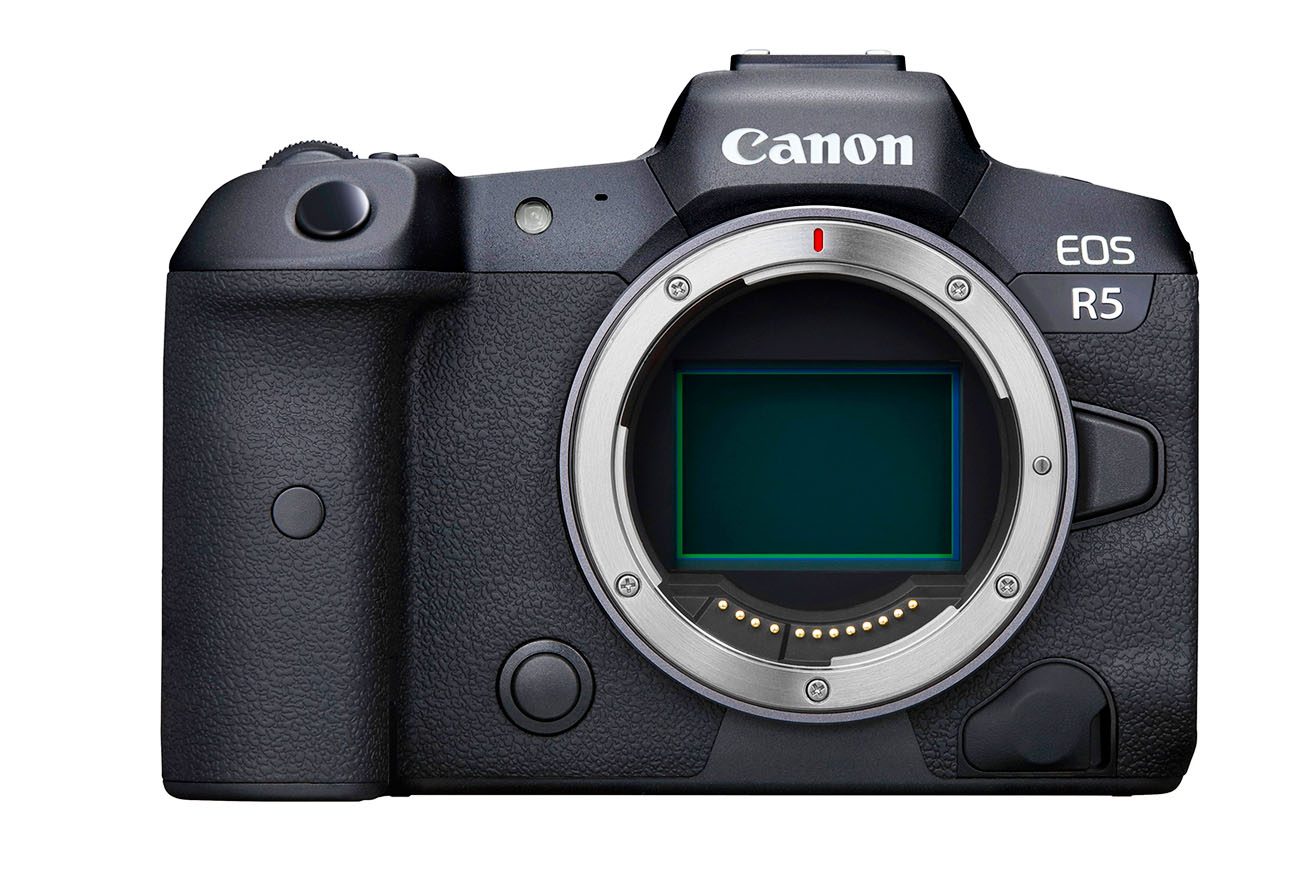
    Canon released two versions of its high-end mirrorless camera, the EOS R5 and R6. While the 20-megapixel R6 is aimed to be a general-purpose tool, the Canon EOS R5 is much more specialized thanks to its high-resolution 45-megapixel sensor that is capable of shooting 8K video. As a result, it is a fairly sophisticated camera with a complex menu system and controls. In this article, I am going to share my recommended camera settings for the Camon EOS R5, which will hopefully make it easy for our readers to get started with this camera.

    It is important to point out that while the settings below work great for my needs, there are other ways to set up and configure the camera.

    Before we delve into the camera menu, let’s first go over all the exterior controls. The Canon EOS R5 has many menu options, but there are some things that you can only do via specific buttons and controls.


    أصدرت شركة كانون نسختين من الكاميرا المتطورة بدون مرآة، EOS R5 وR6. في حين أن كاميرا R6 بدقة 20 ميجابكسل تهدف إلى أن تكون أداة للأغراض العامة، فإن كاميرا EOS R5 من Canon أكثر تخصصًا بفضل مستشعرها عالي الدقة بدقة 45 ميجابكسل القادر على تصوير فيديو بدقة 8K. ونتيجة لذلك، فهي كاميرا متطورة إلى حد ما مع نظام قائمة وعناصر تحكم معقدة. في هذه المقالة، سأشارك إعدادات الكاميرا الموصى بها لكاميرا Camon EOS R5، والتي نأمل أن تسهل على قرائنا البدء باستخدام هذه الكاميرا.
    ​
    من المهم الإشارة إلى أنه على الرغم من أن الإعدادات أدناه تلبي احتياجاتي بشكل جيد، إلا أن هناك طرقًا أخرى لإعداد الكاميرا وتكوينها.

    قبل أن نتعمق في قائمة الكاميرا، دعونا نتعرف أولاً على جميع عناصر التحكم الخارجية. تحتوي كاميرا Canon EOS R5 على العديد من خيارات القائمة، ولكن هناك بعض الأشياء التي لا يمكنك القيام بها إلا من خلال أزرار وعناصر تحكم محددة.

  • #2
    Top Buttons and Controls


    Just like most other Canon DSLRs, the EOS R5 has a very simple and uncluttered front, with a single programmable button that is by default used for exposure preview. The top of the camera, however, has a number of dials and function buttons that make it easy to switch between different camera modes and settings.

    Here they are, from left to right:
    1. Power On / Off Switch: self-explanatory.
    2. Shutter Release Button: by default, half-pressing the shutter release activates autofocus, while fully pressing it takes a picture. You can change the behavior to disable autofocus on half-press in order to use back-button focusing (explained further down in the article).
    3. Multi-Function (M-Fn) Button: this button is used to quickly change important camera settings, such as ISO, drive mode, AF operation, white balance, and exposure compensation (items customizable via menu).
    4. Vertical Dial: used for changing shutter speed or aperture, depending on which camera mode you are in. Also used for changing specific button and quick menu settings.
    5. Video Record Button: for starting and stopping movie capture.
    6. Lock Button: used for locking camera controls (customizable via menu).
    7. Top LCD Info Switching / Illumination Button: for illuminating the top LCD screen in dark environments and for switching top LCD information.
    8. Mode Button / Horizontal Dial: the mode button along with the horizontal dial by default are used for changing camera modes, which display on the top LCD. These controls are also used for changing some camera settings in the menu.

    تعليق


    • #3
      أعلى الأزرار والضوابط

      تمامًا مثل معظم كاميرات DSLR الأخرى من Canon، تتميز كاميرا EOS R5 بواجهة بسيطة جدًا ومرتبة، مع زر واحد قابل للبرمجة يُستخدم افتراضيًا لمعاينة التعريض. ومع ذلك، يحتوي الجزء العلوي من الكاميرا على عدد من الأزرار والأزرار الوظيفية التي تسهل التبديل بين أوضاع وإعدادات الكاميرا المختلفة.


      وها هم من اليسار إلى اليمين:

      مفتاح التشغيل/إيقاف التشغيل: لا يحتاج إلى شرح. زر تحرير الغالق: بشكل افتراضي، يؤدي الضغط على زر الغالق إلى نصفين إلى تنشيط التركيز التلقائي، بينما يؤدي الضغط عليه بالكامل إلى التقاط صورة. يمكنك تغيير السلوك لتعطيل التركيز التلقائي عند الضغط نصف مرة من أجل استخدام التركيز على زر الرجوع (موضح أدناه في المقالة). الزر متعدد الوظائف (M-Fn): يُستخدم هذا الزر لتغيير إعدادات الكاميرا المهمة بسرعة، مثل ISO، ووضع المحرك، وتشغيل التركيز البؤري التلقائي، وتوازن اللون الأبيض، وتعويض التعريض الضوئي (عناصر قابلة للتخصيص عبر القائمة). قرص عمودي: يستخدم لتغيير سرعة الغالق أو فتحة العدسة، اعتمادًا على وضع الكاميرا الذي تستخدمه. ويستخدم أيضًا لتغيير زر معين وزر محدد إعدادات القائمة السريعة. زر تسجيل الفيديو: لبدء وإيقاف التقاط الفيلم. زر القفل: يستخدم لقفل عناصر التحكم في الكاميرا (قابل للتخصيص عبر القائمة). زر تبديل معلومات LCD العلوي / زر الإضاءة: لإضاءة شاشة LCD العلوية في البيئات المظلمة ولتبديل الجزء العلوي معلومات شاشة LCD. زر الوضع / القرص الأفقي: يتم استخدام زر الوضع مع القرص الأفقي بشكل افتراضي لتغيير أوضاع الكاميرا، والتي يتم عرضها على شاشة LCD العلوية. تُستخدم عناصر التحكم هذه أيضًا لتغيير بعض إعدادات الكاميرا في القائمة.

      تعليق


      • #4
        Rear Buttons


        The rear of the Canon EOS R5 has a bunch of buttons and dials that serve particular needs. Let’s go over these in detail.

        To the left of the electronic viewfinder (EVF), you will find two buttons, while to the right of the EVF there are a total of 13 buttons and dials, as explained in detail below:
        1. Rate / Voice Memo Button: used to rank images from 1 to 5 when viewing images, or for recording voice memos.
        2. Menu Button: used to access the camera menu.
        3. Joystick: this is what you will be using to move focus points and reset them. The joystick can also be used for navigating the camera menu, as well as navigating through a played-back image while zoomed in.
        4. AF-ON Button: used to engage autofocus. This is the button you will be pressing if you want to set up back-button focusing.
        5. AE Lock Button (star label): used to the exposure, which can be useful for keeping the exposure consistent between shots or when shooting panoramas.
        6. AF Point Button (rectangle with five dots label): used for switching between different autofocus modes, as well as for moving the focus point. By default, the rear rotary dial will move focus points vertically, while the top vertical dial will move focus points horizontally. Since the joystick is so much better for moving focus points, I set up my vertical dial so that it allows quickly moving between autofocus modes, instead of having to press the M-Fn button (explained in the menu section below).
        7. Magnifying Glass Button: used for zooming into the image when taking pictures, or when viewing images. I set up mine to zoom to 100% (actual pixels) when I press this button, so that I can instantly see if my captured image is sharp or not. It is also very useful to be able to zoom in to 100% view in the viewfinder when capturing images, to ensure that your subject is in focus.
        8. “INFO” Button: a very useful button that allows toggling between different information screens when capturing images, or when viewing them.
        9. “Q” Button: a very handy button for making quick adjustments to the camera settings. It gives you access to ten important camera settings including: autofocus modes, AF operation, image quality, drive mode, metering mode, anti-flicker detection, white balance, picture style, auto lighting optimizer and cropping / aspect ratio. Unfortunately, it is impossible to customize the Q button at this time.
        10. Large Rotary Dial: by default, this dial is used to adjust exposure compensation when taking pictures. It can also be used to navigate the camera menu, or to adjust the aperture when shooting in manual mode.
        11. Set Button: primarily used for adjusting camera settings in the menu, but can be customized to perform a specific function when used during shooting.
        12. Playback Button: used for playing back images.
        13. Trash Button: used for deleting images during image playback.

        Let’s go through the camera Menu settings now.

        تعليق


        • #5
          الأزرار الخلفية

          يحتوي الجزء الخلفي من Canon EOS R5 على مجموعة من الأزرار والأقراص التي تخدم احتياجات معينة. دعنا نتناول هذه التفاصيل بالتفصيل.


          على يسار معين المنظر الإلكتروني (EVF)، ستجد زرين، بينما على يمين معين المنظر الإلكتروني (EVF) يوجد إجمالي 13 زرًا وقرصًا، كما هو موضح بالتفصيل أدناه:

          زر المعدل / مذكرة الصوت: يستخدم لترتيب الصور من 1 إلى 5 عند عرض الصور، أو لتسجيل المذكرات الصوتية. زر القائمة: يستخدم للوصول إلى قائمة الكاميرا. عصا التحكم: هذا هو ما ستستخدمه لتحريك نقاط التركيز وإعادة ضبطها . يمكن أيضًا استخدام عصا التحكم للتنقل في قائمة الكاميرا، بالإضافة إلى التنقل عبر الصورة التي يتم تشغيلها أثناء تكبيرها. زر AF-ON: يستخدم لتشغيل التركيز البؤري التلقائي. هذا هو الزر الذي ستضغط عليه إذا كنت تريد إعداد التركيز على زر الرجوع. زر قفل AE (علامة النجمة): يُستخدم للتعريض الضوئي، والذي يمكن أن يكون مفيدًا للحفاظ على تناسق التعريض الضوئي بين اللقطات أو عند التقاط الصور البانورامية. نقطة AF الزر (مستطيل مع تصنيف خمس نقاط): يُستخدم للتبديل بين أوضاع التركيز التلقائي المختلفة، وكذلك لتحريك نقطة التركيز. افتراضيًا، سيحرك القرص الدوار الخلفي نقاط التركيز عموديًا، بينما سيحرك القرص الرأسي العلوي نقاط التركيز أفقيًا. نظرًا لأن عصا التحكم أفضل بكثير لتحريك نقاط التركيز، فقد قمت بإعداد قرصي الرأسي بحيث يسمح بالتنقل بسرعة بين أوضاع التركيز البؤري التلقائي، بدلاً من الاضطرار إلى الضغط على زر M-Fn (موضح في قسم القائمة أدناه). زر العدسة المكبرة : يستخدم لتكبير الصورة عند التقاط الصور، أو عند عرض الصور. لقد قمت بإعداد التكبير إلى 100% (البكسل الفعلي) عندما أضغط على هذا الزر، حتى أتمكن على الفور من معرفة ما إذا كانت الصورة الملتقطة حادة أم لا. ومن المفيد جدًا أيضًا أن تكون قادرًا على تكبير العرض بنسبة 100% في عدسة الكاميرا عند التقاط الصور، للتأكد من أن موضوعك في التركيز. زر "INFO": زر مفيد جدًا يسمح بالتبديل بين شاشات المعلومات المختلفة عند التقاط الصور. أو عند مشاهدتها. زر "Q": زر مفيد جدًا لإجراء تعديلات سريعة على إعدادات الكاميرا. فهو يتيح لك الوصول إلى عشرة إعدادات مهمة للكاميرا بما في ذلك: أوضاع التركيز التلقائي، وتشغيل التركيز البؤري التلقائي، وجودة الصورة، ووضع القيادة، ووضع القياس، والكشف المضاد للوميض، وتوازن اللون الأبيض، ونمط الصورة، ومحسن الإضاءة التلقائي، ونسبة الاقتصاص / العرض إلى الارتفاع. لسوء الحظ، من المستحيل تخصيص زر Q في الوقت الحالي. قرص دوار كبير: افتراضيًا، يتم استخدام هذا القرص لضبط تعويض التعريض الضوئي عند التقاط الصور. ويمكن استخدامه أيضًا للتنقل في قائمة الكاميرا، أو لضبط فتحة العدسة عند التصوير في الوضع اليدوي. زر الضبط: يستخدم بشكل أساسي لضبط إعدادات الكاميرا في القائمة، ولكن يمكن تخصيصه لأداء وظيفة معينة عند استخدامه أثناء التصوير. الزر: يستخدم لتشغيل الصور. زر المهملات: يستخدم لحذف الصور أثناء تشغيل الصورة.

          دعنا ننتقل إلى إعدادات قائمة الكاميرا الآن.

          تعليق


          • #6
            Shoot Menu 1


            Here are the settings I use for Camera Menu 1, with explanations:
            • Image Quality: RAW – I always recommend shooting in RAW format. As explained in my RAW versus JPEG article, there is a huge difference between RAW and JPEG. With RAW, you also do not have to worry about other camera settings such as picture styles and white balance, because you can modify those in post-processing.
            • Dual Pixel RAW: Disable. Read about this feature here, and only enable it if you actually plan on using the Dual Pixel RAW feature.
            • Cropping/aspect ratio: Full. Only change this setting if you want to shoot in a particular aspect ratio. The EOS R5 provides the following aspect ratios: Full (3:2), 1:1, 4:3 and 16:9. You can also shoot in 1.6x crop mode

            تعليق


            • #7
              قائمة التصوير 1

              فيما يلي الإعدادات التي أستخدمها لقائمة الكاميرا 1، مع التوضيحات:

              جودة الصورة: RAW - أوصي دائمًا بالتصوير بتنسيق RAW. كما هو موضح في مقالتي RAW مقابل JPEG، هناك فرق كبير بين RAW وJPEG. مع RAW، لا داعي للقلق أيضًا بشأن إعدادات الكاميرا الأخرى مثل أنماط الصورة وتوازن اللون الأبيض، لأنه يمكنك تعديل تلك الإعدادات في مرحلة ما بعد المعالجة. Dual Pixel RAW: تعطيل. اقرأ عن هذه الميزة هنا، وقم بتمكينها فقط إذا كنت تخطط بالفعل لاستخدام ميزة Dual Pixel RAW. الاقتصاص/نسبة العرض إلى الارتفاع: كاملة. لا يمكنك تغيير هذا الإعداد إلا إذا كنت تريد التصوير بنسبة عرض إلى ارتفاع معينة. توفر كاميرا EOS R5 نسب العرض إلى الارتفاع التالية: كاملة (3:2)، و1:1، و4:3، و16:9. يمكنك أيضًا التصوير في وضع الاقتصاص 1.6x

              تعليق


              • #8
                Shoot Menu 2
                • Expo.comp./AEB: 0 – this is for setting exposure compensation or exposure bracketing. I would not bother with setting exposure compensation through the menu, since you can do it much quicker with the large rotary dial on the back of the camera.
                • ISO speed settings:
                  • ISO speed: I personally like to use the Auto ISO feature, since it works really well for automatically adjusting my shutter speed in different lighting environments.
                  • ISO speed range: 100-H – this setting affects what you are able to see when changing ISO. I want to keep the entire range for ISO selection, so I leave it at 100-H range.
                  • Auto range: 100-12800 – now this setting is particularly useful when shooting in “Auto ISO” mode. I am typically not comfortable with noise above ISO 12800 on the EOS R6, so I keep the maximum range limited to 12800.
                  • Min. shutter spd.: Auto – with the “Auto” setting, the camera will automatically adjust the shutter speed of the camera to the reciprocal rule. For steady hands and good posture, this might be sufficient. However, if you have shaky hands, then the default “Auto” setting might not do justice to keep you away from camera shake. If you notice blur in your images, you can move the slider under “Auto” to the right towards “Faster” with the top dial, which will use a shutter speed that’s twice as fast.
                • HDR PQ Settings: Default. If you are planning to shoot HDR video or stills, you can enable it from here.
                • Auto Lighting Optimizer: OFF – ALO settings are only applicable to JPEG images and I usually keep them turned off.
                • Highlight tone priority: OFF – unlike Auto Lighting Optimizer (ALO), Highlight tone priority affects RAW data since it actually underexposes an image to recover highlights. Unless you shoot JPEG, instead of letting the camera underexpose images with HTP to keep highlight details, I would recommend to properly expose images and even slightly over-expose, then recover the data in post. This technique is known as “exposing to the right” and it gives you better results, especially when dealing with noise.
                • Anti-flicker shoot.: Disable – if you shoot in artificial light covering sports or other events, this is a great feature that can really help in obtaining images that are properly exposed top to bottom. As described in our light flickering article, shooting indoors can be quite challenging. Once you turn this feature on, the camera will automatically delay the shutter to match the light frequency.
                • External Speedlite control: Only applies when you photograph with flash
                  • Flash firing: Enable
                  • E-TTL balance: Standard
                  • E-TTL II meter.: Eval (FacePrty)
                  • Contin flash ctrl: E-TTL each shot
                  • Slow synchro: 1/250-1/60 sec auto
                  • Flash function settings (only available when external flash unit is mounted)
                  • Flash C.Fn settings (only available when external flash unit is mounted)

                تعليق


                • #9
                  قائمة التصوير 2

                  Expo.comp./AEB: 0 – هذا مخصص لإعداد تعويض التعريض الضوئي أو تصحيح التعريض الضوئي. لن أزعج نفسي بتعيين تعويض التعريض الضوئي من خلال القائمة، حيث يمكنك القيام بذلك بشكل أسرع بكثير باستخدام القرص الدوار الكبير الموجود في الجزء الخلفي من الكاميرا. إعدادات سرعة ISO: سرعة ISO: أنا شخصيًا أحب استخدام ميزة Auto ISO، نظرًا لأنها يعمل بشكل جيد حقًا لضبط سرعة الغالق تلقائيًا في بيئات الإضاءة المختلفة. نطاق سرعة ISO: 100-H - يؤثر هذا الإعداد على ما يمكنك رؤيته عند تغيير ISO. أريد الاحتفاظ بالنطاق بأكمله لتحديد ISO، لذلك أتركه عند نطاق 100-H. النطاق التلقائي: 100-12800 - أصبح هذا الإعداد الآن مفيدًا بشكل خاص عند التصوير في وضع "Auto ISO". عادةً لا أشعر بالارتياح تجاه الضوضاء التي تتجاوز ISO 12800 في كاميرا EOS R6، لذا أبقي الحد الأقصى للنطاق محدودًا بـ 12800.Min. سرعة الغالق: تلقائي - مع الإعداد "تلقائي"، ستقوم الكاميرا تلقائيًا بضبط سرعة غالق الكاميرا على القاعدة المتبادلة. للحصول على أيدي ثابتة ووضعية جيدة، قد يكون هذا كافيًا. ومع ذلك، إذا كانت يداك مرتعشتين، فقد لا يكون الإعداد الافتراضي "تلقائي" كافيًا لإبعادك عن اهتزاز الكاميرا. إذا لاحظت ضبابية في صورك، فيمكنك تحريك شريط التمرير الموجود أسفل "تلقائي" إلى اليمين نحو "أسرع" باستخدام القرص العلوي، والذي سيستخدم سرعة غالق أسرع مرتين. إعدادات HDR PQ: افتراضي. إذا كنت تخطط لتصوير فيديو HDR أو صور ثابتة، فيمكنك تمكينه من هنا. مُحسِّن الإضاءة التلقائي: إيقاف - تنطبق إعدادات ALO فقط على صور JPEG وعادةً ما أبقيها في وضع إيقاف التشغيل. أولوية نغمة التمييز: إيقاف - على عكس مُحسِّن الإضاءة التلقائي (ALO)، تؤثر أولوية درجة التمييز على بيانات RAW نظرًا لأنها في الواقع تقلل من تعريض الصورة لاستعادة الإبرازات. ما لم تقم بتصوير JPEG، فبدلاً من السماح للكاميرا بتعريض الصور بشكل ناقص باستخدام HTP للاحتفاظ بتفاصيل التمييز، أوصي بتعريض الصور بشكل صحيح وحتى الإفراط في تعريضها قليلاً، ثم استعادة البيانات في النشر. تُعرف هذه التقنية باسم "التعريض إلى اليمين" وهي تمنحك نتائج أفضل، خاصة عند التعامل مع الضوضاء. التصوير المضاد للوميض.: تعطيل - إذا قمت بالتصوير في ضوء صناعي يغطي الأحداث الرياضية أو غيرها من الأحداث، فهذه ميزة رائعة يمكن أن يساعد حقًا في الحصول على الصور التي يتم عرضها بشكل صحيح من أعلى إلى أسفل. كما هو موضح في مقالتنا عن وميض الضوء، قد يكون التصوير في الداخل أمرًا صعبًا للغاية. بمجرد تشغيل هذه الميزة، ستقوم الكاميرا تلقائيًا بتأخير الغالق ليتوافق مع تردد الضوء. التحكم في Speedlite الخارجي: ينطبق فقط عند التصوير باستخدام الفلاش. إطلاق الفلاش: تمكين توازن E-TTL: مقياس StandardE-TTL II.: Eval (FacePrty)Contin التحكم في الفلاش: E-TTL لكل لقطة، تزامن بطيء: إعدادات وظيفة الفلاش التلقائي 1/250-1/60 ثانية (متوفرة فقط عند تركيب وحدة فلاش خارجية) إعدادات Flash C.Fn (متوفرة فقط عند تركيب وحدة فلاش خارجية)

                  تعليق


                  • #10
                    Shoot Menu 3
                    • White balance: AWB – Just like ALO, white balance setting also does not matter, as you can adjust it later in post-processing.
                    • Custom White Balance – unless you want to set custom white balance with a gray card, skip this setting.
                    • WB Shift/Bkt.: 0,0/±0 – don’t mess with this unless you know what you are doing.
                    • Color space: Adobe RGB – although color space does not matter for RAW images, Adobe RGB gives a slightly more accurate histogram to determine the correct exposure (since the camera shows histogram based on camera-rendered JPEG image, even if you shoot exclusively in RAW).
                    • Picture Style: Standard – does not matter when shooting in RAW. I set mine to “Standard” and use the Standard camera profile in Lightroom for consistency. For more details about this, check out my article “how to get accurate Canon colors“.
                    • Clarity: 0 – does not matter when shooting in RAW.
                    • Lens aberration correction: I disable all lens corrections because they only apply to JPEG images. If you are a JPEG shooter, leaving these on will reduce vignetting, chromatic aberration, distortion and diffraction issues in your images.
                      • Peripheral illum corr: Off
                      • Distortion correction: Off
                      • Digital Lens Optimizer: Off
                      • Chromatic aberr corr: Off
                      • Diffraction correction: Off

                    تعليق


                    • #11
                      قائمة التصوير 3

                      توازن اللون الأبيض: AWB – تمامًا مثل ALO، لا يهم أيضًا إعداد توازن اللون الأبيض، حيث يمكنك ضبطه لاحقًا في مرحلة ما بعد المعالجة. توازن اللون الأبيض المخصص – إلا إذا كنت تريد تعيين توازن اللون الأبيض المخصص باستخدام بطاقة رمادية، فتخطي هذا الإعداد.WB Shift/Bkt.: 0,0/±0 - لا تعبث بهذا إلا إذا كنت تعرف ما تفعله. مساحة اللون: Adobe RGB - على الرغم من أن مساحة اللون لا تهم صور RAW، إلا أن Adobe RGB يوفر رسمًا بيانيًا أكثر دقة قليلاً لتحديد التعريض الضوئي الصحيح (نظرًا لأن الكاميرا تعرض رسمًا بيانيًا استنادًا إلى صورة JPEG المعروضة بالكاميرا، حتى إذا قمت بالتصوير بصيغة RAW حصريًا). نمط الصورة: قياسي - لا يهم عند التصوير بصيغة RAW. لقد قمت بضبط إعداداتي على "قياسي" واستخدم ملف تعريف الكاميرا القياسي في Lightroom لتحقيق الاتساق. لمزيد من التفاصيل حول هذا، راجع مقالتي "كيفية الحصول على ألوان Canon دقيقة". الوضوح: 0 - لا يهم عند التصوير بصيغة RAW. تصحيح انحراف العدسة: أقوم بتعطيل جميع تصحيحات العدسة لأنها تنطبق فقط على صور JPEG. إذا كنت من هواة التصوير بصيغة JPEG، فإن ترك هذه العناصر قيد التشغيل سيؤدي إلى تقليل مشكلات التظليل والانحراف اللوني والتشوه والانحراف في صورك. تصحيح إضاءة الأجهزة الطرفية: تصحيح التشوه: إيقاف محسن العدسة الرقمية: تصحيح الانحراف اللوني: إيقاف تصحيح الانحراف: إيقاف

                      تعليق


                      • #12
                        Shoot Menu 4
                        • Long exp. noise reduction: Auto – will reduce noise when doing long exposure photography.
                        • High ISO speed NR: OFF – another one I leave off, as it only affects JPEG images.
                        • Dust Delete Data – this is used for removing dust in images if you have dust particles on the image sensor. I never use this feature, since I prefer cleaning the camera sensor instead.
                        Shoot Menu 5
                        • Multiple exposure: Disable – this is used for creative photography when stacking photos on top of each other.
                        • HDR Mode: Off – only relevant when shooting in JPEG and wanting to make HDR images.
                        • Focus bracketing: Disable – use this menu setting to perform focus stacking.
                        Shoot Menu 6
                        • Interval timer: Disable – built-in intervalometer for shooting timelapse sequences.
                        • Bulb timer: Disable – disabled in all normal modes, so you can only activate it when you select “B” camera mode. With the bulb timer feature, you can set exposure lengths longer than 30 seconds. This is particularly useful when doing long exposure photography and when working with neutral density filters.
                        • Shutter mode: Elec. 1st-curtain – allows changing the shutter mode.
                        • Release shutter without card: OFF – you do not want the camera to fire without a memory card, in case you forget to insert one.

                        تعليق


                        • #13
                          قائمة التصوير 4

                          تجربة طويلة. تقليل الضوضاء: تلقائي - سيقلل الضوضاء عند التصوير الفوتوغرافي بتعريض ضوئي طويل. سرعة iso عالية nr: إيقاف - واحدة أخرى أتركها، لأنها تؤثر فقط على صور jpeg. بيانات حذف الغبار - يستخدم هذا لإزالة الغبار في الصور إذا كان لديك غبار الجسيمات الموجودة على مستشعر الصورة. لا أستخدم هذه الميزة مطلقًا، لأنني أفضل تنظيف مستشعر الكاميرا بدلاً من ذلك.

                          قائمة التصوير 5

                          التعرض المتعدد: تعطيل - يستخدم هذا للتصوير الفوتوغرافي الإبداعي عند تجميع الصور فوق بعضها البعض. وضع hdr: متوقف - مناسب فقط عند التصوير بتنسيق jpeg والرغبة في إنشاء صور hdr. تصحيح التركيز البؤري: تعطيل - استخدم إعداد القائمة هذا لإجراء التركيز التراص.

                          قائمة التصوير 6

                          مؤقت الفاصل الزمني: معطل - مقياس الفاصل الزمني المدمج لتصوير تسلسلات الفاصل الزمني. مؤقت المصباح: معطل - معطل في جميع الأوضاع العادية، لذلك لا يمكنك تنشيطه إلا عند تحديد وضع الكاميرا "b". باستخدام ميزة مؤقت المصباح، يمكنك ضبط أطوال التعرض لفترة أطول من 30 ثانية. يعد هذا مفيدًا بشكل خاص عند القيام بالتصوير الفوتوغرافي بالتعريض الضوئي الطويل وعند العمل باستخدام مرشحات الكثافة المحايدة. وضع الغالق: كهربائي. الستارة الأولى - تسمح بتغيير وضع الغالق. تحرير الغالق بدون بطاقة: إيقاف - لا تريد أن تعمل الكاميرا بدون بطاقة ذاكرة، في حالة نسيان إدخال واحدة.

                          تعليق


                          • #14
                            Shoot Menu 7
                            • IS (Image Stabilizer) mode: allows turning in-body image stabilization on or off. If your lens has a Stabilizer switch, the menu item disappears.
                            • Touch Shutter: Disable – allows touching the rear LCD to take a picture.
                            • Image review: 2 sec, disable. After you take an image, it will be shown on the rear LCD for 2 seconds. I disable viewfinder review, so that I can continue shooting without any distractions.
                            • High speed display: when shooting in high speed drive mode and continuous / Servo AF operation, you can enable this feature to make the viewfinder more responsive when photographing fast-moving subjects.
                            • Metering timer: 4 sec – I prefer using a shorter value to preserve the battery.
                            • Expo. simulation: Enable – by default, the camera LCD / EVF will simulate how bright or dark the image will look when captured. If you disable this, the LCD / EVF will always be boosted.
                            • Shooting info. disp.: used to increase and decrease the amount of information when pressing the INFO button:
                              • Screen info. settings: 1, 3 and 4 are enabled. I disable 2 and 5 to reduce the clutter.
                              • VF info/toggle settings: 1 and 3 are enabled.
                              • VF vertical display: On
                              • Grid display: 3×3
                              • Histogram disp: RGB
                              • Focus distance disp: In MF mode

                            تعليق


                            • #15
                              قائمة التصوير 7

                              وضع IS (مثبت الصورة): يسمح بتشغيل أو إيقاف تشغيل تثبيت الصورة داخل الجسم. إذا كانت عدستك تحتوي على مفتاح مثبت، فسيختفي عنصر القائمة. مصراع اللمس: تعطيل - يسمح بلمس شاشة LCD الخلفية لالتقاط صورة. مراجعة الصورة: ثانيتان، تعطيل. بعد التقاط الصورة، سيتم عرضها على شاشة LCD الخلفية لمدة ثانيتين. أقوم بتعطيل مراجعة عدسة الكاميرا، حتى أتمكن من مواصلة التصوير دون أي تشتيت. عرض عالي السرعة: عند التصوير في وضع القيادة عالي السرعة وتشغيل التركيز البؤري التلقائي المستمر / المؤازر، يمكنك تمكين هذه الميزة لجعل عدسة الكاميرا أكثر استجابة عند تصوير الأهداف سريعة الحركة .مؤقت القياس: 4 ثواني – أفضل استخدام قيمة أقصر للحفاظ على البطارية. المحاكاة: تمكين - بشكل افتراضي، ستقوم شاشة LCD / معين المنظر الإلكتروني بالكاميرا بمحاكاة مدى سطوع أو قتامة الصورة عند التقاطها. إذا قمت بتعطيل هذا، فسيتم دائمًا تعزيز شاشة LCD / معين المنظر الإلكتروني. معلومات التصوير. عرض: يستخدم لزيادة وتقليل كمية المعلومات عند الضغط على زر INFO:معلومات الشاشة. الإعدادات: تم تمكين 1 و3 و4. أقوم بتعطيل 2 و5 لتقليل الفوضى. إعدادات معلومات/تبديل VF: تم تمكين 1 و3. عرض VF الرأسي: عرض OnGrid: عرض الرسم البياني 3×3: عرض مسافة RGBFocus: في وضع MF

                              تعليق

                              يعمل...
                              X